Diese Version enthält möglicherweise inkorrekte Änderungen. Wechsle zur letzten geprüften Version.
Was du brauchst
-
Dieser Schritt ist noch nicht übersetzt. Hilf mit, ihn zu übersetzen!
-
Close down the display and flip the device upside down.
-
Use a Phillips #1 screwdriver to remove 18 black 10mm Phillips Head screws in order to loosen up the protective bottom casing.
-
-
Dieser Schritt ist noch nicht übersetzt. Hilf mit, ihn zu übersetzen!
-
With the screws removed, flip the device right-side up and open up the display.
-
Run a plastic spudger tool along the seam of the face-plate in order to loosen up the protective bottom casing.
-
-
Dieser Schritt ist noch nicht übersetzt. Hilf mit, ihn zu übersetzen!
-
Close the display down once more, and flip the laptop upside down, with the hinge facing away from you.
-
Taking note of the small speaker wire, gently lift only the left side of the bottom casing.
-
-
-
Dieser Schritt ist noch nicht übersetzt. Hilf mit, ihn zu übersetzen!
-
Using a pair of blunt tweezers, push on the tabs of the small white connector to separate it from the motherboard.
-
-
Dieser Schritt ist noch nicht übersetzt. Hilf mit, ihn zu übersetzen!
-
Locate the wireless card on the top left quadrant. It should have two antenna cables connected to it, one white and one black.
-
-
Dieser Schritt ist noch nicht übersetzt. Hilf mit, ihn zu übersetzen!
-
With a pair of blunt tweezers, firmly grasp each antenna head and detach it by lifting straight up.
-
-
Dieser Schritt ist noch nicht übersetzt. Hilf mit, ihn zu übersetzen!
-
Using a Phillip Head size 1 screwdriver, remove the screw attaching the wireless card to the laptop frame.
-
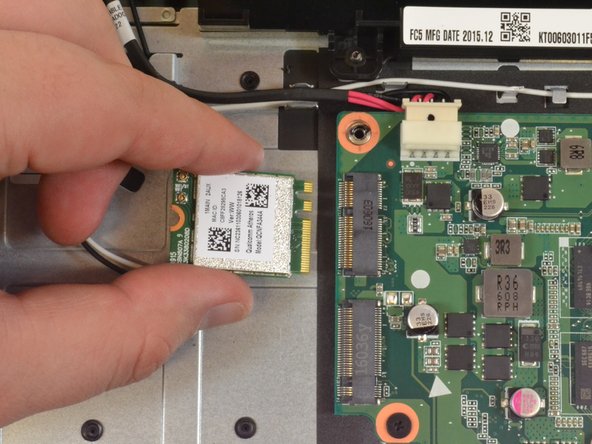
To detach the wireless card, lift up slightly and pull away.
-


