Einleitung
To avoid electric discharge and possible damage to internal components, the battery should be disconnected from the motherboard as a prerequisite to replacing other parts. You will not need to remove or replace any other parts of the device in order to do so. For this guide, you will need an anti-static mat to avoid electrostatic discharge, a Phillips #0 screwdriver head, a spudger (either plastic or metal) and tweezers to handle small parts. The process is relatively simple and should only take about 10 minutes.
Was du brauchst
-
-
Flip the computer over and use a Phillips #0 screwdriver head to remove the 13 2.5 mm bottom cover screws.
-
-
-
Use your spudger to carefully pry the bottom cover away from the palm rest assembly.
-
-
-
-
Use the pointed side of the spudger to disconnect the headphone jack cable from the motherboard and completely remove the bottom cover.
-
-
-
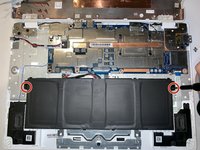
Use the pointed side of the spudger to disconnect the battery cable from the motherboard.
-
-
-
Use a Phillips #0 screwdriver head to remove the two 2.5 mm #1 battery screws.
-
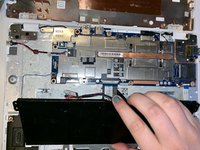
Use your hands to remove the battery by gently picking it up.
-


To reassemble your device, follow these instructions in reverse order.
To reassemble your device, follow these instructions in reverse order.
Rückgängig: Ich habe diese Anleitung nicht absolviert.
2 weitere Personen haben diese Anleitung absolviert.
Team

University of Michigan, Team S1-G1, Li Winter 2019 Mitglied von University of Michigan, Team S1-G1, Li Winter 2019
UMIC-LI-W19S1G1
4 Mitglieder
1 Anleitung geschrieben