Diese Version enthält möglicherweise inkorrekte Änderungen. Wechsle zur letzten geprüften Version.
Was du brauchst
-
Dieser Schritt ist noch nicht übersetzt. Hilf mit, ihn zu übersetzen!
-
Place the laptop on a flat surface with the bottom side facing up.
-
Place the tip of a spudger or finger into the hole on the battery release slider.
-
-
Dieser Schritt ist noch nicht übersetzt. Hilf mit, ihn zu übersetzen!
-
Use the spudger to move the slider to the right and hold it there.
-
With the slider held, use your other hand to pull the battery back away from the laptop.
-
-
Dieser Schritt ist noch nicht übersetzt. Hilf mit, ihn zu übersetzen!
-
Open the laptop, keeping the screen on the table.
-
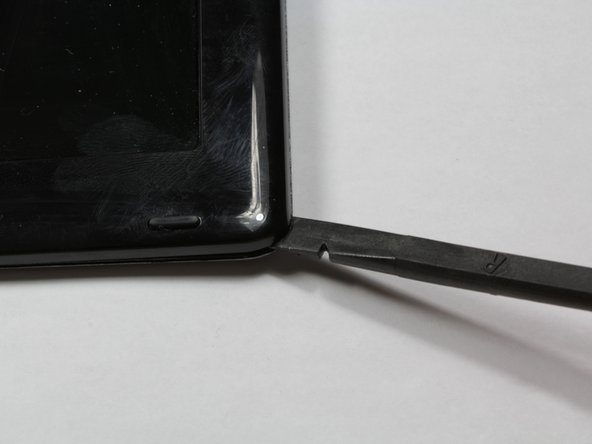
Use a spudger to unclip the top left and right sides of the bezel. You should feel and hear the clips releasing as you do this.
-
Turn the device around 180 degrees, keeping the screen on the table. Use the spudger on the bottom of the screen to unclip the bezel between the hinges.
-
-
-
Dieser Schritt ist noch nicht übersetzt. Hilf mit, ihn zu übersetzen!
-
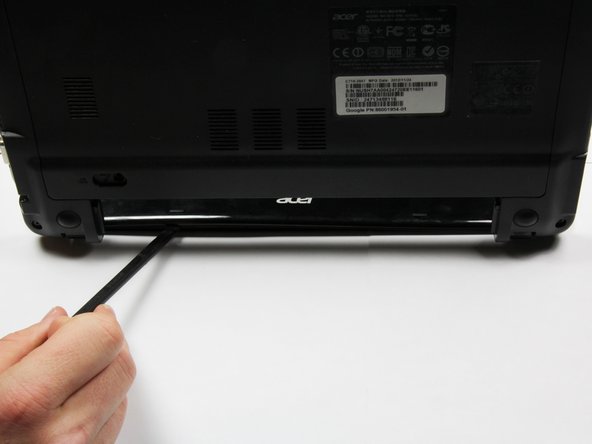
Lift the bezel one inch off the top corners of the screen.
-
Gently pull the plastic bezel toward you.
-
Set the bezel aside.
-
-
Dieser Schritt ist noch nicht übersetzt. Hilf mit, ihn zu übersetzen!
-
Unscrew the four black #0 3mm Phillips screws holding down the screen.
-
Lift up the small pieces of black tape at the bottom center of the screen near the keyboard.
-
-
Dieser Schritt ist noch nicht übersetzt. Hilf mit, ihn zu übersetzen!
-
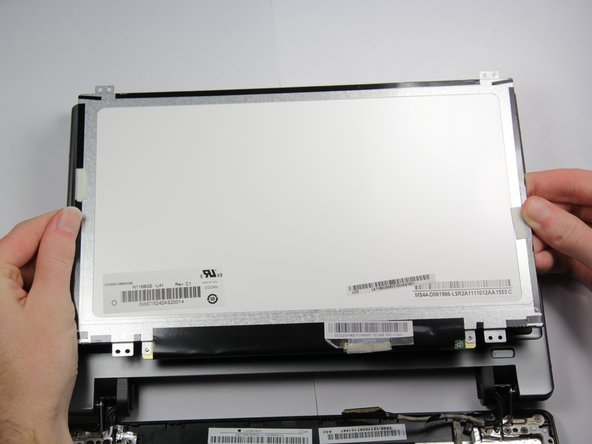
Lift up the screen from the silver tabs at the top and flip it over to rest on top of the keyboard.
-
Carefully unwrap the narrow black tape from around the ribbon cable connection.
-
Pull off the clear tape from the ribbon cable connection.
-
-
Dieser Schritt ist noch nicht übersetzt. Hilf mit, ihn zu übersetzen!
-
Pull out the ribbon cable.
-
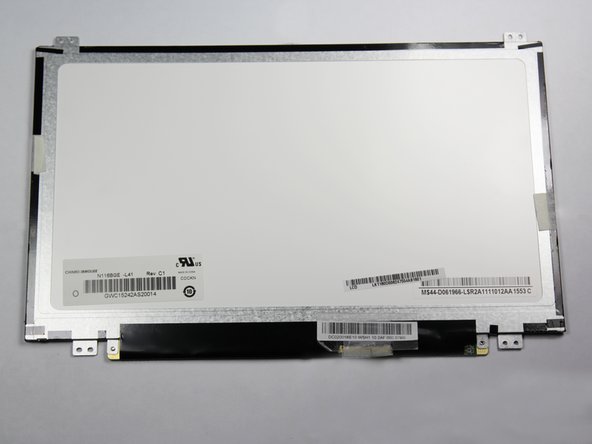
Remove any remaining tape holding the screen to the laptop.
-


Rückgängig: Ich habe diese Anleitung nicht absolviert.
33 weitere Nutzer:innen haben diese Anleitung absolviert.
Team

Cal Poly, Team 13-3, Forte Fall 2013 Mitglied von Cal Poly, Team 13-3, Forte Fall 2013
CPSU-FORTE-F13S13G3
5 Mitglieder
14 Anleitungen geschrieben
8 Kommentare
I am 69 years old and bought myself and 4 grandchildren Acer Chromebooks. I heard the screen messing up was quite common. So when my screen went first, I knew I had to learn to fix it, or spend another small fortune if they all broke down. So here I am. The screen is out..next adventure..putting a new one in. Will return here to do that. Thanks for the site.
Great guide. Didn't realize it was that simple...i'd like a little information on which screen was purchased for this model.
Thanks!
I like it. The link for the screen is dead for me but I will find one.
Thanks for this. Just repaired 3 laptops for my classroom! Super easy.