Zum Hauptinhalt wechseln

Acer Chromebook C720-2420 Battery Replacement

Was du brauchst

  1. Acer Chromebook C720-2420 Battery Replacement, Back Cover Replacement: Schritt 1, Bild 1 von 2 Acer Chromebook C720-2420 Battery Replacement, Back Cover Replacement: Schritt 1, Bild 2 von 2
    • Place your Chromebook upside down.

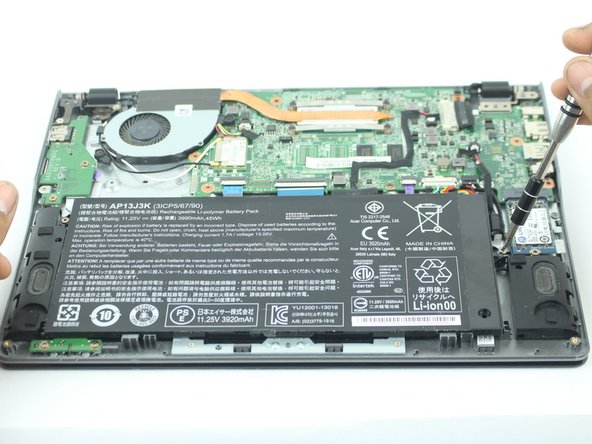
    • Utilizing the precision magnetized Phillips #0 screwdriver, remove all thirteen 6.5 mm Phillips screws that secure the back cover.

    • Before doing anything, make sure your Acer Chromebook is completely turned off.

  2. Acer Chromebook C720-2420 Battery Replacement: Schritt 2, Bild 1 von 1
    • Use the plastic opening tool to carefully remove the bottom.

  3. Acer Chromebook C720-2420 Battery Replacement, Battery: Schritt 3, Bild 1 von 2 Acer Chromebook C720-2420 Battery Replacement, Battery: Schritt 3, Bild 2 von 2
    • Remove the two 3.6 mm Phillips screws holding the battery in place.

  4. Acer Chromebook C720-2420 Battery Replacement: Schritt 4, Bild 1 von 2 Acer Chromebook C720-2420 Battery Replacement: Schritt 4, Bild 2 von 2
    • Disconnect the connector that attaches the battery to the Chromebook with a pair of pliers or tweezers.

    • Alternatively, you could use your hands, as it may be difficult to unhook the connector.

  5. Acer Chromebook C720-2420 Battery Replacement: Schritt 5, Bild 1 von 1
    • Remove the battery.

Abschluss

To reassemble your device, follow these instructions in reverse order.

Team

USF Tampa, Team S15-G4, Boczar Spring 2018 Mitglied von USF Tampa, Team S15-G4, Boczar Spring 2018

USFT-BOCZAR-S18S15G4

4 Mitglieder

12 Anleitungen geschrieben

0 Kommentare

Kommentar hinzufügen

Seitenaufrufe:

Letzte 24 Stunden: 0

Letzte 7 Tage: 2

Letzte 30 Tage: 4

Insgesamt: 542