Einleitung
This guide explains how to remove the solid state drive. Before removing the solid state drive, the back panel assembly needs to be removed. Once the back panel assembly is removed, the solid state drive can be quickly unscrewed and pulled out.
Was du brauchst
-
-
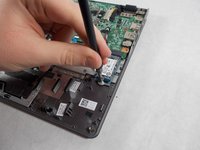
Remove the thirteen 6.0mm screws on the back panel using your Phillips #1 screwdriver.
-
-
-
-
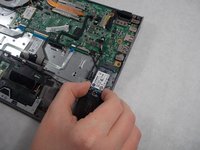
Remove the single 3.0mm screw securing the solid state drive using a Phillips #1 screwdriver.
-


To reassemble your device, follow these instructions in reverse order.
To reassemble your device, follow these instructions in reverse order.
Rückgängig: Ich habe diese Anleitung nicht absolviert.
2 weitere Personen haben diese Anleitung absolviert.
Team

UMass Dartmouth, Team S4-G7, Julie Fall 2017 Mitglied von UMass Dartmouth, Team S4-G7, Julie Fall 2017
UMASSD-JULIE-F17S4G7
1 Mitglied
7 Anleitungen geschrieben