Einleitung
This replacement guide is designed to instruct you on how to replace the battery on your Chromebook. This is a fairly easy repair and only requires a Phillips #0 screwdriver and a plastic opening tool. Before beginning this repair, make sure to completely power down your computer as it is dangerous to work on the internals of the computer while it is running. Also, remember to handle all of the internal components of your Chromebook with care as they are fragile.
Was du brauchst
-
-
Remove the eight 4mm Phillips #0 screws.
-
Remove the two 6mm Phillips #0 screws.
There are two tabs on the battery opposite the connector side that need to be inserted into the retention slots or the battery won’t sit flat. Need to do this before reinserting the battery screws.
Also, I found that #00 Phillips works best on the 4mm screws.
-
-
-
-
Insert a plastic opening tool into the crack between the bottom panel and the side of the computer.
-
Gently pry the panel off the computer by continuously pulling up and on the panel and moving the plastic opening tool around the crack until the panel comes off.
-
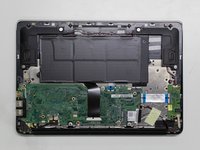
Remove the bottom panel and set it aside.
-
-
-
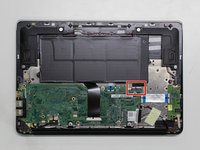
Remove the two 4mm Phillips #0 screws on either side of the battery pack that are securing it in place.
-
-
-
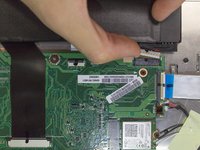
Disconnect the taped white 8-pin cable on the bottom right of the battery pack.
-


To reassemble your device, follow these instructions in reverse order.
To reassemble your device, follow these instructions in reverse order.
Rückgängig: Ich habe diese Anleitung nicht absolviert.
7 weitere Personen haben diese Anleitung absolviert.
Team

Cal Poly, Team S17-G3, Banghart Spring 2017 Mitglied von Cal Poly, Team S17-G3, Banghart Spring 2017
CPSU-BANGHART-S17S17G3
5 Mitglieder
10 Anleitungen geschrieben
2 Kommentare zur Anleitung
A heat gun is listed as a need tool, but the instructions do not mention using it.
Medium strength (blue) threadlocker compound should be used during reassembly.
why didnt it stop giving instruction I think I got the wrong battery pak no more acer for me acer 14 they dont know what batterty to send you what a joke LOL