Diese Version enthält möglicherweise inkorrekte Änderungen. Wechsle zur letzten geprüften Version.
Was du brauchst
-
Dieser Schritt ist noch nicht übersetzt. Hilf mit, ihn zu übersetzen!
-
Remove the following eighteen screws using a Phillips #0 screwdriver.
-
-
Dieser Schritt ist noch nicht übersetzt. Hilf mit, ihn zu übersetzen!
-
Using the flat side of the spudger, pry open the bottom case of the laptop.
-
-
Dieser Schritt ist noch nicht übersetzt. Hilf mit, ihn zu übersetzen!
-
Using a Phillips #0 screwdriver, unscrew the screw on right side of the battery placement.
-
-
-
Dieser Schritt ist noch nicht übersetzt. Hilf mit, ihn zu übersetzen!
-
Using a plastic opening tool, disconnect the wires connecting the battery to the motherboard.
-
-
Dieser Schritt ist noch nicht übersetzt. Hilf mit, ihn zu übersetzen!
-
Gently lift the battery out and remove it from the laptop casing.
-
-
Dieser Schritt ist noch nicht übersetzt. Hilf mit, ihn zu übersetzen!
-
Unhook the black ribbon from the motherboard, using the opening tool to pull the hooks in the direction of the arrows.
-
Once the hooks are released, simply pull the black ribbon outward to remove it from the motherboard.
-
-
Dieser Schritt ist noch nicht übersetzt. Hilf mit, ihn zu übersetzen!
-
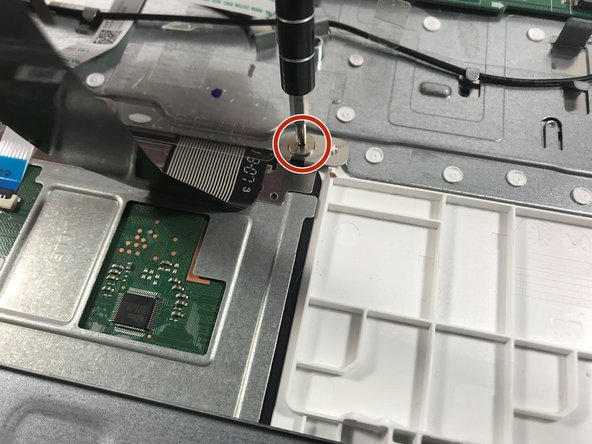
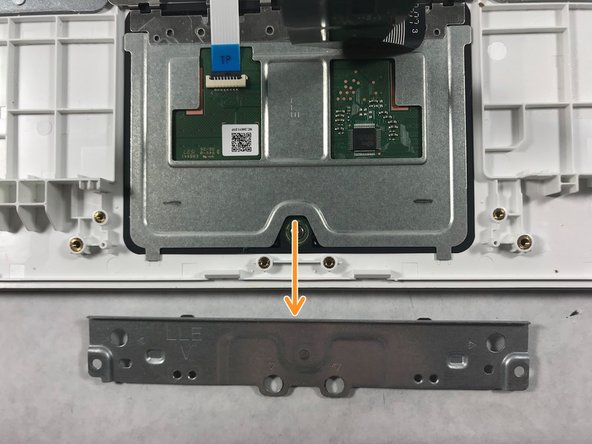
Using a Phillips #0 screwdriver, remove the 7 screws holding the trackpad in place.
-
The metal piece at the bottom edge of the laptop will lift off after the screws are removed.
-
-
Dieser Schritt ist noch nicht übersetzt. Hilf mit, ihn zu übersetzen!
-
Use the spudger tool to unhook the locks on both sides of the end of the white ribbon. Pull the ribbon outward away from the motherboard.
-
-
Dieser Schritt ist noch nicht übersetzt. Hilf mit, ihn zu übersetzen!
-
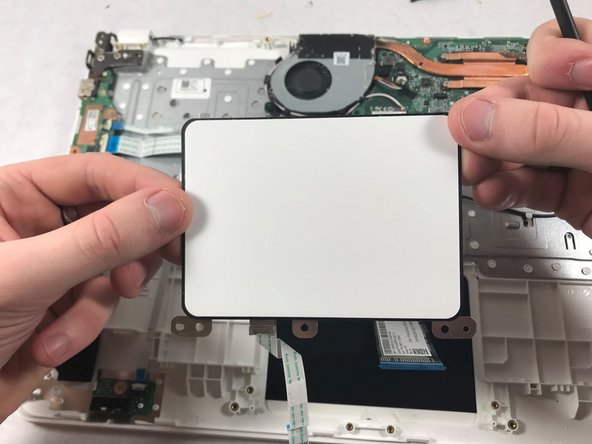
Use the spudger tool to pry the trackpad up and away from the laptop.
-


Team

UMass Dartmouth, Team S6-G1, Rockett Fall 2017 Mitglied von UMass Dartmouth, Team S6-G1, Rockett Fall 2017
UMASSD-ROCKETT-F17S6G1
3 Mitglieder
10 Anleitungen geschrieben