Einleitung
The trackpad is a component that is likely to malfunction if damaged or altered. Signs of a malfunctioning trackpad include but are not limited to: cursor won’t move, mouse won’t click, cursor keeps disappearing, etc. In addition, if the trackpad comes into contact with any liquid, the trackpad may be faulty. If you’re experiencing any problems with the trackpad of your device, the trackpad may need to be replaced. Follow the instructions in this guide to replace the trackpad.
Was du brauchst
-
-
Power down the laptop prior to beginning.
-
Turn the laptop over with the battery closest to your body.
-
-
-
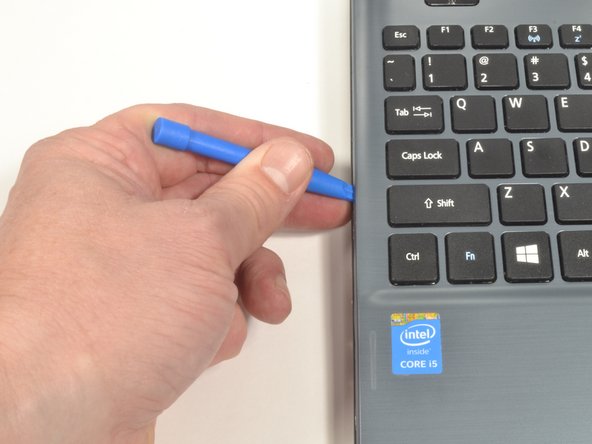
Insert the pointed end of a spudger into the battery release.
-
Slide the release gently all the way to the left.
-
-
-
Place your hands on each end of the battery.
-
Pull the battery towards your body to remove it.
-
-
-
Using a #0 Phillips screwdriver, remove a total of eighteen identical 8mm Phillips screws and set them aside.
-
-
-
Rotate the laptop 180 degrees so that the battery compartment is now furthest away from your body.
-
-
-
Turn the laptop over so that you can easily open the screen to a vertical position.
-
-
-
-
Put your fingers under the top of the keyboard assembly directly below the Acer logo.
-
Carefully pull up on the center until you hear the tabs disengage from the bottom.
-
-
-
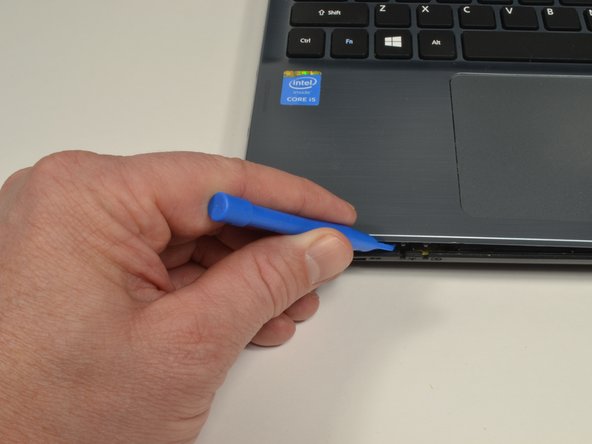
Work your way around the seam with the plastic opening tool carefully prying the base and top cover apart.
-
-
-
When the two halves are separated, carefully lift up the front of the keyboard and touchpad assembly.
-
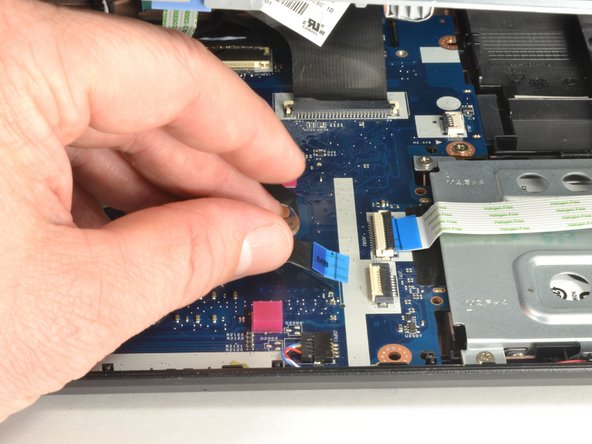
You will see three ribbon cables attached to the motherboard.
-
-
-
Closest to the ribbon cable on the zero insertion force (ZIF) connector is a white locking tab.
-
Carefully lift up on the locking tab with the plastic opening tool to release the ribbon cable. (Picture 2)
-
Remove the ribbon cable from the connector.
-
-
-
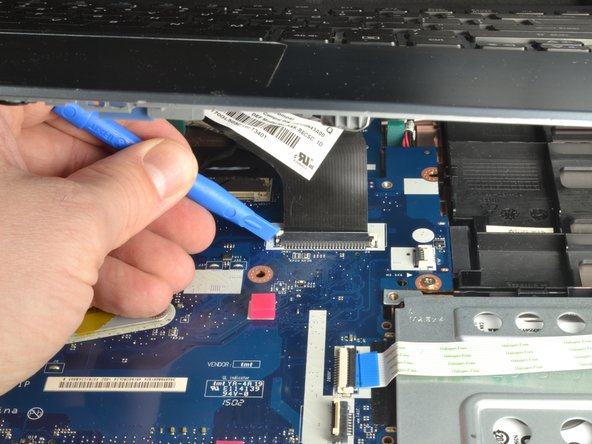
Closest to the ribbon cable on the ZIF connector is a black locking tab.
-
Carefully lift up on the locking tab with the plastic opening tool to release the ribbon cable. (Picture 2)
-
Remove the ribbon cable from the connector.
-
-
-
On each side of the large connector there are two white tabs.
-
Carefully push away from you with the plastic opening tool on each white tab to release the cable. (Picture 2)
-
Remove the ribbon cable from the connector.
-
-
-
Once all three ribbon cables are disconnected, lift off the top cover with the keyboard and touchpad.
-
-
-
Remove the screw at the bottom of the track pad using the Phillips #0 screwdriver.
-
-
-
Gently remove the copper adhesive strips attached to the track pad.
-
Remove the two screws using the Phillips #0 screwdriver.
-
-
-
Pop the track pad out of of the keyboard casing and remove it from the device.
-


To reassemble your device, follow these instructions in reverse order.
To reassemble your device, follow these instructions in reverse order.
Team

University of North Alabama, Team S1-G2, Winner Fall 2019 Mitglied von University of North Alabama, Team S1-G2, Winner Fall 2019
UNA-WINNER-F19S1G2
3 Mitglieder
3 Anleitungen geschrieben