Zum Hauptinhalt wechseln

Acer Iconia B1-711 Audio Jack Connector Replacement

Was du brauchst

Einführungsvideo

  1. Acer Iconia B1-711 Audio Jack Connector Replacement, Back Cover: Schritt 1, Bild 1 von 3 Acer Iconia B1-711 Audio Jack Connector Replacement, Back Cover: Schritt 1, Bild 2 von 3 Acer Iconia B1-711 Audio Jack Connector Replacement, Back Cover: Schritt 1, Bild 3 von 3
    • Switch-off the tablet.

    • Remove any SIM and/or Memory Card.

    • Start opening near to the Volume Up/Down buttons. It's more well to use a plastic opening tool to avoid damaging the cover.

    • When lifting the cover, be careful not to tear the Loudspeaker cable at the bottom right side.

    • Disconnect the Loudspeaker cable from the Logic board.

  2. Acer Iconia B1-711 Audio Jack Connector Replacement: Schritt 2, Bild 1 von 2 Acer Iconia B1-711 Audio Jack Connector Replacement: Schritt 2, Bild 2 von 2
    • Before doing anything, disconnect the battery.

  3. Acer Iconia B1-711 Audio Jack Connector Replacement, Audio Jack Connector: Schritt 3, Bild 1 von 3 Acer Iconia B1-711 Audio Jack Connector Replacement, Audio Jack Connector: Schritt 3, Bild 2 von 3 Acer Iconia B1-711 Audio Jack Connector Replacement, Audio Jack Connector: Schritt 3, Bild 3 von 3
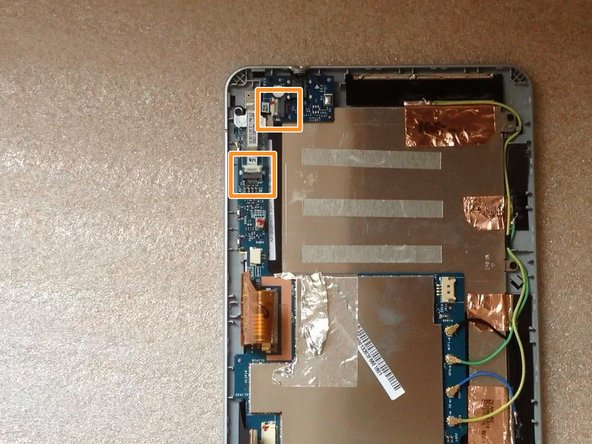
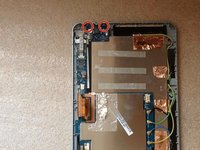
    • Unscrew 2x Philips screws

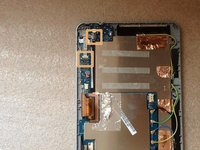
    • Disconnect and remove the Audio Jack Board flex cable.

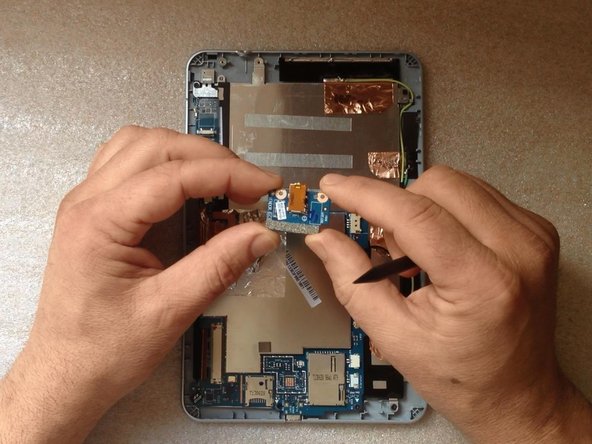
    • Remove the board with the Audio Jack Connector.

Abschluss

To reassemble your device, follow these instructions in reverse order.

ZFix

Mitglied seit: 12/09/13

191.182 Reputation

330 Anleitungen geschrieben

Team

Master Techs Mitglied von Master Techs

Community

322 Mitglieder

2.521 Anleitungen geschrieben

Ein Kommentar

Can anyone suggest part number for whole jack board or just of jack?

Alexander Zaripov - Antwort

Kommentar hinzufügen

Seitenaufrufe:

Letzte 24 Stunden: 0

Letzte 7 Tage: 1

Letzte 30 Tage: 1

Insgesamt: 576