Zum Hauptinhalt wechseln

Acer Iconia B1-711 Battery Replacement

Was du brauchst

Einführungsvideo

  1. Acer Iconia B1-711 Battery Replacement, Back Cover: Schritt 1, Bild 1 von 3 Acer Iconia B1-711 Battery Replacement, Back Cover: Schritt 1, Bild 2 von 3 Acer Iconia B1-711 Battery Replacement, Back Cover: Schritt 1, Bild 3 von 3
    • Switch-off the tablet.

    • Remove any SIM and/or Memory Card.

    • Start opening near to the Volume Up/Down buttons. It's more well to use a plastic opening tool to avoid damaging the cover.

    • When lifting the cover, be careful not to tear the Loudspeaker cable at the bottom right side.

    • Disconnect the Loudspeaker cable from the Logic board.

  2. Acer Iconia B1-711 Battery Replacement: Schritt 2, Bild 1 von 2 Acer Iconia B1-711 Battery Replacement: Schritt 2, Bild 2 von 2
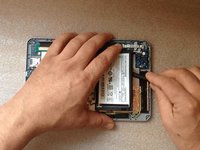
    • Before doing anything, disconnect the battery.

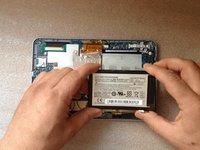
  3. Acer Iconia B1-711 Battery Replacement, Battery: Schritt 3, Bild 1 von 2 Acer Iconia B1-711 Battery Replacement, Battery: Schritt 3, Bild 2 von 2
    • With a long plastic tool like a spudger, unstick the battery from the metal LCD shield.

    • Lithium Ion Battery Pack - 3.8V, 2710mAh

Abschluss

To reassemble your device, follow these instructions in reverse order.

Ein:e weitere:r Nutzer:in hat diese Anleitung absolviert.

ZFix

Mitglied seit: 12/09/13

191.182 Reputation

330 Anleitungen geschrieben

Team

Master Techs Mitglied von Master Techs

Community

322 Mitglieder

2.521 Anleitungen geschrieben

0 Kommentare

Kommentar hinzufügen

Seitenaufrufe:

Letzte 24 Stunden: 0

Letzte 7 Tage: 0

Letzte 30 Tage: 3

Insgesamt: 1,933