Zum Hauptinhalt wechseln

Acer Iconia B1-720 Battery Replacement

Was du brauchst

  1. Acer Iconia B1-720 Battery Replacement, Rear Case: Schritt 1, Bild 1 von 3 Acer Iconia B1-720 Battery Replacement, Rear Case: Schritt 1, Bild 2 von 3 Acer Iconia B1-720 Battery Replacement, Rear Case: Schritt 1, Bild 3 von 3
    • Insert a plastic opening tool into a gap near the charging port at the top of the device. Slide the tool in either direction along the device.

  2. Acer Iconia B1-720 Battery Replacement: Schritt 2, Bild 1 von 3 Acer Iconia B1-720 Battery Replacement: Schritt 2, Bild 2 von 3 Acer Iconia B1-720 Battery Replacement: Schritt 2, Bild 3 von 3
    • Slide the tool along until you have completely separated the rear cover.

    • If needed, place the first tool in the gap created to hold this gap open and use a second tool to pry the remaining portion of the rear cover off.

  3. Acer Iconia B1-720 Battery Replacement: Schritt 3, Bild 1 von 2 Acer Iconia B1-720 Battery Replacement: Schritt 3, Bild 2 von 2
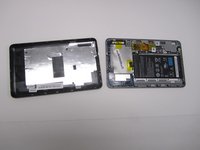
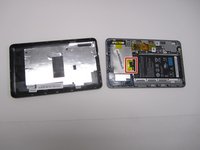
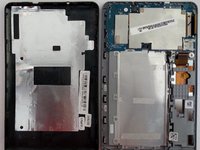
    • Once all the sides have been separated, you should be able to simply lift the cover off of the device.

  4. Acer Iconia B1-720 Battery Replacement, Battery: Schritt 4, Bild 1 von 2 Acer Iconia B1-720 Battery Replacement, Battery: Schritt 4, Bild 2 von 2
    • Peel back the plastic tape covering the battery connector.

  5. Acer Iconia B1-720 Battery Replacement: Schritt 5, Bild 1 von 1
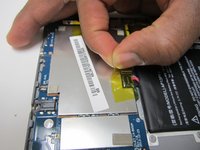
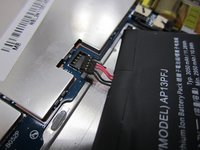
    • Use the plastic opening tool to lift the battery off of the back panel. The adhesive used is strong so apply force during removal.

  6. Acer Iconia B1-720 Battery Replacement: Schritt 6, Bild 1 von 3 Acer Iconia B1-720 Battery Replacement: Schritt 6, Bild 2 von 3 Acer Iconia B1-720 Battery Replacement: Schritt 6, Bild 3 von 3
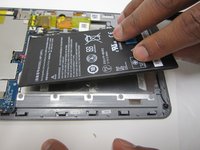
    • Lift the battery off of the panel gently. This will disconnect the battery connector from the motherboard.

Abschluss

To reassemble your device, follow these instructions in reverse order.

5 weitere Nutzer:innen haben diese Anleitung absolviert.

Kervis Boston

Mitglied seit: 03/18/15

479 Reputation

3 Anleitungen geschrieben

Team

Michigan Tech, Team 1-1, Lauer Spring 2015 Mitglied von Michigan Tech, Team 1-1, Lauer Spring 2015

MTU-LAUER-S15S1G1

2 Mitglieder

5 Anleitungen geschrieben

2 Kommentare

Why the battery has a 4 pin connector? I tried to buy another generic battery but it got only 2 cables, don't know how to replace :(

Tadeu - Antwort

I just wanted to throw a red flag out there…I broke my connector off the motherboard trying to reinstall the four-pin connection…can anyone advise?

John Merritt - Antwort

Kommentar hinzufügen

Seitenaufrufe:

Letzte 24 Stunden: 1

Letzte 7 Tage: 3

Letzte 30 Tage: 5

Insgesamt: 2,881