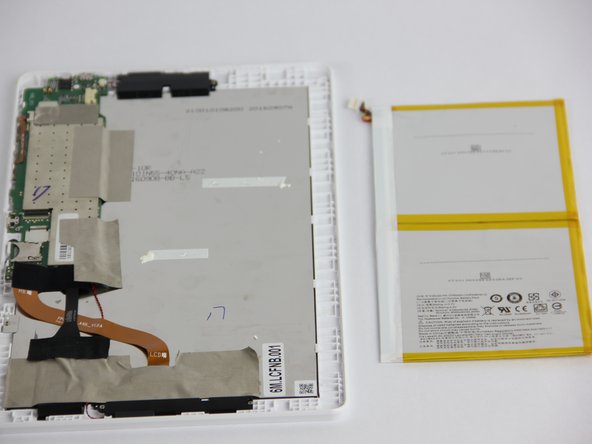
Zum Hauptinhalt wechseln

Acer Iconia One 10 B3-A30 Repair Screen Replacement

Was du brauchst

  1. Acer Iconia One 10 B3-A30 Repair Screen Replacement, Battery: Schritt 1, Bild 1 von 2 Acer Iconia One 10 B3-A30 Repair Screen Replacement, Battery: Schritt 1, Bild 2 von 2
    • Make sure the device is powered off.

    • Open media port cover at the top of the tablet.

    • Use the Phillips #00 screwdriver to remove the 1 mm screw.

  2. Acer Iconia One 10 B3-A30 Repair Screen Replacement: Schritt 2, Bild 1 von 3 Acer Iconia One 10 B3-A30 Repair Screen Replacement: Schritt 2, Bild 2 von 3 Acer Iconia One 10 B3-A30 Repair Screen Replacement: Schritt 2, Bild 3 von 3
    • Using the metal spudger, carefully pry open the back cover.

  3. Acer Iconia One 10 B3-A30 Repair Screen Replacement: Schritt 3, Bild 1 von 1
    • Remove small section of grey tape.

  4. Acer Iconia One 10 B3-A30 Repair Screen Replacement: Schritt 4, Bild 1 von 2 Acer Iconia One 10 B3-A30 Repair Screen Replacement: Schritt 4, Bild 2 von 2
    • Unplug the connection cord from the motherboard.

  5. Acer Iconia One 10 B3-A30 Repair Screen Replacement: Schritt 5, Bild 1 von 3 Acer Iconia One 10 B3-A30 Repair Screen Replacement: Schritt 5, Bild 2 von 3 Acer Iconia One 10 B3-A30 Repair Screen Replacement: Schritt 5, Bild 3 von 3
    • Try to remove the battery by pulling on the blue tabs.

    • If unsuccessful, use the black plastic spudger to gently break the glue bonds underneath and pull up to remove the battery.

    • Be very cautious not to puncture or bend the battery.

  6. Acer Iconia One 10 B3-A30 Repair Screen Replacement, Motherboard: Schritt 6, Bild 1 von 3 Acer Iconia One 10 B3-A30 Repair Screen Replacement, Motherboard: Schritt 6, Bild 2 von 3 Acer Iconia One 10 B3-A30 Repair Screen Replacement, Motherboard: Schritt 6, Bild 3 von 3
    • Remove all of the tape surrounding the motherboard.

  7. Acer Iconia One 10 B3-A30 Repair Screen Replacement: Schritt 7, Bild 1 von 2 Acer Iconia One 10 B3-A30 Repair Screen Replacement: Schritt 7, Bild 2 von 2
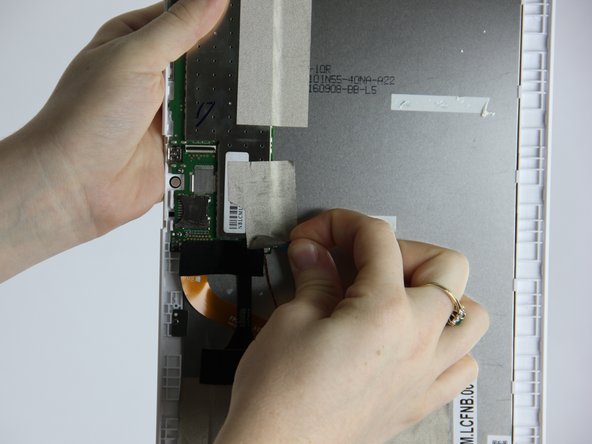
    • Starting with the 2 large connections use the plastic opening tool to gently pry on the connections and pop them out.

    • Now, disconnect the two smaller black and red cords from the motherboard.

  8. Acer Iconia One 10 B3-A30 Repair Screen Replacement: Schritt 8, Bild 1 von 1
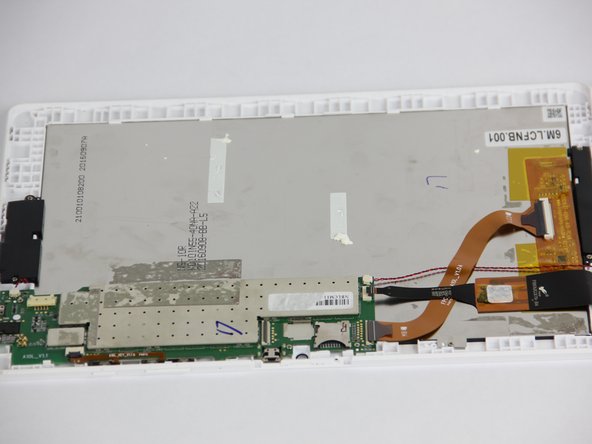
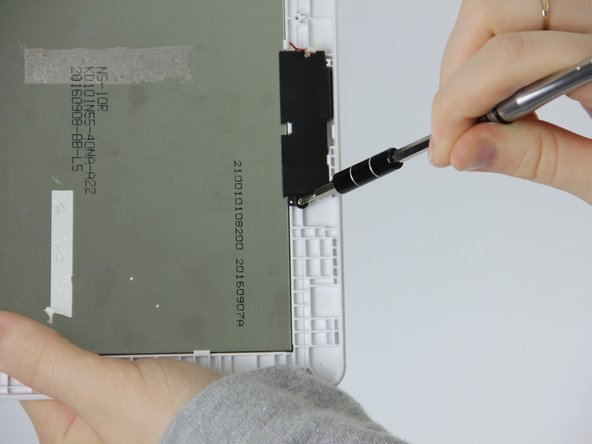
    • Scrape away the small square sticker to reveal one small screw. Use the Phillips #00 screwdriver to remove the screw.

    • Using the same screwdriver remove the other three screws on the motherboard.

  9. Acer Iconia One 10 B3-A30 Repair Screen Replacement: Schritt 9, Bild 1 von 2 Acer Iconia One 10 B3-A30 Repair Screen Replacement: Schritt 9, Bild 2 von 2
    • Using the small plastic tool, carefully pry the motherboard out of the device.

  10. Acer Iconia One 10 B3-A30 Repair Screen Replacement, Screen: Schritt 10, Bild 1 von 3 Acer Iconia One 10 B3-A30 Repair Screen Replacement, Screen: Schritt 10, Bild 2 von 3 Acer Iconia One 10 B3-A30 Repair Screen Replacement, Screen: Schritt 10, Bild 3 von 3
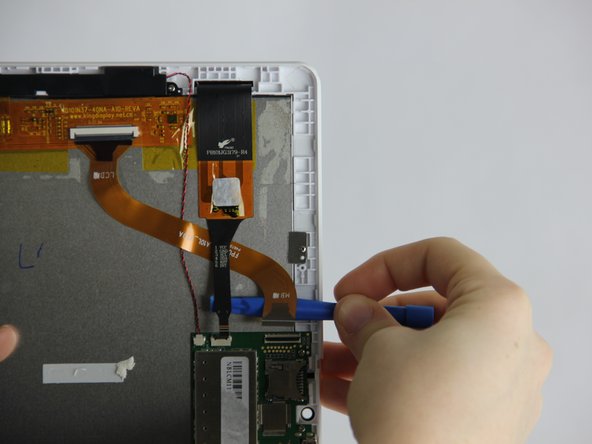
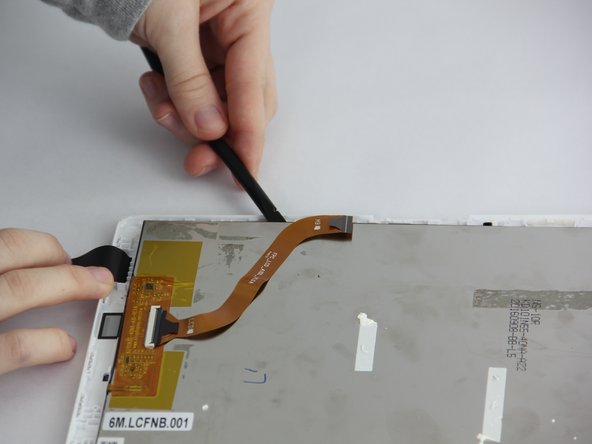
    • Using a plastic spudger pry the square connection away from the screen.

  11. Acer Iconia One 10 B3-A30 Repair Screen Replacement: Schritt 11, Bild 1 von 1
    • Using the Philips #00 head unscrew the screw holding in the small plate.

  12. Acer Iconia One 10 B3-A30 Repair Screen Replacement: Schritt 12, Bild 1 von 3 Acer Iconia One 10 B3-A30 Repair Screen Replacement: Schritt 12, Bild 2 von 3 Acer Iconia One 10 B3-A30 Repair Screen Replacement: Schritt 12, Bild 3 von 3
    • Using the Philips #00 unscrew the remaining 4 screws along the two speakers.

  13. Acer Iconia One 10 B3-A30 Repair Screen Replacement: Schritt 13, Bild 1 von 2 Acer Iconia One 10 B3-A30 Repair Screen Replacement: Schritt 13, Bild 2 von 2
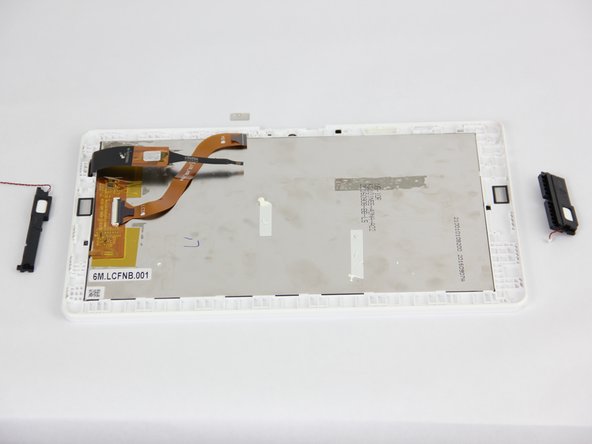
    • Using the plastic spudger gently pry the screen along the plastic clips.

    • Once at least 1/2 of the screen is unclipped slide it out of the frame using hands.

Abschluss

To reassemble your device, follow these instructions in reverse order.

14 weitere Nutzer:innen haben diese Anleitung absolviert.

Team

USF Tampa, Team S1-G5, Nance Fall 2017 Mitglied von USF Tampa, Team S1-G5, Nance Fall 2017

USFT-NANCE-F17S1G5

4 Mitglieder

5 Anleitungen geschrieben

11 Kommentare

It worked! I’m very happy

marmaesker - Antwort

nice job

Linh Pham

Linh Pham - Antwort

This helped out a lot, thanks

feje75 - Antwort

Fantastic set of instructions. Very much appreciated. Cheers very much!!

Chris Wilson - Antwort

Kommentar hinzufügen

Seitenaufrufe:

Letzte 24 Stunden: 0

Letzte 7 Tage: 7

Letzte 30 Tage: 18

Insgesamt: 12,798