Einleitung
The microphone is used to recognize sound input for the device.
Was du brauchst
-
-
With the plastic opening tool pry open the grey plastic siding on both sides of the tablet.
-
-
-
Using a Phillips #00 screwdriver remove the 4.0 mm screws on the sides of the tablet.
-
-
-
Once the 4 screws have been removed use the plastic opening tool to pry open the device on the side of the device.
-
After prying open the case with the plastic opening tool carefully remove the case from the device and place the device face down on its screen.
-
-
-
-
Using a Phillips #00 screwdriver remove the 4.0 mm screws holding the battery in place.
-
-
-
Lift the battery out of the device, and disconnect the cable attached to the motherboard by pulling it out to the side not lifting it up.
-
-
-
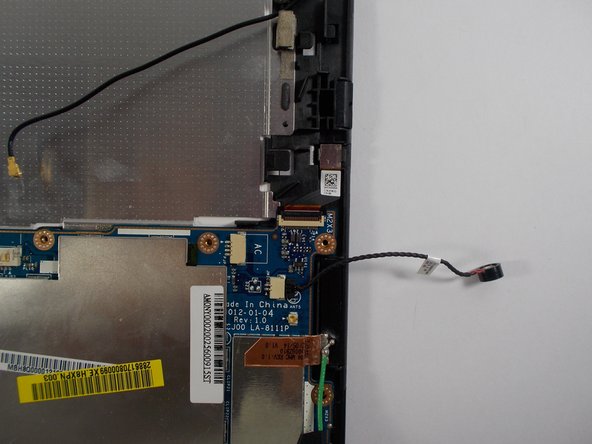
Lift up on the microphone cable to lift the microphone component away from the case.
-
-
-
Once the microphone has been lifted away from the case, disconnect the microphone cable from the motherboard by pulling the cable out horizontally. Do not lift up to remove.
-


To reassemble your device, follow these instructions in reverse order.
To reassemble your device, follow these instructions in reverse order.
Team

UMass Dartmouth, Team 5-5, Landers Spring 2016 Mitglied von UMass Dartmouth, Team 5-5, Landers Spring 2016
UMASSD-LANDERS-S16S5G5
3 Mitglieder
6 Anleitungen geschrieben