Einleitung
The USB-A/Micro-USB Port enhances the connectivity of the tablet to other portable devices. Follow this guide to replace the USB-A/Micro-USB Port.
Was du brauchst
-
-
Use a plastic opening tool to carefully separate the back cover, starting at the volume buttons.
-
Continue separating the back cover along the short side closest to the camera and around the device.
-
-
-
When separated enough, a little more than halfway around the device, the back cover will be easy to take off.
-
-
-
-
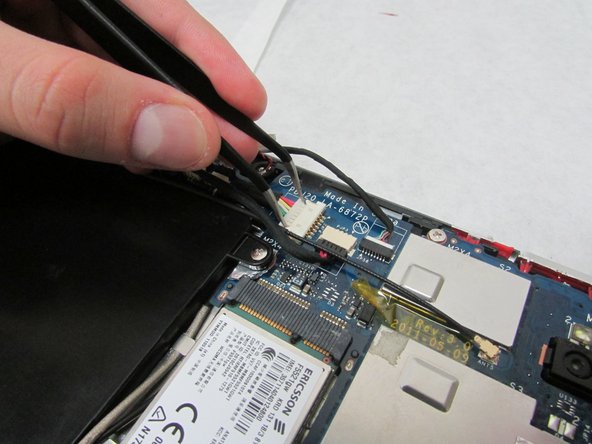
Use the angled tweezers to disconnect the white motherboard-battery connector in the middle of the side opposite the docking port.
-
-
-
Use the plastic opening tool to flip up the locking mechanism for the flat, white ribbon cable connecting to the USB ports' board.
-
Remove the flat, white ribbon cable.
-
-
-
Use a Phillips #1 screwdriver to remove the two 4.0 mm Philips screws attaching the metal plate, USB board, and device.
-
-
-
Use the Halberd Spudger to carefully pop up and take out the ports.
-


To reassemble your device, follow these instructions in reverse order.
To reassemble your device, follow these instructions in reverse order.
Team

Embry-Riddle Aeronautical University, Team S3-G1, Watkins Summer 2019 Mitglied von Embry-Riddle Aeronautical University, Team S3-G1, Watkins Summer 2019
ERAU-WATKINS-SU19S3G1
5 Mitglieder
10 Anleitungen geschrieben