Zum Hauptinhalt wechseln

Acer Nitro 5 AN515-53-52FA CMOS Replacement

Was du brauchst

  1. Acer Nitro 5 AN515-53-52FA CMOS Replacement, Battery: Schritt 1, Bild 1 von 1
    • Before starting the replacement, make sure the laptop is turned off and unplugged.

    • Flip the laptop upside down so that the bottom is facing up.

  2. Acer Nitro 5 AN515-53-52FA CMOS Replacement: Schritt 2, Bild 1 von 2 Acer Nitro 5 AN515-53-52FA CMOS Replacement: Schritt 2, Bild 2 von 2
    • Use the Phillips #0 screwdriver to unscrew the sixteen 9 mm screws holding the back cover in place.

  3. Acer Nitro 5 AN515-53-52FA CMOS Replacement: Schritt 3, Bild 1 von 2 Acer Nitro 5 AN515-53-52FA CMOS Replacement: Schritt 3, Bild 2 von 2
    • Use the opening pick to work your way around the edges to remove the bottom case carefully.

    • Do not try to put too much force on the shell off as you may damage it.

  4. Acer Nitro 5 AN515-53-52FA CMOS Replacement: Schritt 4, Bild 1 von 1
    • Use the Phillips #0 screwdriver to unscrew the four 9 mm screws holding the battery in place.

  5. Acer Nitro 5 AN515-53-52FA CMOS Replacement: Schritt 5, Bild 1 von 2 Acer Nitro 5 AN515-53-52FA CMOS Replacement: Schritt 5, Bild 2 von 2
    • Disconnect the battery's motherboard connector with your fingers.

  6. Acer Nitro 5 AN515-53-52FA CMOS Replacement: Schritt 6, Bild 1 von 2 Acer Nitro 5 AN515-53-52FA CMOS Replacement: Schritt 6, Bild 2 von 2
    • Lift the battery up and out of the laptop.

  7. Acer Nitro 5 AN515-53-52FA CMOS Replacement, CMOS: Schritt 7, Bild 1 von 2 Acer Nitro 5 AN515-53-52FA CMOS Replacement, CMOS: Schritt 7, Bild 2 von 2
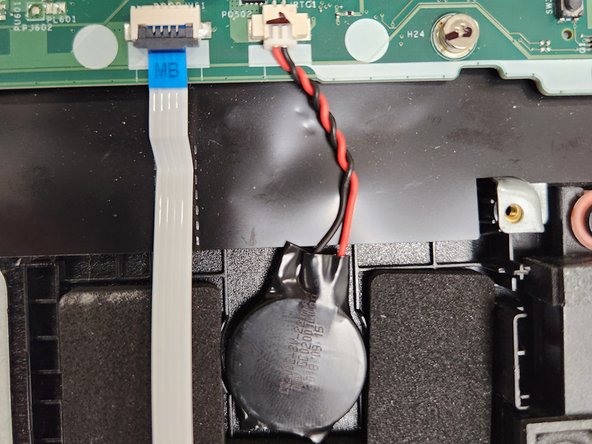
    • Locate the CMOS that is under the battery.

  8. Acer Nitro 5 AN515-53-52FA CMOS Replacement: Schritt 8, Bild 1 von 2 Acer Nitro 5 AN515-53-52FA CMOS Replacement: Schritt 8, Bild 2 von 2
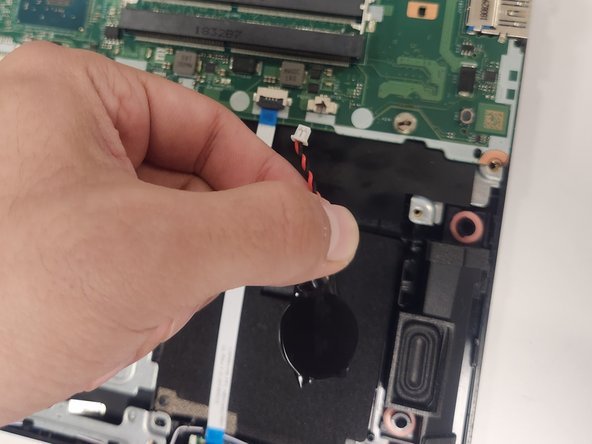
    • Gently unplug the port.

  9. Acer Nitro 5 AN515-53-52FA CMOS Replacement: Schritt 9, Bild 1 von 2 Acer Nitro 5 AN515-53-52FA CMOS Replacement: Schritt 9, Bild 2 von 2
    • Carefully pull the CMOS Battery, as there is adhesive keeping it attached.

Abschluss

To reassemble your device, follow these instructions in reverse order.

Team

Gateway, Team 1-3, Pee Fall 2022 Mitglied von Gateway, Team 1-3, Pee Fall 2022

GCC-PEE-F22S1G3

4 Mitglieder

5 Anleitungen geschrieben

0 Kommentare

Kommentar hinzufügen

Seitenaufrufe:

Letzte 24 Stunden: 12

Letzte 7 Tage: 70

Letzte 30 Tage: 268

Insgesamt: 4,451