Einleitung
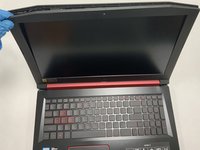
Diese Anleitung zeigt dir, wie du das defekte oder kaputte Display deines Acer Nitro 5 AN515-53-55G9 ersetzen kannst. Wenn dein Display gebrochen ist, Streifen anzeigt oder nicht angeht, kann diese Anleitung dabei helfen, das Display durch ein funktionierendes auszutauschen. Um zu überprüfen, ob nur das Display kaputt ist, kannst du dein Gerät z. B. an einen externen Monitor anschließen. Wenn dein Laptop damit problemlos funktioniert, dann ist es höchstwahrscheinlich das Display, das defekt ist.
Wenn dein Display besonders stark gebrochen ist, ist es hilfreich es mit Klebeband zu überkleben, um zu vermeiden, dass du dich schneidest oder verletzt. Du solltest nur sicher stellen, das du den Rahmen nicht beklebst, da dieser entfernt werden muss.
Was du brauchst
-
-
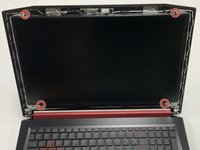
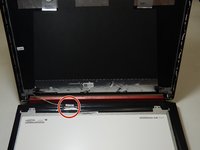
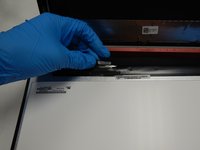
Heble die Kunststoffeinfassung des Displays an allen vier Seiten mit einem Öffnungswerkzeug aus Kunststoff ab.
-
-
-
-
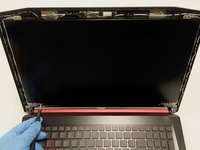
Benutze einen Kreuzschlitzschraubendreher #0, um die vier 9 mm Schrauben zu entfernen, mit denen das Display befestigt ist.
-
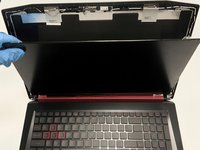
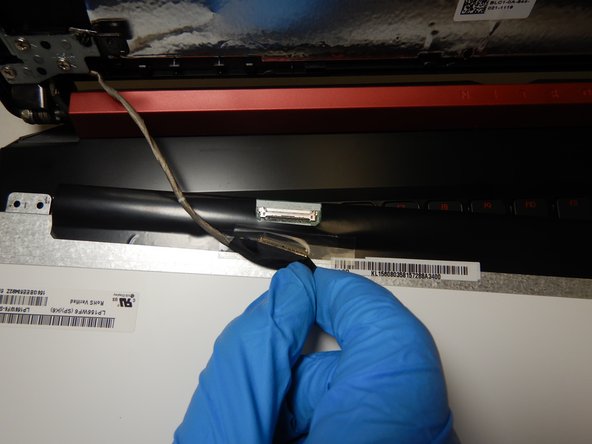
Lege das Display vorsichtig auf der Tastatur ab.
-


Um dein Gerät wieder zusammenzubauen, folge den Schritten dieser Anleitung in umgekehrter Reihenfolge.
Um dein Gerät wieder zusammenzubauen, folge den Schritten dieser Anleitung in umgekehrter Reihenfolge.
Rückgängig: Ich habe diese Anleitung nicht absolviert.
8 weitere Personen haben diese Anleitung absolviert.
Besonderer Dank geht an diese Übersetzer:innen:
100%

Diese Übersetzer:innen helfen uns, die Welt zu reparieren! Wie kann ich mithelfen?
Hier starten ›
Team

The Citadel Military College of South Carolina, Team S2-G11, Eggleston Fall 2020 Mitglied von The Citadel Military College of South Carolina, Team S2-G11, Eggleston Fall 2020
CMCSC-EGGLESTON-F20S2G11
3 Mitglieder
6 Anleitungen geschrieben
5 Kommentare
This guide was helpful in replacing the screen in my son’s Acer Nitro 5 AN515--43-R0YM, with a slight difference. That model’s screen is held in place with adhesive strips, not screws. Kind of pain, but not too bad to deal with. The strips work basically like 3M Command Strips. Use pliers are strong tweezers to grab the tab peeking out from behind the screen at each corner (but do one at a time, of course), and _slowly_ pull straight out (parallel to the screen). Once enough has come out, grab with your fingers and keep pulling _slowly_. If you pull too fast it could break, and then you’ve got a real headache on your hands. Be patient and eventually the tape will release.
I've use it for a AN515-52 and the steps are the same. I did a screen replace in less then 15 min. Top guide
nice 15 min is it hard for a beginner
Hi, mate I'm just wondering what the problem with my laptop Acer Nitro 5 is when I turn it on its almost the entire screen is black but after a while probably 40-50mins time the screen is working fine with flickering on the top portion of the screen and after 10-15 mins the flickering is gone. I also try connecting it to external monitor and it's working fine, Thank you in advance for your answer. Cheers
How to fix my acer nitro 5 AN515-57-53SB? I'm just playing Valorant Game then suddenly the screen starts to have some kind of glitches, the dislpay is okay and then every second it starts to glitch