Einleitung
If the cooling fans in your 2018 Acer Nitro V have stopped functioning, this guide will instruct you on how to remove blockage from the fans, reseat their bearing, and reapply adhesive to the motor housing in the event that it has failed. You should be able to diagnose this if your fans fail to spin while the device is running, or if there is a grinding noise while they are spinning. This is a common issue that can occur mainly due to the collection of dust and other debris within the fan mechanism over the lifetime of the product. these issues can also occur after periods of sustained heavy use of the laptop as it ages, wherein the stock adhesive can degrade to the point where it no longer functions. It is imperative that you address this issue as soon as possible as if the fans are not function properly the internal components of your laptop are not being properly cooled either which is bad for the longevity of your device.
This guide works for the AN515-52-50WX, AN515-52-73LN and AN515-52-78AS models. The main discrepancies between these models that concern this guide is whether or not there is a secondary drive installed, in which case it will need to be removed. It should also be noted that because this device does allow the user to install one on their own that if you installed a secondary drive yourself, or a third party distributor did , you will still need to remove it to complete the repair.
The exterior cover of the device, as well as the secondary drive mentioned above, will need to be removed to access the fans of the device which you will then remove to either remove blockage, reseat the bearing, or reapply adhesive to secure the fan. When choosing a replacement adhesive it is recommended that you choose an adhesive that can withstand temperatures up to 212 degrees Fahrenheit or 100 degrees Celsius. It is also recommended that you choose an adhesive that does not expand after application as this can cause the position of the fan to shift and inhibit its rotation. When in doubt something like Loctite super glue is always a good option.
After completing the guide and reassembling your device both of the fans should spin freely without any grinding noise when the device is running. If however your fans fail to function even after completing this guide you will need to purchase a replacement fan, which can be found here. It should also be noted that the fans used in the Nitro V are the same fans that Acer uses in their Aspire line of devices, so don’t worry if you see that when you are searching for replacement fans. After you have purchased your new fans you can also install them using this guide.
Was du brauchst
-
-
Remove the two 8 mm Phillips #0 screws that secure the covers for the RAM and drive trays.
-
-
-
Remove the covers for the RAM and drive trays by prying the cover away from the recess next to where the screws that you removed in the previous step were.
-
In some cases you might need to use a spudger or a prying tool to remove the covers.
-
-
-
Remove the four 4 mm Phillips #0 screws that secure the drive tray.
-
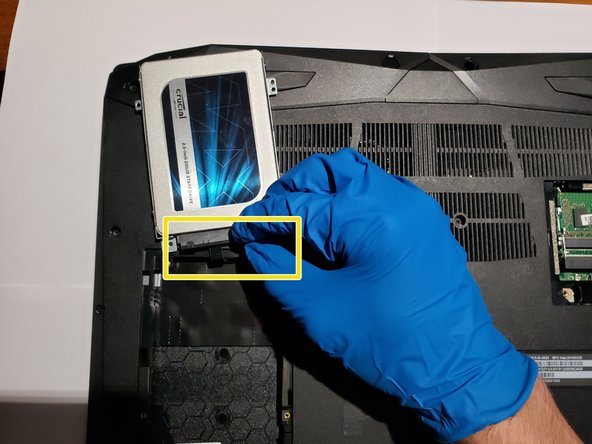
Using the silver tab located on the top of the drive tray, gently lift the drive tray out of the laptop and rest it towards the back of the device.
-
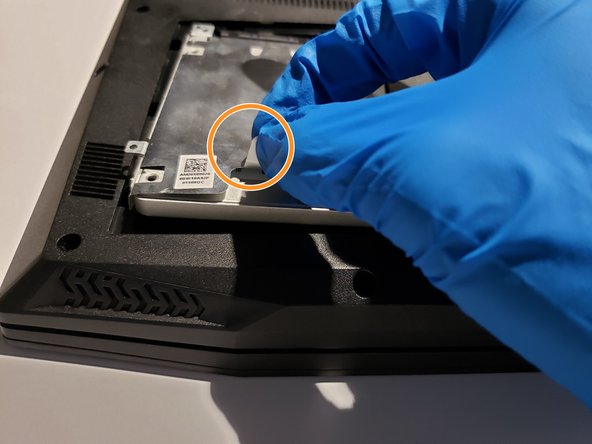
Gently remove the SATA connector located on the bottom of the drive by pulling directly away from the drive whilst gripping the plastic connector not the wire.
-
-
-
-
Remove the fifteen 8 mm Phillips #0 screws that secure the backplate to the device.
-
Using a sludger or prying tool gently separate the backplate front he body of the device. Insert the sludger at the corners of the device first and gently work away from your starting point.
-
-
-
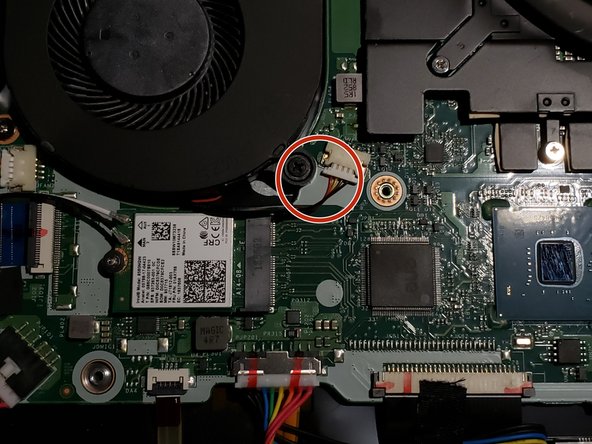
Using your fingernail, or a spudger if needed, gently grip the fan power cable housing and pull it directly away from the connector. Do not pull on the wires.
-
-
-
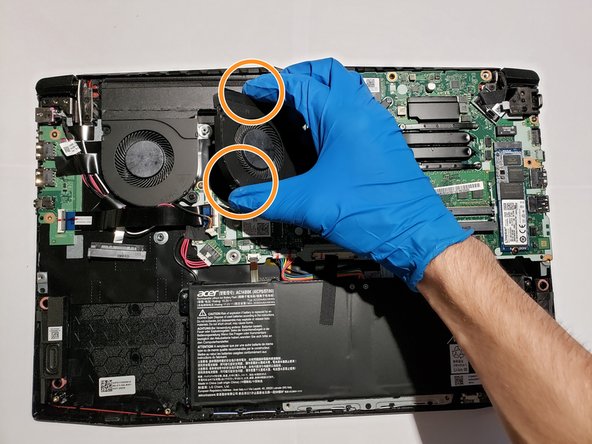
Remove the four 4 mm Phillips #0 screws that secure the fans to the motherboard.
-
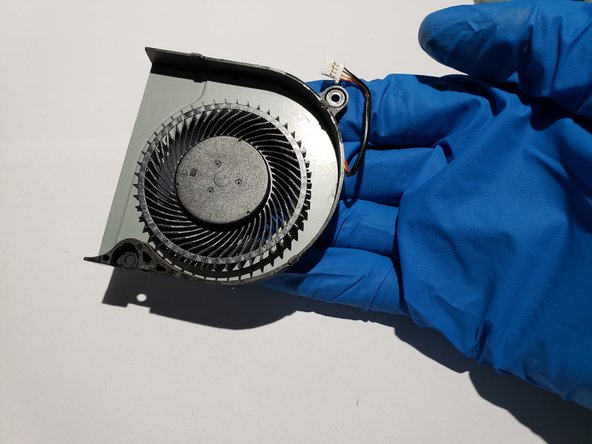
Remove the affected fan from the laptop by gripping the sides and lifting it up and out of the laptop.
-
-
-
Using a spudger or a prying tool gently lift the cover of the fan housing away from the main bottom housing. Start on near the corner where the screws in the previous step were located.
-
-
-
Using a dry cotton swab remove any blockage in the fan channel that is preventing the fan from rotating.
-
If the fan bearing has unseated, gently grip the fan housing as shown in the second image and pinch it until there is a tactile bump and the fan rotates freely.
-
If the stock adhesive has failed and the motor is no longer secured to the housing, apply pea sized amount of adhesive to a cotton swab and spread it evenly along the bottom of the motor. Repeat the pinching motion in the second image.
-
-
-
Reassemble following the previous steps in reverse order. Ensure that the fan cables are plugged back in in the correct orientation.
-


To reassemble your device, follow these instructions in reverse order.
To reassemble your device, follow these instructions in reverse order.
Rückgängig: Ich habe diese Anleitung nicht absolviert.
Ein:e weitere:r Nutzer:in hat diese Anleitung absolviert.
Team

Embry-Riddle Aeronautical University, Team S3-G20, Cromer Twal Fall 2020 Mitglied von Embry-Riddle Aeronautical University, Team S3-G20, Cromer Twal Fall 2020
ERAU-CROMER TWAL-F20S3G20
1 Mitglied
1 Anleitung geschrieben