Zum Hauptinhalt wechseln

Acer One 10 S1003-114M Motherboard Replacement

Was du brauchst

  1. Acer One 10 S1003-114M Motherboard Replacement, Battery: Schritt 1, Bild 1 von 2 Acer One 10 S1003-114M Motherboard Replacement, Battery: Schritt 1, Bild 2 von 2
    • Make sure the device is turned off and disconnected from any power source.

    • To disconnect the tablet from the keyboard attachment, open the laptop and lift the tablet component up from the keyboard dock.

  2. Acer One 10 S1003-114M Motherboard Replacement: Schritt 2, Bild 1 von 3 Acer One 10 S1003-114M Motherboard Replacement: Schritt 2, Bild 2 von 3 Acer One 10 S1003-114M Motherboard Replacement: Schritt 2, Bild 3 von 3
    • While handling the device, make sure to avoid pushing the power button. Device must remain powered off.

    • Metal spudgers and similar prying tools can damage internal components like the motherboard. It is ideal to use a regular black nylon spudger or a plastic opening tool, but for this device the metal jimmy and spudger were the only tools that worked.

    • Starting from the corner of the tablet, use a jimmy to create a gap between the screen and the back covering.

    • Insert a metal spudger in the gap that you created with the Jimmy.

    • Slowly maneuver the metal spudger along the perimeter of the tablet to pry the screen and back covering apart.

    • Separate the back covering from the screen.

  3. Acer One 10 S1003-114M Motherboard Replacement: Schritt 3, Bild 1 von 2 Acer One 10 S1003-114M Motherboard Replacement: Schritt 3, Bild 2 von 2
    • Using your hands, peel off the Polyimide tape (yellow tape).

  4. Acer One 10 S1003-114M Motherboard Replacement: Schritt 4, Bild 1 von 3 Acer One 10 S1003-114M Motherboard Replacement: Schritt 4, Bild 2 von 3 Acer One 10 S1003-114M Motherboard Replacement: Schritt 4, Bild 3 von 3
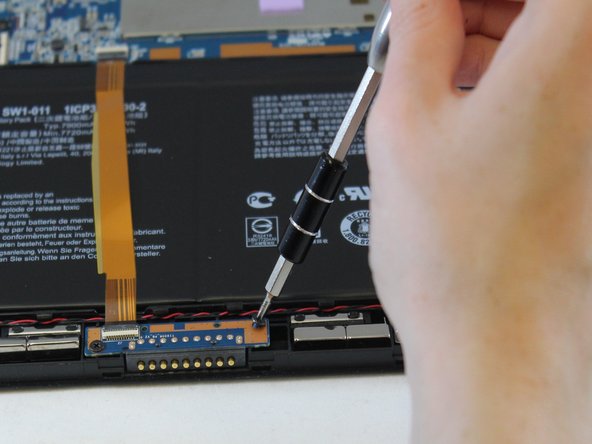
    • Using the Phillips #00 screwdriver, unscrew the two 2mm screws at the bottom of the tablet and open the ZIF latch.

    • Gently remove the gold ribbon cable covering the battery and set it aside.

  5. Acer One 10 S1003-114M Motherboard Replacement: Schritt 5, Bild 1 von 2 Acer One 10 S1003-114M Motherboard Replacement: Schritt 5, Bild 2 von 2
    • Using the Phillips #00 screwdriver, unscrew the two 2mm screws at the top right of the battery.

  6. Acer One 10 S1003-114M Motherboard Replacement: Schritt 6, Bild 1 von 2 Acer One 10 S1003-114M Motherboard Replacement: Schritt 6, Bild 2 von 2
    • Peel the three shiny black stickers from the battery (top left, bottom right, and bottom left), but keep them attached to the motherboard.

  7. Acer One 10 S1003-114M Motherboard Replacement: Schritt 7, Bild 1 von 2 Acer One 10 S1003-114M Motherboard Replacement: Schritt 7, Bild 2 von 2
    • Battery is adhered to the tablet.

    • Avoid putting pressure on the glass while separating the battery from the screen.

    • Use the spudger to separate the battery from glue that holds the battery to the screen. Carefully pry the battery from the tablet.

  8. Acer One 10 S1003-114M Motherboard Replacement: Schritt 8, Bild 1 von 1
    • Remove the battery from the device.

  9. Acer One 10 S1003-114M Motherboard Replacement, Motherboard: Schritt 9, Bild 1 von 3 Acer One 10 S1003-114M Motherboard Replacement, Motherboard: Schritt 9, Bild 2 von 3 Acer One 10 S1003-114M Motherboard Replacement, Motherboard: Schritt 9, Bild 3 von 3
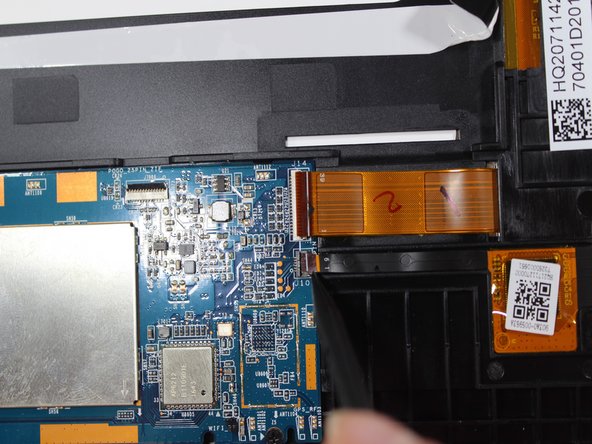
    • Using a spudger, disconnect the two ribbon cables on the top right and the three on the bottom left of the motherboard.

  10. Acer One 10 S1003-114M Motherboard Replacement: Schritt 10, Bild 1 von 2 Acer One 10 S1003-114M Motherboard Replacement: Schritt 10, Bild 2 von 2
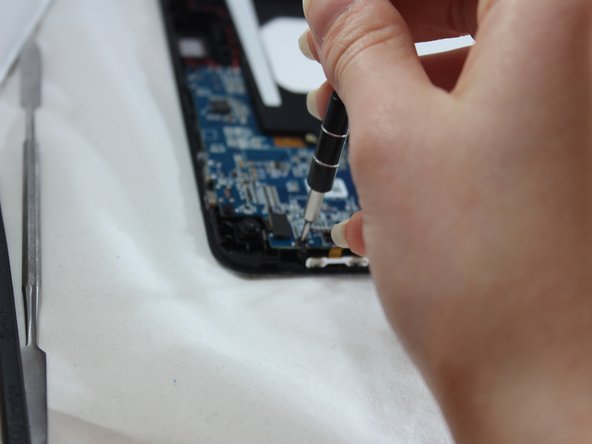
    • Use a Phillips #00 screwdriver to remove the five 2mm screws from the motherboard. There are two on the left edge and three on the bottom edge of the motherboard.

  11. Acer One 10 S1003-114M Motherboard Replacement: Schritt 11, Bild 1 von 2 Acer One 10 S1003-114M Motherboard Replacement: Schritt 11, Bild 2 von 2
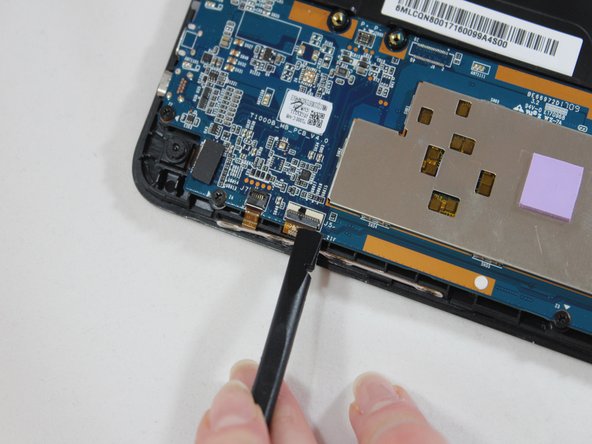
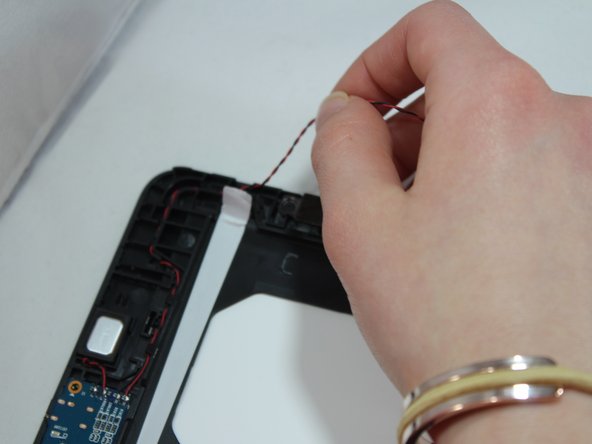
    • Using the spudger, pry the speaker from the right side of the tablet.

    • Lift the red and black wires attached to speaker on right side out of the track to where it connects to motherboard and the speaker on the left side.

    • Using the spudger, pry the speaker from the left side of the tablet.

  12. Acer One 10 S1003-114M Motherboard Replacement: Schritt 12, Bild 1 von 3 Acer One 10 S1003-114M Motherboard Replacement: Schritt 12, Bild 2 von 3 Acer One 10 S1003-114M Motherboard Replacement: Schritt 12, Bild 3 von 3
    • Use a spudger to create a gap between motherboard and back covering.

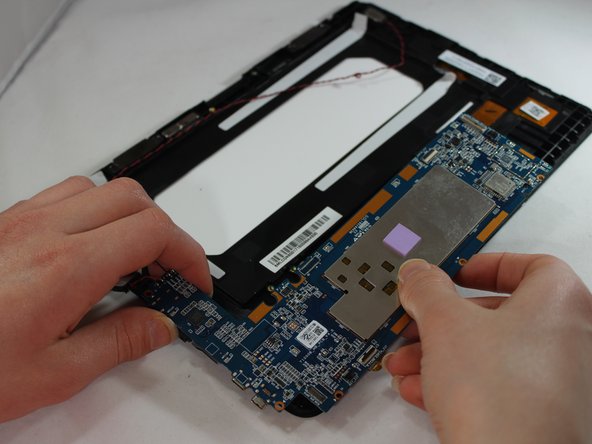
    • Using the spudger, gently pry the motherboard away from the back covering.

    • Gently lift and remove the motherboard and speakers from tablet.

Abschluss

To reassemble your device, follow these instructions in reverse order.

2 weitere Nutzer:innen haben diese Anleitung absolviert.

3 Kommentare

Is it crutial to remove the battery? Or can this be done with it disconnected?

Thomas Richardson - Antwort

Where is the bios battery?

Ramon - Antwort

Bios battery don't exist! UEFI Bios Flash memory NVRAM

philip - Antwort

Kommentar hinzufügen

Seitenaufrufe:

Letzte 24 Stunden: 0

Letzte 7 Tage: 5

Letzte 30 Tage: 16

Insgesamt: 2,271