Einleitung
This guide will show you how to successfully replace a damaged or dead battery in your device.
Was du brauchst
-
-
Power off the device and make sure it is disconnected from any external devices.
-
Use a plastic opening tool to create a gap between the front and back casing of the device.
-
Slowly maneuver the plastic tool around the entire perimeter of the tablet to separate the front and back.
-
-
-
-
Remove the two pieces of transparent yellow tape inside the device.
-
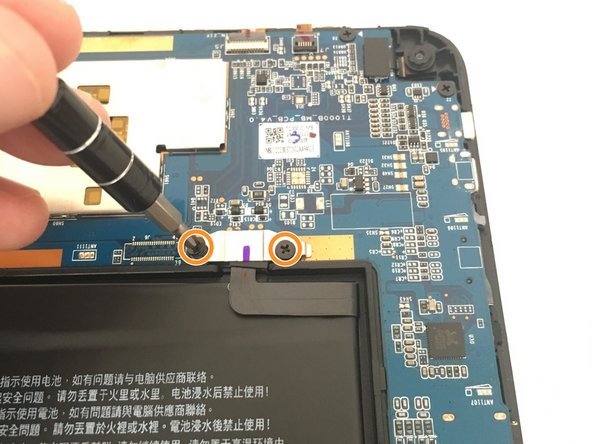
Using the Phillips #0 screwdriver, remove the two screws on either side of the connector.
-
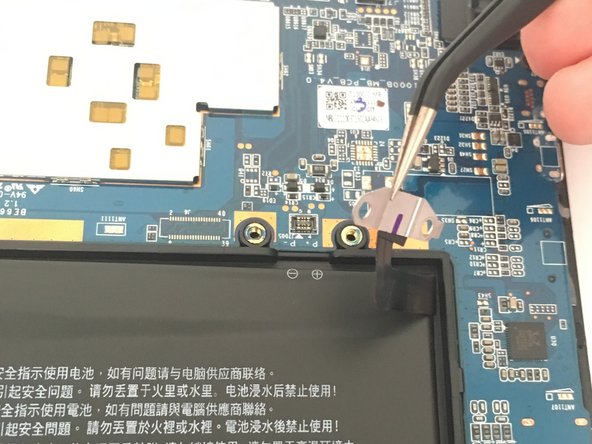
Grab the the connector with tweezers and pull it slightly away from the motherboard.
-
-
-
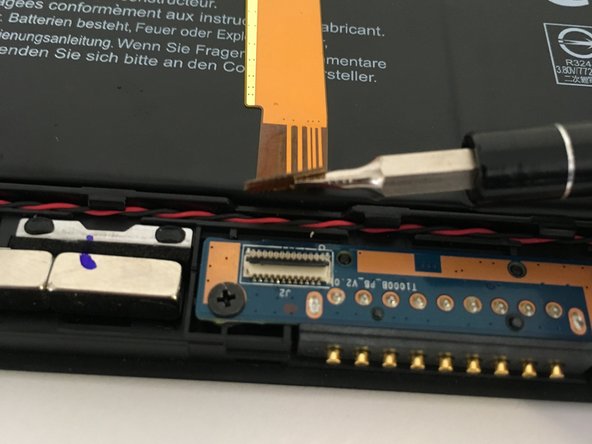
Flip the small black latch up on the connector where the ribbon inserts.
-
Gently pull the ribbon out of the connection.
-
Repeat this process on the upper orange ribbon connection.
-
-
-
Peel back the black tape holding the battery in the three corners of the battery.
-
-
-
Carefully pry the battery off of the adhesive on one side with a plastic spudger.
-
Remove the battery from the device.
-


To reassemble your device, follow these instructions in reverse order.
To reassemble your device, follow these instructions in reverse order.
Rückgängig: Ich habe diese Anleitung nicht absolviert.
Ein:e weitere:r Nutzer:in hat diese Anleitung absolviert.
Team

University of Alabama, Team S2-G8, Bedsole Fall 2018 Mitglied von University of Alabama, Team S2-G8, Bedsole Fall 2018
UA-BEDSOLE-F18S2G8
4 Mitglieder
6 Anleitungen geschrieben