Zum Hauptinhalt wechseln

Acer Spin 5 SP515-51GN-807G Speakers Replacement

Was du brauchst

  1. Acer Spin 5 SP515-51GN-807G Speakers Replacement, Back Cover: Schritt 1, Bild 1 von 1
    • Remove the eleven 6.5 mm screws that secure the back case using a Phillips #1 screwdriver.

  2. Acer Spin 5 SP515-51GN-807G Speakers Replacement: Schritt 2, Bild 1 von 3 Acer Spin 5 SP515-51GN-807G Speakers Replacement: Schritt 2, Bild 2 von 3 Acer Spin 5 SP515-51GN-807G Speakers Replacement: Schritt 2, Bild 3 von 3
    • Use a plastic opening tool to gently pry open the back cover.

  3. Acer Spin 5 SP515-51GN-807G Speakers Replacement: Schritt 3, Bild 1 von 1
    • Gently remove the back cover from the device.

  4. Acer Spin 5 SP515-51GN-807G Speakers Replacement, Battery: Schritt 4, Bild 1 von 3 Acer Spin 5 SP515-51GN-807G Speakers Replacement, Battery: Schritt 4, Bild 2 von 3 Acer Spin 5 SP515-51GN-807G Speakers Replacement, Battery: Schritt 4, Bild 3 von 3
    • Using tweezers, remove the piece of black tape over the battery cable connector.

  5. Acer Spin 5 SP515-51GN-807G Speakers Replacement: Schritt 5, Bild 1 von 3 Acer Spin 5 SP515-51GN-807G Speakers Replacement: Schritt 5, Bild 2 von 3 Acer Spin 5 SP515-51GN-807G Speakers Replacement: Schritt 5, Bild 3 von 3
    • Remove the piece of black tape that covers the battery.

  6. Acer Spin 5 SP515-51GN-807G Speakers Replacement: Schritt 6, Bild 1 von 2 Acer Spin 5 SP515-51GN-807G Speakers Replacement: Schritt 6, Bild 2 von 2
    • Grip the battery cable on both sides with your fingertips and gently pull it away from the port.

    • If needed, use the plastic opening tool to remove the cord from its port.

  7. Acer Spin 5 SP515-51GN-807G Speakers Replacement: Schritt 7, Bild 1 von 3 Acer Spin 5 SP515-51GN-807G Speakers Replacement: Schritt 7, Bild 2 von 3 Acer Spin 5 SP515-51GN-807G Speakers Replacement: Schritt 7, Bild 3 von 3
    • Remove the two 3.5 mm screws that secure the battery using a Phillips #00 screwdriver (PH00 bit).

  8. Acer Spin 5 SP515-51GN-807G Speakers Replacement: Schritt 8, Bild 1 von 2 Acer Spin 5 SP515-51GN-807G Speakers Replacement: Schritt 8, Bild 2 von 2
    • Carefully place your fingers under the plastic lip where the screws were removed.

    • Lift upwards to remove the battery.

    • Do not bend or puncture the lithium ion battery as it poses a fire hazard.

  9. Acer Spin 5 SP515-51GN-807G Speakers Replacement, Fan: Schritt 9, Bild 1 von 3 Acer Spin 5 SP515-51GN-807G Speakers Replacement, Fan: Schritt 9, Bild 2 von 3 Acer Spin 5 SP515-51GN-807G Speakers Replacement, Fan: Schritt 9, Bild 3 von 3
    • Remove the piece of tape covering the fan screw using a pair of tweezers.

    • This can also be done using your fingernail.

  10. Acer Spin 5 SP515-51GN-807G Speakers Replacement: Schritt 10, Bild 1 von 3 Acer Spin 5 SP515-51GN-807G Speakers Replacement: Schritt 10, Bild 2 von 3 Acer Spin 5 SP515-51GN-807G Speakers Replacement: Schritt 10, Bild 3 von 3
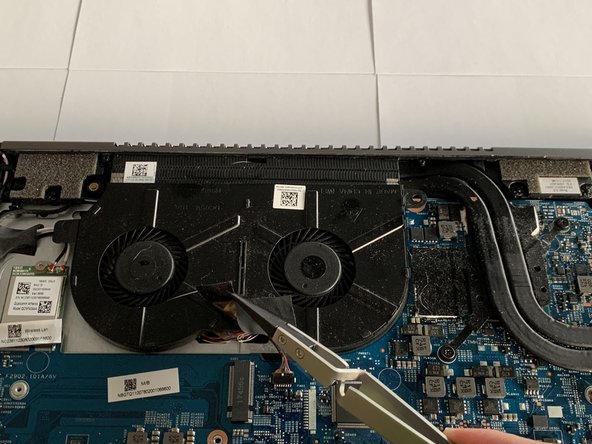
    • Grip the cord that connects the fan to the motherboard and gently pull out to disconnect the cable from the connector.

  11. Acer Spin 5 SP515-51GN-807G Speakers Replacement: Schritt 11, Bild 1 von 2 Acer Spin 5 SP515-51GN-807G Speakers Replacement: Schritt 11, Bild 2 von 2
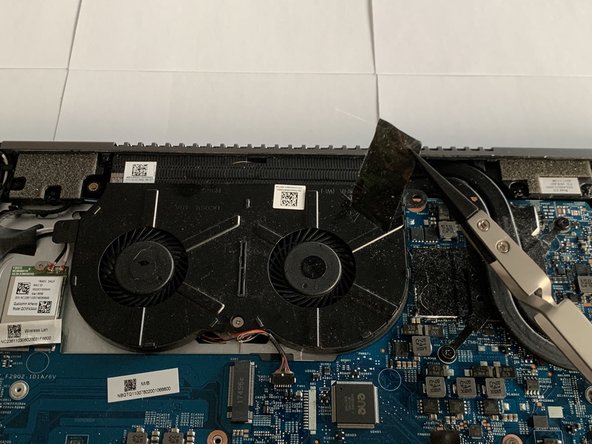
    • Remove the 3.5 mm screw connecting the fan to the computer using a Phillips #00 screwdriver (PH00 bit).

  12. Acer Spin 5 SP515-51GN-807G Speakers Replacement: Schritt 12, Bild 1 von 2 Acer Spin 5 SP515-51GN-807G Speakers Replacement: Schritt 12, Bild 2 von 2
    • Grip the fan with your fingers by the edges and lift up to remove the fan.

  13. Acer Spin 5 SP515-51GN-807G Speakers Replacement, Speakers: Schritt 13, Bild 1 von 1
    • Unscrew the four captive screws on the heatsink with a Phillips #00 screwdriver.

    • These captive screws will remain in the heatsink bracket once disengaged.

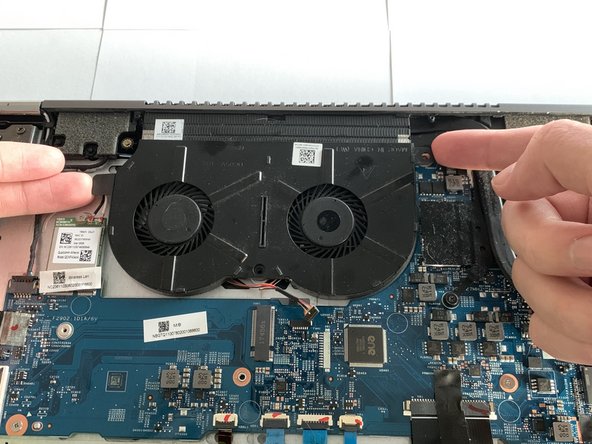
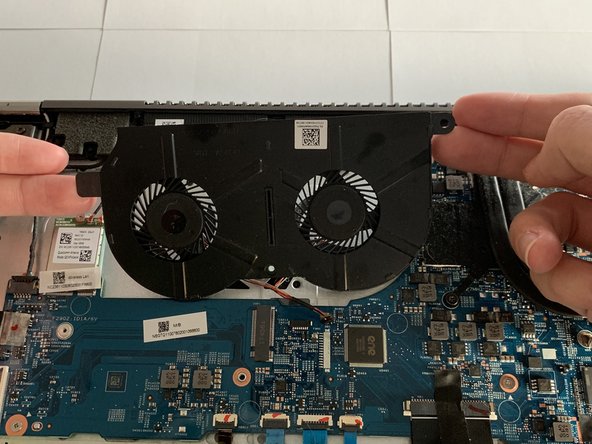
    • Lift off the heatsink.

    • Be sure to reapply thermal paste while reinstalling the heatsink.

  14. Acer Spin 5 SP515-51GN-807G Speakers Replacement: Schritt 14, Bild 1 von 1
    • Unplug the speaker cables from the motherboard.

  15. Acer Spin 5 SP515-51GN-807G Speakers Replacement: Schritt 15, Bild 1 von 3 Acer Spin 5 SP515-51GN-807G Speakers Replacement: Schritt 15, Bild 2 von 3 Acer Spin 5 SP515-51GN-807G Speakers Replacement: Schritt 15, Bild 3 von 3
    • Remove the two speakers.

    • You may need to unhook the cables from the plastic pegs holding them in case. Be careful not to snag the cables on these pegs.

Abschluss

To reassemble your device, follow these instructions in reverse order.

0 Kommentare

Kommentar hinzufügen

Seitenaufrufe:

Letzte 24 Stunden: 0

Letzte 7 Tage: 0

Letzte 30 Tage: 0

Insgesamt: 285