Zum Hauptinhalt wechseln

Alcatel Pixi Theatre Touch Screen Display Assembly Replacement

Was du brauchst

  1. Alcatel Pixi Theatre Touch Screen Display Assembly Replacement, Battery: Schritt 1, Bild 1 von 3 Alcatel Pixi Theatre Touch Screen Display Assembly Replacement, Battery: Schritt 1, Bild 2 von 3 Alcatel Pixi Theatre Touch Screen Display Assembly Replacement, Battery: Schritt 1, Bild 3 von 3
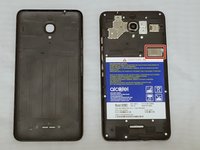
    • Take off the case by flipping the phone over and wedging your finger in the notch on the bottom edge. Pry up until you hear the clicking and the edge releases. Continue to pry the case up, moving around the perimeter of the phone.

    • It should pop off in various places around the perimeter of the phone, and then come off easily.

  2. Alcatel Pixi Theatre Touch Screen Display Assembly Replacement: Schritt 2, Bild 1 von 1
    • Using a Phillips #000 screwdriver, remove the fourteen 3mm screws that connect the housing and the battery.

  3. Alcatel Pixi Theatre Touch Screen Display Assembly Replacement: Schritt 3, Bild 1 von 2 Alcatel Pixi Theatre Touch Screen Display Assembly Replacement: Schritt 3, Bild 2 von 2
    • Remove the metal bracket covering the battery connector flex cable. Now that it's unscrewed, it should come out easily.

  4. Alcatel Pixi Theatre Touch Screen Display Assembly Replacement: Schritt 4, Bild 1 von 2 Alcatel Pixi Theatre Touch Screen Display Assembly Replacement: Schritt 4, Bild 2 von 2
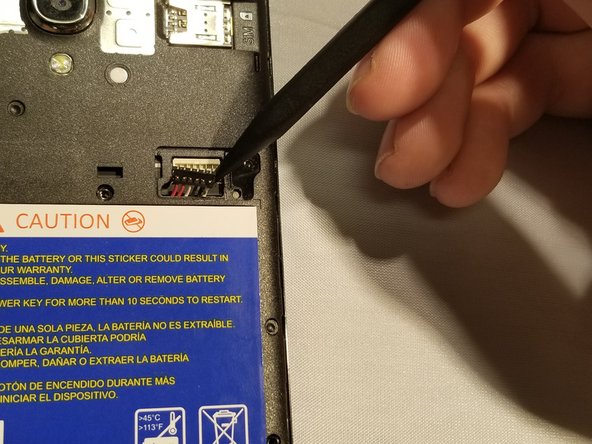
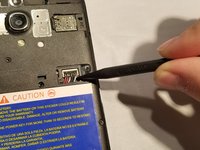
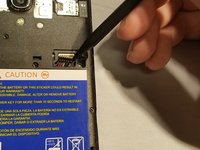
    • Disconnect the battery connector flex cable by sliding the black spudger under the wires and carefully prying up the entire terminal casing.

  5. Alcatel Pixi Theatre Touch Screen Display Assembly Replacement: Schritt 5, Bild 1 von 3 Alcatel Pixi Theatre Touch Screen Display Assembly Replacement: Schritt 5, Bild 2 von 3 Alcatel Pixi Theatre Touch Screen Display Assembly Replacement: Schritt 5, Bild 3 von 3
    • Be careful not to insert the Jimmy too far into the phone when prying the housing apart; if you do, you may damage the motherboard inside.

    • Once removed from the rest of the phone, the sides of the housing are flimsier than the top and bottom. Be careful not to bend the housing when taking it off.

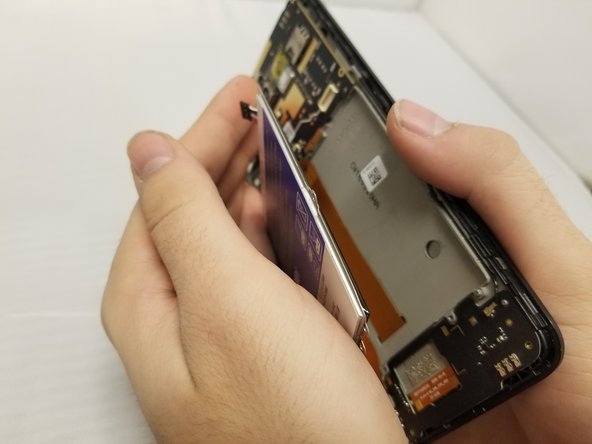
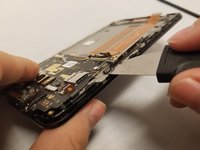
    • Starting at the top left corner and moving around the perimeter of the phone, insert the Jimmy between the housing and the phone and gently pry it up.

  6. Alcatel Pixi Theatre Touch Screen Display Assembly Replacement: Schritt 6, Bild 1 von 3 Alcatel Pixi Theatre Touch Screen Display Assembly Replacement: Schritt 6, Bild 2 von 3 Alcatel Pixi Theatre Touch Screen Display Assembly Replacement: Schritt 6, Bild 3 von 3
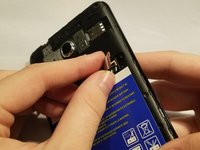
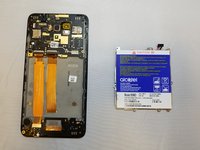
    • Remove the blue battery by lifting it straight up, or by gently turning the phone over into your palm and catching the battery as it comes out.

  7. Alcatel Pixi Theatre Touch Screen Display Assembly Replacement, USB charging port: Schritt 7, Bild 1 von 2 Alcatel Pixi Theatre Touch Screen Display Assembly Replacement, USB charging port: Schritt 7, Bild 2 von 2
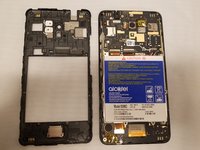
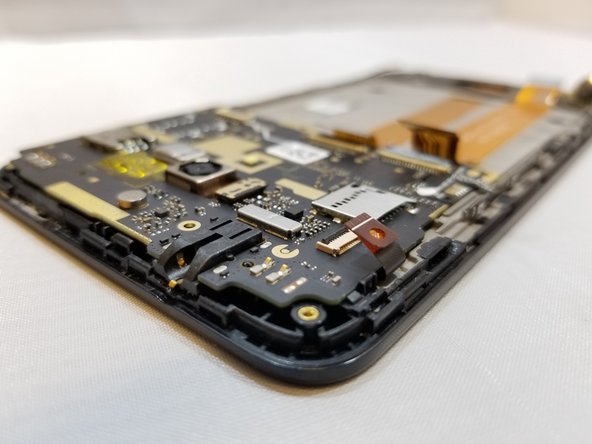
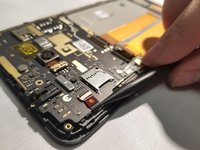
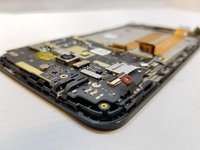
    • Turn the phone so the top is facing you. The board the USB charging port is attached to is on the bottom.

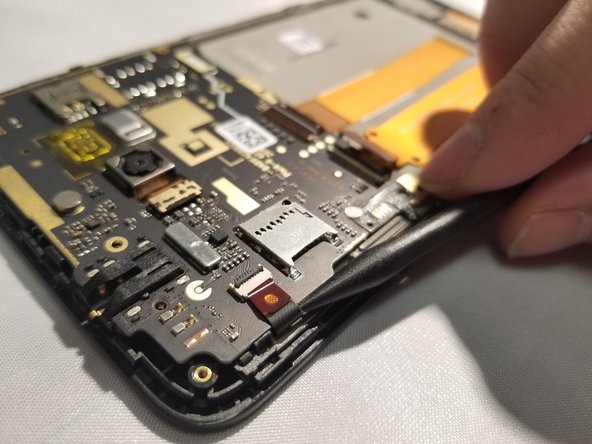
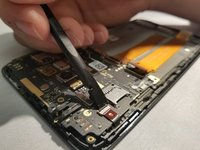
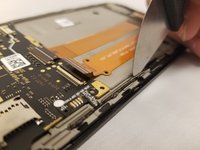
    • Disconnect the other side of the outer orange ribbon cable by locating the socket terminal at the base of the phone and prying it up using the blue spudger.

  8. Alcatel Pixi Theatre Touch Screen Display Assembly Replacement: Schritt 8, Bild 1 von 1
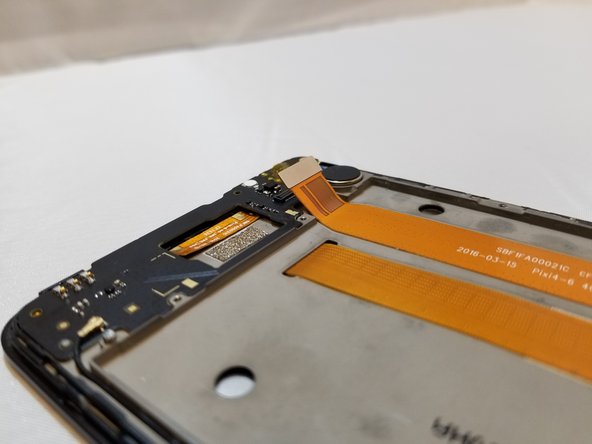
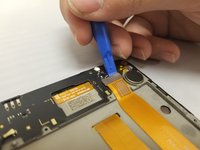
    • Disconnect the antenna flex cable by gently prying up the golden connection with the black spudger.

    • Slide the pointed end gently under the socket until it releases and hangs loose.

  9. Alcatel Pixi Theatre Touch Screen Display Assembly Replacement: Schritt 9, Bild 1 von 2 Alcatel Pixi Theatre Touch Screen Display Assembly Replacement: Schritt 9, Bild 2 von 2
    • Be sure that you're reaching down far enough into the crack before you begin prying the vibrator up, or you could break it.

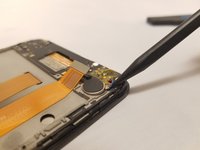
    • Carefully pry up the vibrator with the black spudger, being mindful of its connecting wires. Do not disconnect the vibrator from the board.

  10. Alcatel Pixi Theatre Touch Screen Display Assembly Replacement: Schritt 10, Bild 1 von 2 Alcatel Pixi Theatre Touch Screen Display Assembly Replacement: Schritt 10, Bild 2 von 2
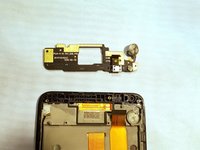
    • Using the black spudger, pry off the board the USB charging port is attached to.

  11. Alcatel Pixi Theatre Touch Screen Display Assembly Replacement, Motherboard: Schritt 11, Bild 1 von 3 Alcatel Pixi Theatre Touch Screen Display Assembly Replacement, Motherboard: Schritt 11, Bild 2 von 3 Alcatel Pixi Theatre Touch Screen Display Assembly Replacement, Motherboard: Schritt 11, Bild 3 von 3
    • When disconnecting the ribbon cables from the clamps, do not peel the cables up. They're glued down.

    • Turn the phone so the volume buttons are facing you.

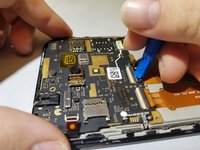
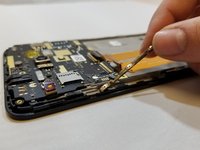
    • Disconnect the orange ribbon cables from the motherboard. Flip the black switches with the blue spudger.

    • Gently pull the ribbons away from the clamp by lifting them away from the connection with the blue spudger. It should release and hang loose.

  12. Alcatel Pixi Theatre Touch Screen Display Assembly Replacement: Schritt 12, Bild 1 von 3 Alcatel Pixi Theatre Touch Screen Display Assembly Replacement: Schritt 12, Bild 2 von 3 Alcatel Pixi Theatre Touch Screen Display Assembly Replacement: Schritt 12, Bild 3 von 3
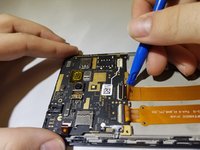
    • Disconnect the small black flex cable by flipping its switch with the flat side of the black spudger.

    • Using the pointy side of the black spudger, gently move the cable away from the connection without pulling on it.

  13. Alcatel Pixi Theatre Touch Screen Display Assembly Replacement: Schritt 13, Bild 1 von 3 Alcatel Pixi Theatre Touch Screen Display Assembly Replacement: Schritt 13, Bild 2 von 3 Alcatel Pixi Theatre Touch Screen Display Assembly Replacement: Schritt 13, Bild 3 von 3
    • The volume buttons are attached with adhesive. Make sure you're prying them out as gently and evenly as possible to avoid damage.

    • Remove the volume buttons on the side by inserting the Jimmy between the buttons and the phone and gently prying them outward. Do not remove the volume buttons from the motherboard.

  14. Alcatel Pixi Theatre Touch Screen Display Assembly Replacement: Schritt 14, Bild 1 von 2 Alcatel Pixi Theatre Touch Screen Display Assembly Replacement: Schritt 14, Bild 2 von 2
    • Be wary of remaining adhesive from the volume buttons when removing the motherboard.

    • Start prying from the top left of the phone to minimize the possibility of damage.

    • Gently pry up the motherboard with the black spudger to remove it.

  15. Alcatel Pixi Theatre Touch Screen Display Assembly Replacement: Schritt 15, Bild 1 von 2 Alcatel Pixi Theatre Touch Screen Display Assembly Replacement: Schritt 15, Bild 2 von 2
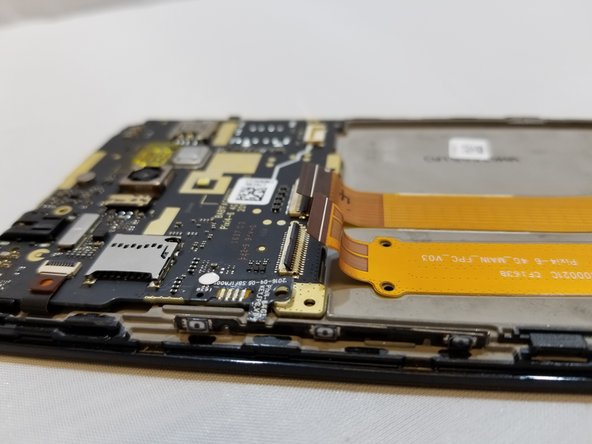
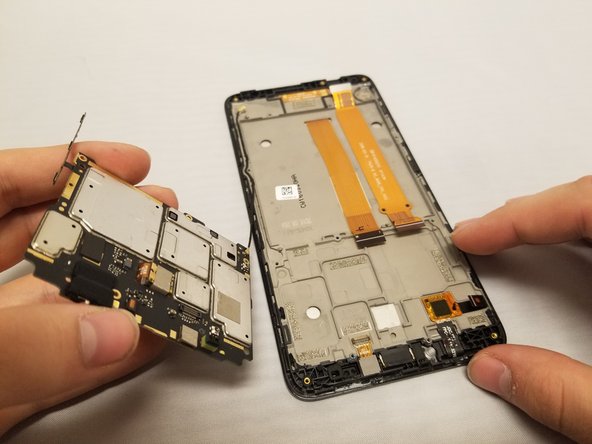
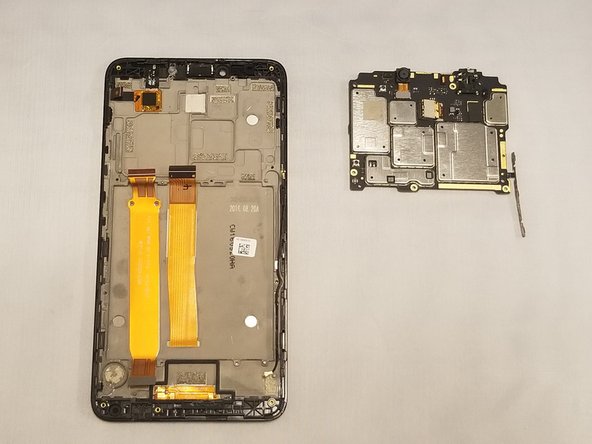
    • Gently lift the motherboard up with your hand and slowly turn it over so the antenna's connection on the bottom is visible.

    • Disconnect the antenna from the motherboard by putting the black spudger under the connection and gently lifting the cable upwards.

  16. Alcatel Pixi Theatre Touch Screen Display Assembly Replacement, Earpiece Speaker: Schritt 16, Bild 1 von 2 Alcatel Pixi Theatre Touch Screen Display Assembly Replacement, Earpiece Speaker: Schritt 16, Bild 2 von 2
    • The earpiece speaker is heavily glued onto the device. Make sure you're reaching far enough down before you start prying.

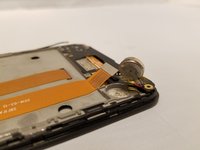
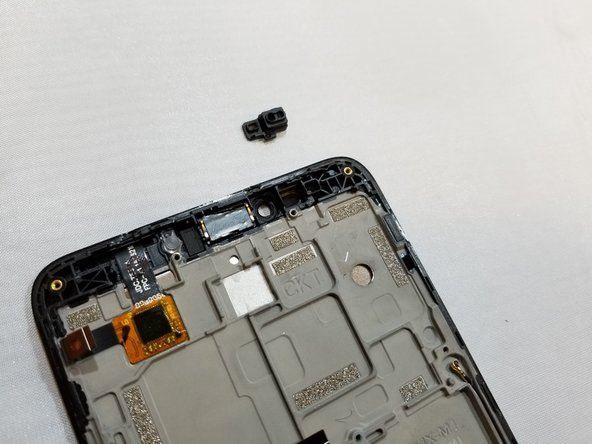
    • Gently pry and lift out the earpiece speaker. Pry from the upper side of the speaker rather than the bottom.

  17. Alcatel Pixi Theatre Touch Screen Display Assembly Replacement, Touch Screen Display Assembly: Schritt 17, Bild 1 von 2 Alcatel Pixi Theatre Touch Screen Display Assembly Replacement, Touch Screen Display Assembly: Schritt 17, Bild 2 von 2
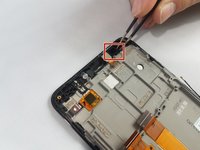
    • Remove the camera's rubber seal by lifting it out with a pair of tweezers; it should come out easily.

  18. Alcatel Pixi Theatre Touch Screen Display Assembly Replacement: Schritt 18, Bild 1 von 2 Alcatel Pixi Theatre Touch Screen Display Assembly Replacement: Schritt 18, Bild 2 von 2
    • You will need to save the antenna to reapply to the new assembly.

    • Remove the antenna that connects to the charging port by gently sliding the blue plastic spudger under it and prying it up.

  19. Alcatel Pixi Theatre Touch Screen Display Assembly Replacement: Schritt 19, Bild 1 von 2 Alcatel Pixi Theatre Touch Screen Display Assembly Replacement: Schritt 19, Bild 2 von 2
    • Do not damage the ribbon cable; you'll need to save it for reassembly.

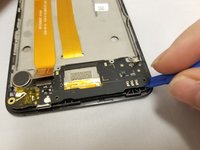
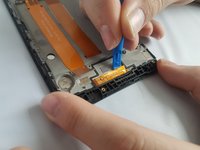
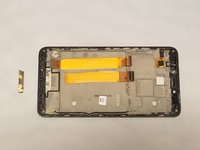
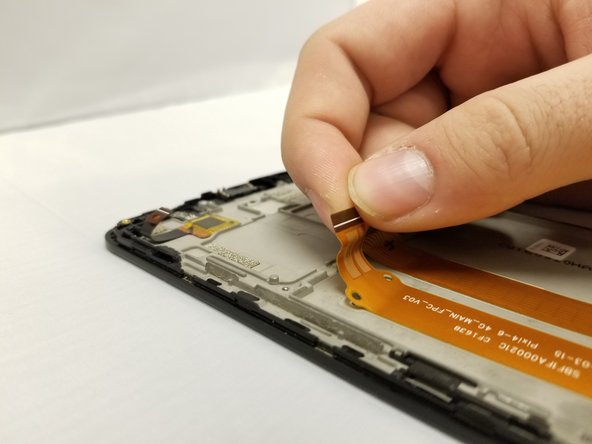
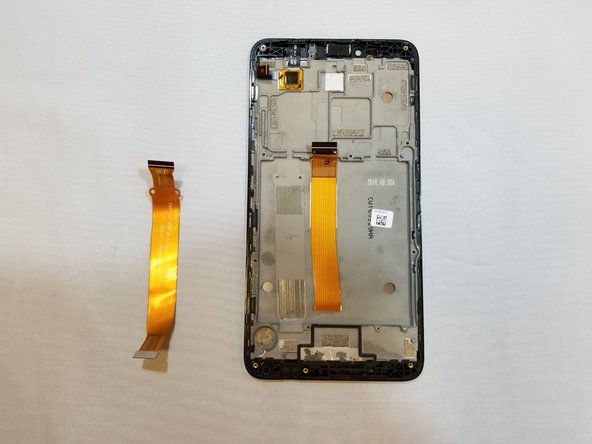
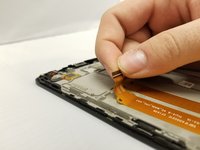
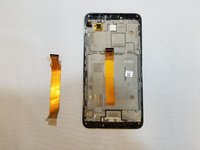
    • Gently remove the outer ribbon cable by slowly peeling it away, starting with the top end.

Abschluss

To reassemble your device, follow these instructions in reverse order.

Ein:e weitere:r Nutzer:in hat diese Anleitung absolviert.

Ein Kommentar

I did all this but when I put it back together the screen won't work. I got a brief random lights display,then nothing. Is there a way to find out what's wrong?

tjiaow - Antwort

Kommentar hinzufügen

Seitenaufrufe:

Letzte 24 Stunden: 0

Letzte 7 Tage: 0

Letzte 30 Tage: 5

Insgesamt: 527