Zum Hauptinhalt wechseln

Alienware P18G M14X R1 Battery Replacement

Was du brauchst

  1. Alienware P18G M14X R1 Battery Replacement, Back Cover: Schritt 1, Bild 1 von 1
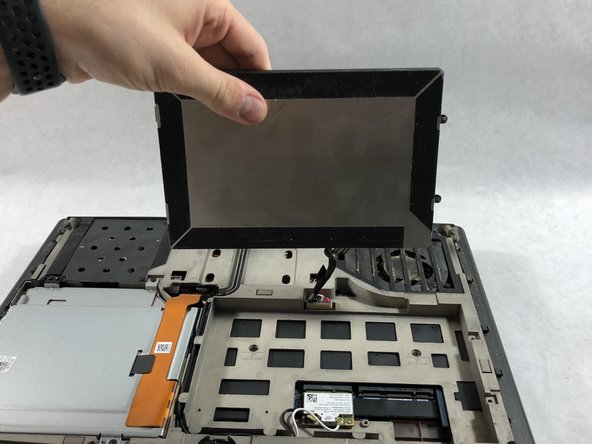
    • Loosen the top left and top right 6.5mm PH1 screws that hold down the back cover.

    • The screws will not be able to be removed from the back cover. They can only be loosened or tightened.

  2. Alienware P18G M14X R1 Battery Replacement: Schritt 2, Bild 1 von 1
    • Slide back cover forward using your thumbs.

  3. Alienware P18G M14X R1 Battery Replacement: Schritt 3, Bild 1 von 1
    • Lift up the cover and set aside exposing the internals of the computer.

  4. Alienware P18G M14X R1 Battery Replacement, Battery: Schritt 4, Bild 1 von 1
    • Make sure the laptop is turned off before starting.

    • Using PH1 screwdriver loosen the two screws on the right of the battery.

    • The screws will not be able to be removed from the battery. They can only be loosened or tightened.

  5. Alienware P18G M14X R1 Battery Replacement: Schritt 5, Bild 1 von 2 Alienware P18G M14X R1 Battery Replacement: Schritt 5, Bild 2 von 2
    • Pull battery up using the tab provided.

  6. Alienware P18G M14X R1 Battery Replacement: Schritt 6, Bild 1 von 1
    • Disconnect the clip connecting the battery to the computer.

    • Set battery aside.

Abschluss

To reassemble your device, follow these instructions in reverse order.

2 weitere Nutzer:innen haben diese Anleitung absolviert.

Team

UMass Dartmouth, Team S2-G2, Simcock Spring 2018 Mitglied von UMass Dartmouth, Team S2-G2, Simcock Spring 2018

UMASSD-SIMCOCK-S18S2G2

3 Mitglieder

5 Anleitungen geschrieben

0 Kommentare

Kommentar hinzufügen

Seitenaufrufe:

Letzte 24 Stunden: 0

Letzte 7 Tage: 4

Letzte 30 Tage: 22

Insgesamt: 1,917