Einleitung
Follow this replacement guide if you are experiencing issues with the user interface of this device (e.g. buttons are not working, LEDs are dead, no voice recognition).
Was du brauchst
-
-
Remove the rubber layer beneath the device.
-
Look for the crater beneath the rubber layer and place your thumb on it. Hold down and lift off the cover with your other hand.
-
Remove the four 8.0 mm T8 Torx screws on the lid.
-
Remove the lid from the device.
-
-
-
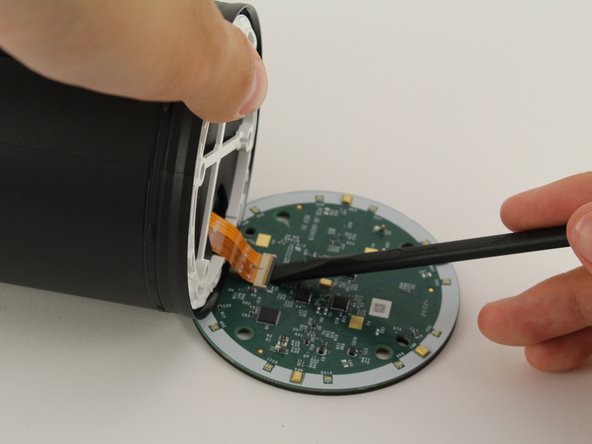
Use a spudger to flip up the small flap on the ZIF connector.
-
Gently pull the ribbon cable out of the ZIF connector.
-
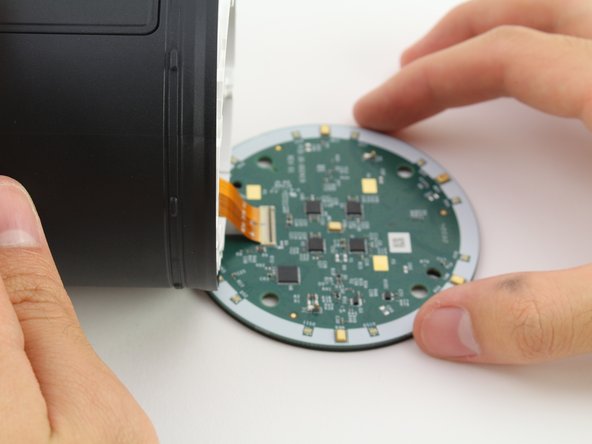
Lift the AMP Board gently while sliding the ribbon cable out through the center hole to reveal another set of wires underneath the board.
Amp board may have two T10 screws holding tweeter speaker, do not remove.
Hi please where can find new main board? Thanks.
I am from India. If you find pls let me know
Dhanapal -
-
-
-
Use a spudger to lift up one of the small flaps on only one side of the female connector.
-
Pull on the wire toward the lifted side until the male connector is disconnected.
-
Remove the AMP Board.
-
-
-
-
Remove the four 30.0 mm T8 Torx screws in the corners.
-
Remove the large plastic piece on top of the subwoofer while threading the ribbon cable and male connector through the hole.
-
-
-
Remove the lid on top of the subwoofer.
-
Flip the device over and let the subwoofer fall into your hand.
Where can you get the replacement speakers?
-
-
-
Remove the four 16.0 mm T8 Torx screws underneath the speaker.
-
Flip the device over while supporting the front panel side.
-
Remove the front panel cover by lifting it.
-
-
-
Lift the MIC board over and lay it down against a surface.
-
Use a spudger to flip up the small flap on the ZIF connector.
-
Disconnect the ribbon cable from the MIC board and pull the board away.
-


To reassemble your device, follow these instructions in reverse order.
To reassemble your device, follow these instructions in reverse order.
Rückgängig: Ich habe diese Anleitung nicht absolviert.
Ein:e weitere:r Nutzer:in hat diese Anleitung absolviert.
Team

Cal Poly, Team S4-G4, White Fall 2018 Mitglied von Cal Poly, Team S4-G4, White Fall 2018
CPSU-WHITE-F18S4G4
3 Mitglieder
5 Anleitungen geschrieben
Removing the rubber layer does not actually seem to be necessary.
jrhifixit - Antwort
Where do you get the replacement Pcb
niall.mcgee1 - Antwort
Rubber base removal not necessary.
Screws for first few steps may be T10, but a quality T8 driver may also work
Vicente Laluz - Antwort