Einleitung
Wenn sich dein Amazon Echo Studio nicht mehr einschalten lässt, überprüfe zunächst, ob das Netzkabel oder die Anschlüsse defekt sind. Wenn sie in Ordnung sind, muss wahrscheinlich die Netzteilplatine ausgetauscht werden. Diese Anleitung zeigt, wie das geht.
Was du brauchst
-
-
Drehe das Gerät um, so dass die Unterseite oben liegt.
-
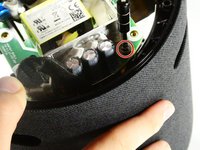
Auf der Bodenplatte befindet sich ein Gummibelag. Heble ihn am Rand mit einem Spudger hoch und ziehe ihn dann mit der Hand ab.
-
-
-
Entferne die neun 3,2 mm langen Torx T15 Schrauben.
-
Entferne die sechs 2,7 mm langen Torx T10 Schrauben.
-
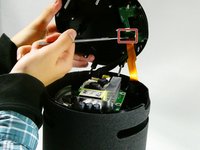
Hebe die Bodenplatte vorsichtig ab, achte dabei auf die noch angeschlossenen Kabel.
-
-
-
-
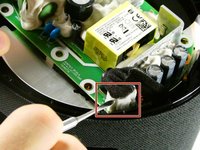
Drehe die einzelne 10 mm lange Kreuzschlitzschraube heraus.
-
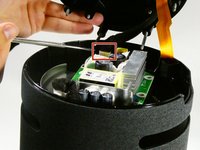
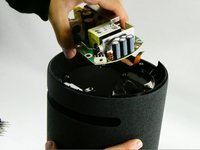
Entferne die Netzteilplatine.
-


Um dein Gerät wieder zusammenzubauen, folge den Schritten in umgekehrter Reihenfolge.
Rückgängig: Ich habe diese Anleitung nicht absolviert.
2 weitere Personen haben diese Anleitung absolviert.
Besonderer Dank geht an diese Übersetzer:innen:
100%
VauWeh hilft uns, die Welt in Ordnung zu bringen! Wie kann ich mithelfen?
Hier starten ›

Team

UMass Dartmouth, Team 2-6, Petersen Fall 2022 Mitglied von UMass Dartmouth, Team 2-6, Petersen Fall 2022
UMASSD-PETERSEN-F22S2G6
4 Mitglieder
7 Anleitungen geschrieben
14 Kommentare zur Anleitung
Thank you for this guide. It was very easy operation, but I believe problem with Echo is that its impossible to get spare parts?
My Echo Studio is in short circuit state.
Taking this thing apart really is easy. Thanks for the tip on how to get started. But as Kertalaaki figured, it seems there is no chance to get replacement parts. I guess Amazon prefers to sell new devices instead of having people repair their Studio device. I have a similar problem Kertalaaki describes. Whenever I plug the device in, it causes the breaker to blow. Now having the device in hand, I can't see any obvious damage as Kertalaakis photos show, but I still would like to get me a new power supply board. If anyone has any ideas on how to get one, please share! Thanks a lot in advance!
Same Problem like Ingo and Kertalaaki. Did anyone figure out how to get a new power supply?
I contacted the Amazon regarding the matter, and spare parts are not available. The solution from their side was a credit towards a new device with a discount. Spare parts are not available.
The power source is custom built just for this implementation and there is nothing similar on the market as far I have found.