Zum Hauptinhalt wechseln

Amazon Fire HD 10 Front Facing Camera Replacement

Was du brauchst

  1. Amazon Fire HD 10 Front Facing Camera Replacement, Screen: Schritt 1, Bild 1 von 3 Amazon Fire HD 10 Front Facing Camera Replacement, Screen: Schritt 1, Bild 2 von 3 Amazon Fire HD 10 Front Facing Camera Replacement, Screen: Schritt 1, Bild 3 von 3
    • Avoid prying near bottom right hand side due to LCD Connector

    • Use a plastic opening tool to pry the screen up in the right hand corner.

  2. Amazon Fire HD 10 Front Facing Camera Replacement: Schritt 2, Bild 1 von 1
    • Do not completely remove the screen yet as there is a ZIF connector connected.

    • Lift the screen and digitizer from the case.

    • You may need to use some force due to the glue.

  3. Amazon Fire HD 10 Front Facing Camera Replacement: Schritt 3, Bild 1 von 2 Amazon Fire HD 10 Front Facing Camera Replacement: Schritt 3, Bild 2 von 2
    • Be mindful of the ZIF connector.

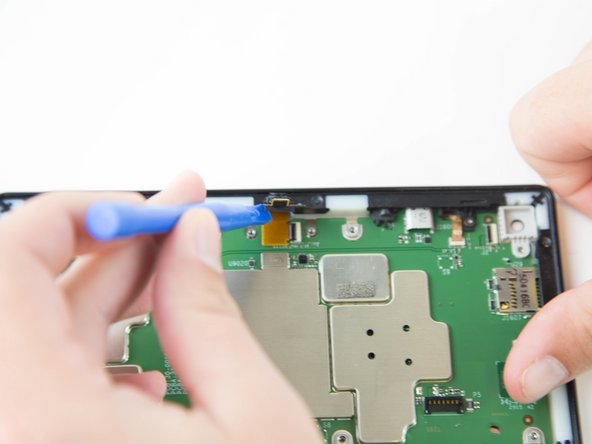
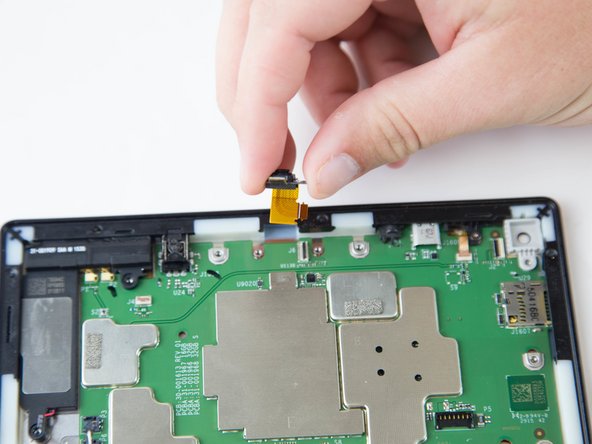
    • Disconnect the ribbon connector from the digitizer side using your hands or the plastic opening tool.

  4. Amazon Fire HD 10 Front Facing Camera Replacement: Schritt 4, Bild 1 von 1
    • Remove the screen and digitizer from the case completely.

  5. Amazon Fire HD 10 Front Facing Camera Replacement, Front Facing Camera: Schritt 5, Bild 1 von 3 Amazon Fire HD 10 Front Facing Camera Replacement, Front Facing Camera: Schritt 5, Bild 2 von 3 Amazon Fire HD 10 Front Facing Camera Replacement, Front Facing Camera: Schritt 5, Bild 3 von 3
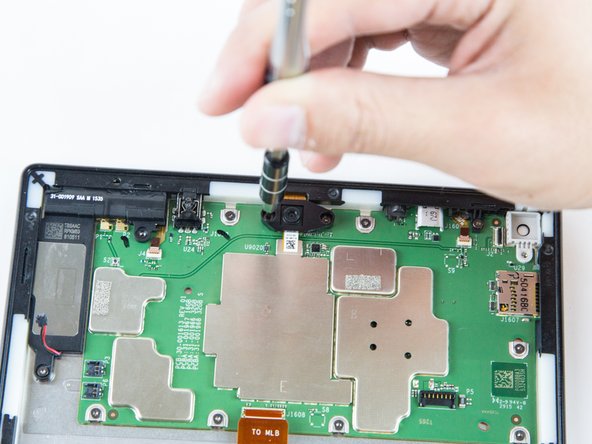
    • Remove the two screws from front facing camera using the T5 Torx Screwdriver.

    • Make sure you place the screws in a safe location nearby.

  6. Amazon Fire HD 10 Front Facing Camera Replacement: Schritt 6, Bild 1 von 2 Amazon Fire HD 10 Front Facing Camera Replacement: Schritt 6, Bild 2 von 2
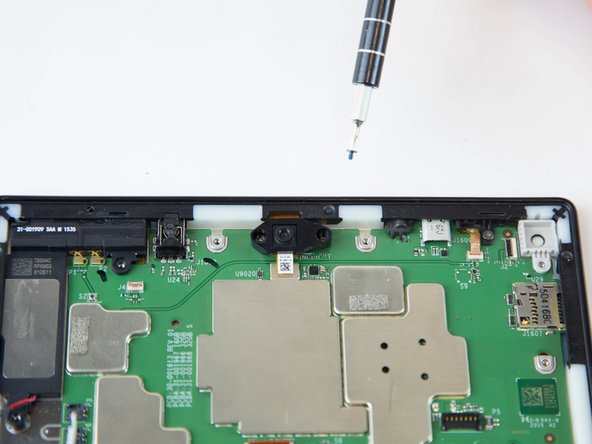
    • Lift the black plastic cover once the screws are removed.

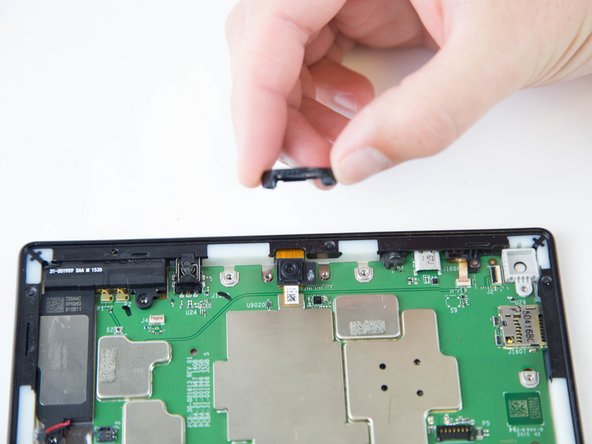
    • Place aside for later reassembly.

  7. Amazon Fire HD 10 Front Facing Camera Replacement: Schritt 7, Bild 1 von 2 Amazon Fire HD 10 Front Facing Camera Replacement: Schritt 7, Bild 2 von 2
    • Detach the connector using a plastic opening tool or spudger.

    • The camera is still connected to the motherboard.

  8. Amazon Fire HD 10 Front Facing Camera Replacement: Schritt 8, Bild 1 von 2 Amazon Fire HD 10 Front Facing Camera Replacement: Schritt 8, Bild 2 von 2
    • Grip the camera and lift up to detach the ZIF connector from the motherboard.

Abschluss

To reassemble your device, follow these instructions in reverse order.

Ein:e weitere:r Nutzer:in hat diese Anleitung absolviert.

Jaie Hillery

Mitglied seit: 10/07/14

1.718 Reputation

10 Anleitungen geschrieben

Team

USF Tampa, Team 16-6, Blackwell Winter 2016 Mitglied von USF Tampa, Team 16-6, Blackwell Winter 2016

USFT-BLACKWELL-W16S16G6

3 Mitglieder

22 Anleitungen geschrieben

Ein Kommentar

Can this camera module be upgraded with a better version?

Jimmy Kee - Antwort

Kommentar hinzufügen

Seitenaufrufe:

Letzte 24 Stunden: 1

Letzte 7 Tage: 1

Letzte 30 Tage: 7

Insgesamt: 1,117