Zum Hauptinhalt wechseln

Amazon Fire HD 10 Motherboard Replacement

Was du brauchst

  1. Amazon Fire HD 10 Motherboard Replacement, Screen: Schritt 1, Bild 1 von 3 Amazon Fire HD 10 Motherboard Replacement, Screen: Schritt 1, Bild 2 von 3 Amazon Fire HD 10 Motherboard Replacement, Screen: Schritt 1, Bild 3 von 3
    • Avoid prying near bottom right hand side due to LCD Connector

    • Use a plastic opening tool to pry the screen up in the right hand corner.

  2. Amazon Fire HD 10 Motherboard Replacement: Schritt 2, Bild 1 von 1
    • Do not completely remove the screen yet as there is a ZIF connector connected.

    • Lift the screen and digitizer from the case.

    • You may need to use some force due to the glue.

  3. Amazon Fire HD 10 Motherboard Replacement: Schritt 3, Bild 1 von 2 Amazon Fire HD 10 Motherboard Replacement: Schritt 3, Bild 2 von 2
    • Be mindful of the ZIF connector.

    • Disconnect the ribbon connector from the digitizer side using your hands or the plastic opening tool.

  4. Amazon Fire HD 10 Motherboard Replacement: Schritt 4, Bild 1 von 1
    • Remove the screen and digitizer from the case completely.

  5. Amazon Fire HD 10 Motherboard Replacement, Battery: Schritt 5, Bild 1 von 3 Amazon Fire HD 10 Motherboard Replacement, Battery: Schritt 5, Bild 2 von 3 Amazon Fire HD 10 Motherboard Replacement, Battery: Schritt 5, Bild 3 von 3
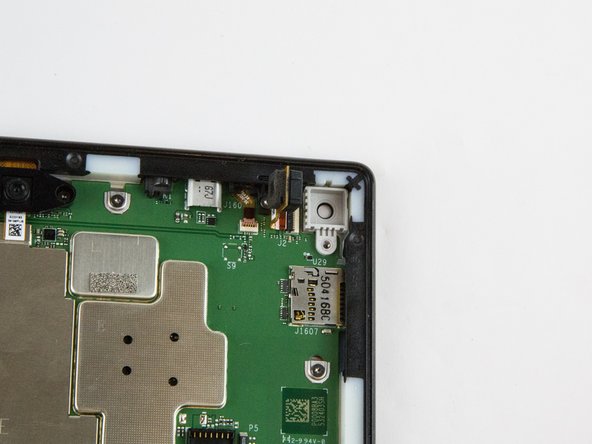
    • Locate the power cable that links the battery to the motherboard.

    • Carefully unplug the battery power cable to disconnect the battery from the motherboard.

    • The third image shows what it should look like with the battery power cable is disconnected.

  6. Amazon Fire HD 10 Motherboard Replacement: Schritt 6, Bild 1 von 3 Amazon Fire HD 10 Motherboard Replacement: Schritt 6, Bild 2 von 3 Amazon Fire HD 10 Motherboard Replacement: Schritt 6, Bild 3 von 3
    • Begin by locating the double sided pull tape locations.

    • Do not lift on the battery when doing the following step. You will bend it. It is very pliable.

    • Pull the black soft tabs to release the tape's adhesion.

    • Make sure you pull the tabs slowly and continuously away from the case until the adhesive is completely out.

    • Do this to all 4 tabs until the battery is completely free of adhesion to the device's backing.

  7. Amazon Fire HD 10 Motherboard Replacement: Schritt 7, Bild 1 von 3 Amazon Fire HD 10 Motherboard Replacement: Schritt 7, Bild 2 von 3 Amazon Fire HD 10 Motherboard Replacement: Schritt 7, Bild 3 von 3
    • Make sure all the adhesive is removed before trying to lift the battery from the case.

    • After the battery is totally free of any adhesion, simply lift the battery from the case.

  8. Amazon Fire HD 10 Motherboard Replacement: Schritt 8, Bild 1 von 3 Amazon Fire HD 10 Motherboard Replacement: Schritt 8, Bild 2 von 3 Amazon Fire HD 10 Motherboard Replacement: Schritt 8, Bild 3 von 3
    • Inspect battery for any leakage.

    • Please follow all U.S. regulations and laws when disposing or recycling the battery.

  9. Amazon Fire HD 10 Motherboard Replacement, Rear Facing Camera: Schritt 9, Bild 1 von 2 Amazon Fire HD 10 Motherboard Replacement, Rear Facing Camera: Schritt 9, Bild 2 von 2
    • Remove the single T5 Torx screw at the base of the camera.

    • Once removed, place the screw aside in a safe location.

  10. Amazon Fire HD 10 Motherboard Replacement: Schritt 10, Bild 1 von 2 Amazon Fire HD 10 Motherboard Replacement: Schritt 10, Bild 2 von 2
    • Lift the camera from the case using the plastic opening tool.

    • The camera is still connected to the motherboard via the ZIF connector.

  11. Amazon Fire HD 10 Motherboard Replacement: Schritt 11, Bild 1 von 2 Amazon Fire HD 10 Motherboard Replacement: Schritt 11, Bild 2 von 2
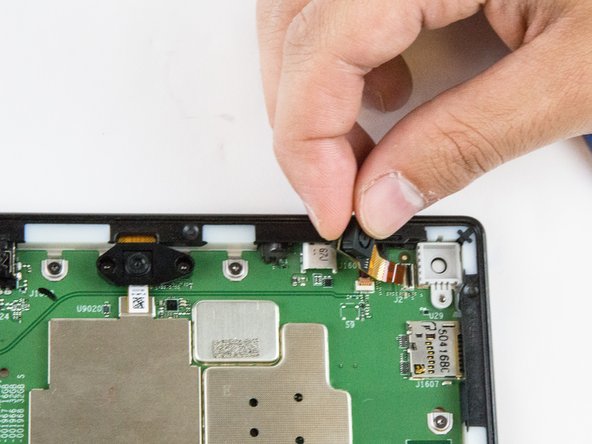
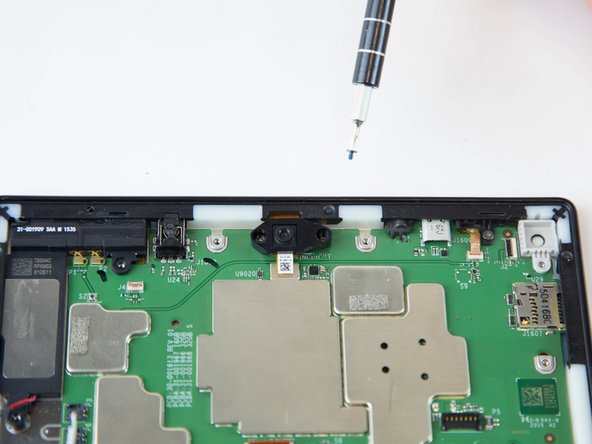
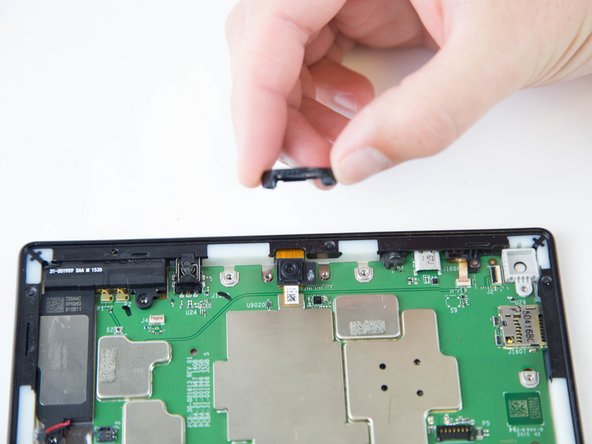
    • Gently grab the camera and pull to remove.

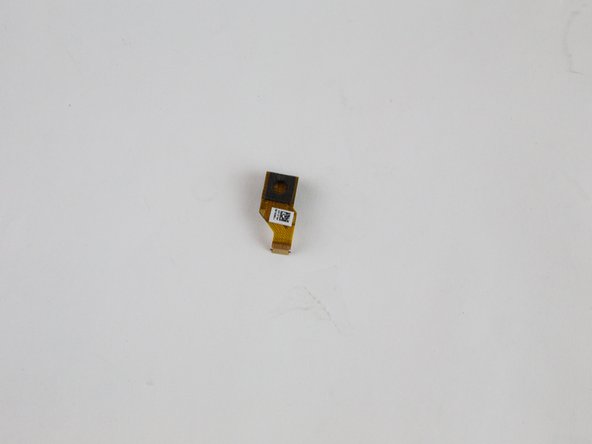
    • The camera is now free from the motherboard.

  12. Amazon Fire HD 10 Motherboard Replacement, Front Facing Camera: Schritt 12, Bild 1 von 3 Amazon Fire HD 10 Motherboard Replacement, Front Facing Camera: Schritt 12, Bild 2 von 3 Amazon Fire HD 10 Motherboard Replacement, Front Facing Camera: Schritt 12, Bild 3 von 3
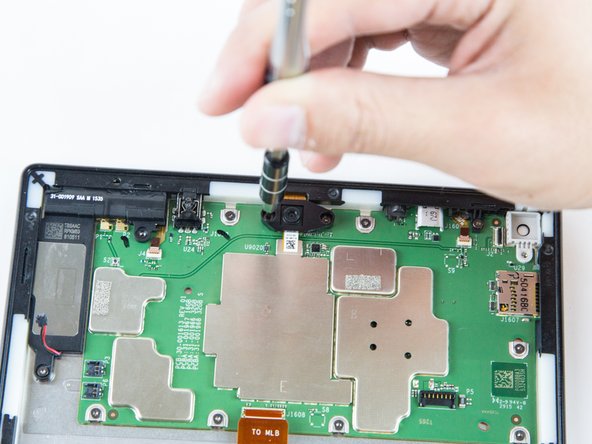
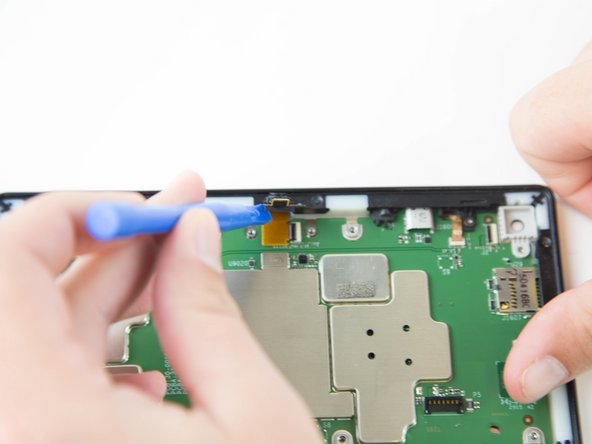
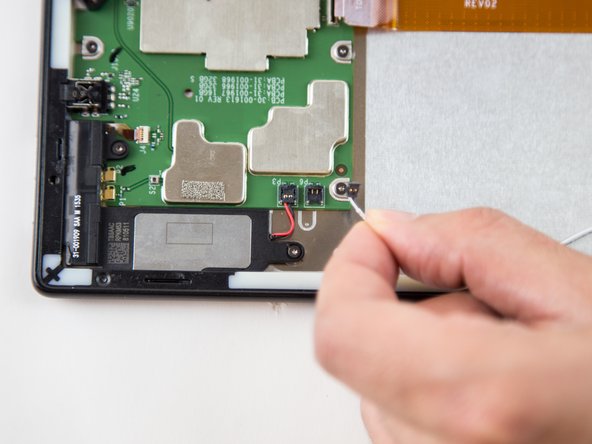
    • Remove the two screws from front facing camera using the T5 Torx Screwdriver.

    • Make sure you place the screws in a safe location nearby.

  13. Amazon Fire HD 10 Motherboard Replacement: Schritt 13, Bild 1 von 2 Amazon Fire HD 10 Motherboard Replacement: Schritt 13, Bild 2 von 2
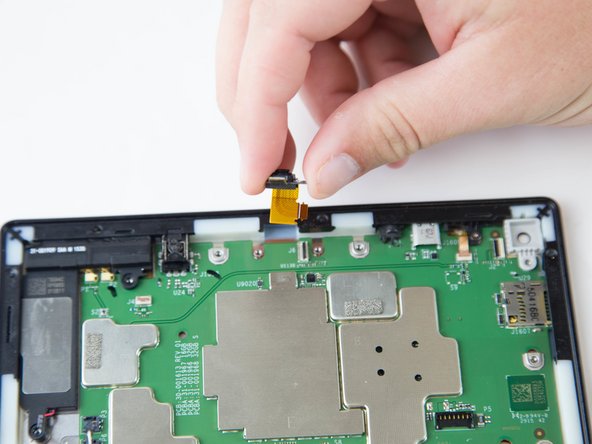
    • Lift the black plastic cover once the screws are removed.

    • Place aside for later reassembly.

  14. Amazon Fire HD 10 Motherboard Replacement: Schritt 14, Bild 1 von 2 Amazon Fire HD 10 Motherboard Replacement: Schritt 14, Bild 2 von 2
    • Detach the connector using a plastic opening tool or spudger.

    • The camera is still connected to the motherboard.

  15. Amazon Fire HD 10 Motherboard Replacement: Schritt 15, Bild 1 von 2 Amazon Fire HD 10 Motherboard Replacement: Schritt 15, Bild 2 von 2
    • Grip the camera and lift up to detach the ZIF connector from the motherboard.

  16. Amazon Fire HD 10 Motherboard Replacement, Motherboard: Schritt 16, Bild 1 von 1
    • Lift the ZIF connector up to disconnect from the motherboard.

  17. Amazon Fire HD 10 Motherboard Replacement: Schritt 17, Bild 1 von 3 Amazon Fire HD 10 Motherboard Replacement: Schritt 17, Bild 2 von 3 Amazon Fire HD 10 Motherboard Replacement: Schritt 17, Bild 3 von 3
    • Disconnect the connectors using the plastic opening tool.

  18. Amazon Fire HD 10 Motherboard Replacement: Schritt 18, Bild 1 von 2 Amazon Fire HD 10 Motherboard Replacement: Schritt 18, Bild 2 von 2
    • Remove the ten T5 Torx screws securing the motherboard to the case.

    • Keep the screws together in a safe place for reassembly.

  19. Amazon Fire HD 10 Motherboard Replacement: Schritt 19, Bild 1 von 3 Amazon Fire HD 10 Motherboard Replacement: Schritt 19, Bild 2 von 3 Amazon Fire HD 10 Motherboard Replacement: Schritt 19, Bild 3 von 3
    • Lift and pull the motherboard down, gently, towards the case using the tweezers.

Abschluss

To reassemble your device, follow these instructions in reverse order.

14 weitere Nutzer:innen haben diese Anleitung absolviert.

Jaie Hillery

Mitglied seit: 10/07/14

1.718 Reputation

10 Anleitungen geschrieben

Team

USF Tampa, Team 16-6, Blackwell Winter 2016 Mitglied von USF Tampa, Team 16-6, Blackwell Winter 2016

USFT-BLACKWELL-W16S16G6

3 Mitglieder

22 Anleitungen geschrieben

6 Kommentare

Just for the record, my screws were T4, not T5.

scottpickles - Antwort

Where is a reliable store to buy this motherboard?

Jimmy Lee - Antwort

what you left out is the speakers are they still attached to the motherboard you get 15 points

elliott reitman - Antwort

Is this the Kindle? Not the Tablet?

imbritneyedwards - Antwort

I have exhausted all online searches for a new HD Fire 10.1 7 generation motherboard replacement and have not been able to locate one anywhere do you have any places you know of that sell these types of motherboards?

Thanks,

Al Silva

Al Silva - Antwort

Kommentar hinzufügen

Seitenaufrufe:

Letzte 24 Stunden: 3

Letzte 7 Tage: 54

Letzte 30 Tage: 173

Insgesamt: 20,890