Einleitung
A defective power button can lead to a lot of problems with your Kindle. The power button of the Kindle turns the Kindle on and off. If defective, turning on your Kindle will become a tedious task. This guide will teach you how to replace the power button for your Kindle.
Was du brauchst
-
-
Carefully wedge the plastic opening tool between the back panel and the device to free the clips holding the back panel and the device together.
-
-
-
Work your way around the back panel to free all the clips.
-
There are 5 clips on the long and thickest side of the oasis, and none on the others.
-
-
-
Carefully remove the back panel from the device.
-
Gently peel the back panel away from the adhesive, being mindful to keep the adhesive strip in good condition so that it can be used again.
-
-
-
Using tweezers, lift the orange bridge connector off.
-
-
-
-
Gently wedge the spudger under the battery starting from the left side, and slowly work the spudger around the edge to loosen the battery from the tape. Be careful not to rip the thin foil on the back of the battery.
-
-
-
Lift the battery up using a spudger and use your fingers to slowly pull the battery off the adhesive.
-
-
-
Using the tweezers, gently lift the tape off of the Power bridge connector. If a new unit comes with a new piece of tape, remove entirely, if not remove and place one corner lightly face down on a clean surface to be used again.
-
-
-
Once free of the adhesive and connectors, remove the old battery from the device.
-
-
-
Attach the new battery by inserting the end of the orange power connector (the end not attached to the battery) clips into a little socket on the device (it's barely visible). You can tell when it clips in by the feel and sound. Make sure that when you put the new battery in, you first clip the connector in before you stick the tape down.
-
Be Aware: Your new battery might not be charged, so it may not power-on immediately! After replacing the battery, plug your Oasis in and let the battery charge to full capacity.
-
-
-
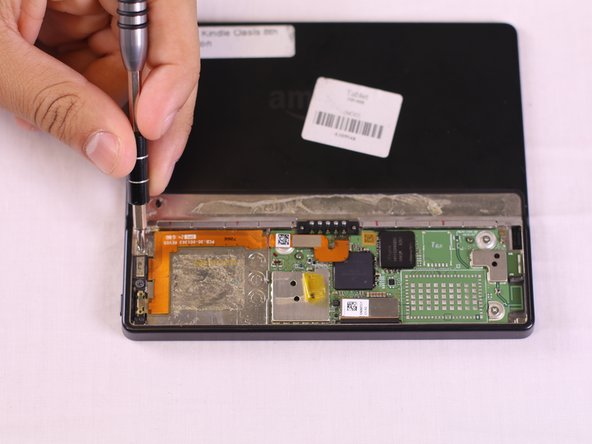
Locate the 2 Phillips screws (labeled PH 0) and remove screws using a screwdriver with a PH0 bit.
-
-
-
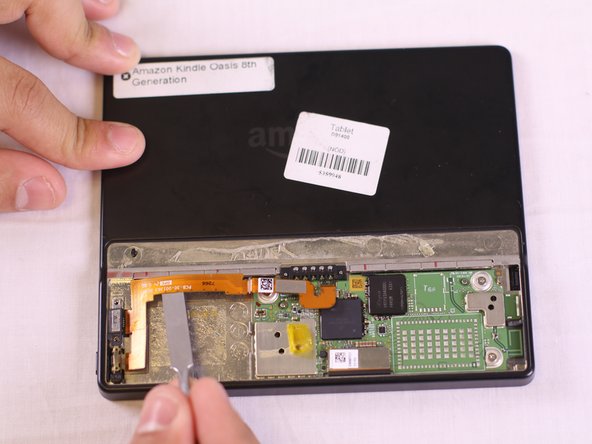
Using the metal spudger, tweezers, and your finger tips, gently lift the orange power bridge connector off of the motherboard first and then off of the kindle.
-
-
-
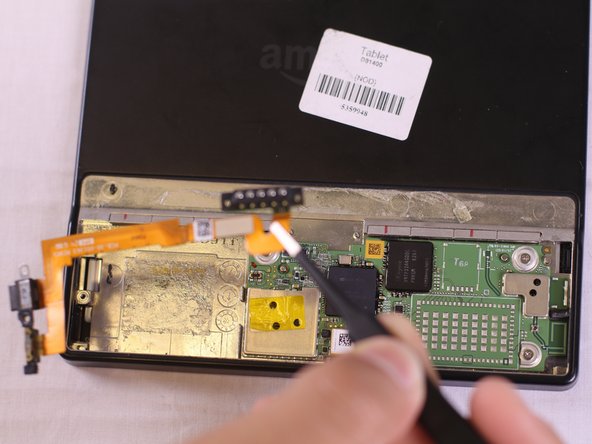
Use the tweezers to pluck the orange bridge power connector from the Kindle. The power button is attached to the connector.
-






To reassemble your device, follow these instructions in reverse order.
To reassemble your device, follow these instructions in reverse order.



Team

USF Tampa, Team S16-G5, Eyestone Fall 2017 Mitglied von USF Tampa, Team S16-G5, Eyestone Fall 2017
USFT-EYESTONE-F17S16G5
4 Mitglieder
16 Anleitungen geschrieben
Ein Kommentar
Hi. Thank you for making such detailed instructions for replacing the power switch. Where can I get a replacement power button for the Kindle Oasis (8th generation)? I'm sure it's a commodity part, but I don't know which part would be a like-for-like replacement.
