Zum Hauptinhalt wechseln

Diese Anleitung enthält neuere Änderungen. Wechsel zur neuesten unüberprüften Version.

Apple IIc Speaker Replacement

Was du brauchst

  1. Apple IIc Speaker Replacement, Disassembling Apple IIc Cover: Schritt 1, Bild 1 von 2 Apple IIc Speaker Replacement, Disassembling Apple IIc Cover: Schritt 1, Bild 2 von 2
    • Remove the six 19 mm long screws with a #2 Phillips head screwdriver.

  2. Apple IIc Speaker Replacement: Schritt 2, Bild 1 von 2 Apple IIc Speaker Replacement: Schritt 2, Bild 2 von 2
    • Release the catch by pushing it in using a plastic opening tool.

    • The catch is off-center, but in line with the middle of the speaker underneath.

  3. Apple IIc Speaker Replacement: Schritt 3, Bild 1 von 2 Apple IIc Speaker Replacement: Schritt 3, Bild 2 von 2
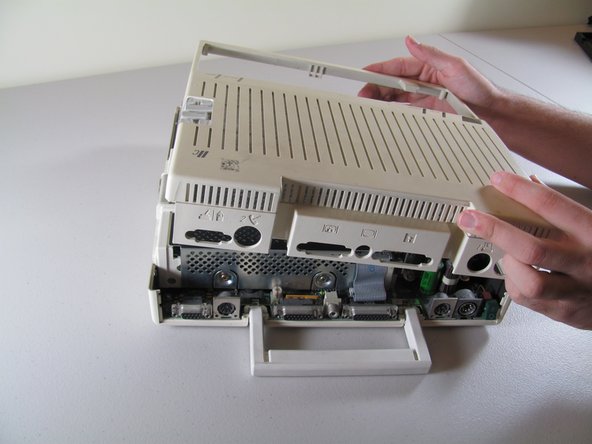
    • Slide the case toward the ports on the back, then grip under the catch and pull up while moving toward the ports to remove.

  4. Apple IIc Speaker Replacement: Schritt 4, Bild 1 von 2 Apple IIc Speaker Replacement: Schritt 4, Bild 2 von 2
    • Lift the handle straight up to remove.

  5. Apple IIc Speaker Replacement, Keyboard: Schritt 5, Bild 1 von 2 Apple IIc Speaker Replacement, Keyboard: Schritt 5, Bild 2 von 2
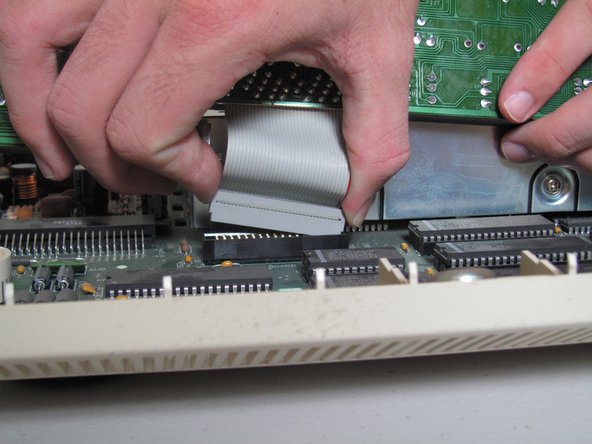
    • Tilt the keyboard up while detaching the ribbon connection by pulling it straight up. You may have to wiggle the connector sideways to loosen it.

    • Be careful not to force the ribbon while pulling it out to avoid tearing. Do not try to pull the ribbon out by pulling the keyboard as it may cause tearing.

  6. Apple IIc Speaker Replacement, Speaker: Schritt 6, Bild 1 von 1
    • Unplug the speaker from the mother board by pulling horizontally.

  7. Apple IIc Speaker Replacement: Schritt 7, Bild 1 von 1
    • Heat the glue to loosen it, then wiggle the speaker up and out. Use the screwdriver to scrape off the remaining glue.

    • An easy way to heat the glue is by using a hair dryer on a low setting.

    • When heating the glue, do not use any high wattage device! This may burn or damage the chips or circuit board.

Abschluss

To reassemble your device, follow these instructions in reverse order.

5 weitere Nutzer:innen haben diese Anleitung absolviert.

Josiah

Mitglied seit: 10/06/11

658 Reputation

3 Anleitungen geschrieben

Team

Cal Poly, Team 21-23, Maness Fall 2011 Mitglied von Cal Poly, Team 21-23, Maness Fall 2011

CPSU-MANESS-F11S21G23

4 Mitglieder

13 Anleitungen geschrieben

0 Kommentare

Kommentar hinzufügen

Seitenaufrufe:

Letzte 24 Stunden: 0

Letzte 7 Tage: 2

Letzte 30 Tage: 7

Insgesamt: 1,531