Diese Anleitung enthält neuere Änderungen. Wechsel zur neuesten unüberprüften Version.
Einleitung
This guide will take you through the steps necessary to disassemble your Powerbook 5300, reach its hard drive, and replace it.
Was du brauchst
-
-
Position the Powerbook towards you with the monitor closed.
-
Press the battery removal latch located on the right side of the front panel.
-
Gently slide the battery out.
-
-
-
Turn the laptop over and remove the three T8 torx screws from the bottom panel.
-
-
-
-
Turn the laptop back over and open the monitor.
-
With the monitor facing towards you, gently pull up on the keyboard panel from the bottom.
-
-
-
Gently lift up the laptop's front-most panel and slowly raise the trackpad from the logic board.
-
Disconnect the front panel's ribbon cable from the board by slowly pulling it out of the connection port. Set the panel aside.
-
-
-
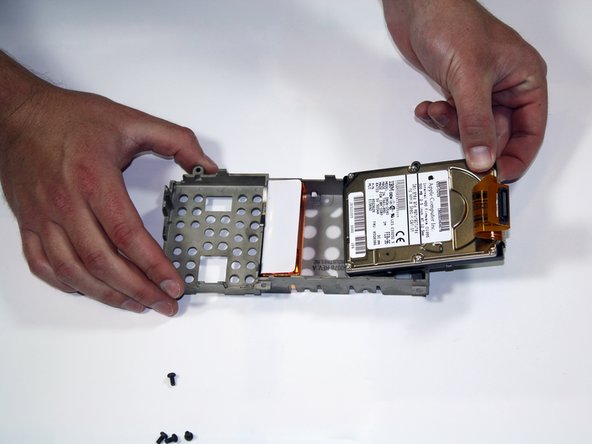
Unscrew the Torx #8 screws holding the hard drive case in place on the logic board.
-
Lift up on the hard drive to disconnect its ribbon cable from the logic board, just like in the previous steps.
-


To reassemble your device, follow these instructions in reverse order.
To reassemble your device, follow these instructions in reverse order.
Rückgängig: Ich habe diese Anleitung nicht absolviert.
2 weitere Nutzer:innen haben diese Anleitung absolviert.
Team

Cal Poly, Team 25-30, Garner Spring 2011 Mitglied von Cal Poly, Team 25-30, Garner Spring 2011
CPSU-GARNER-S11S25G30
4 Mitglieder
6 Anleitungen geschrieben