Einleitung
Diese Anleitung hilft dir, den Akku in deiner Apple Watch Series 1 auszutauschen.
Achtung: wenn dein Akku aufgebläht ist, musst du geeignete Vorsichtsmaßnahmen treffen.
Was du brauchst
-
-
Nimm vor Reparaturbeginn die Uhr aus dem Ladegerät und schalte sie aus.
-
-
-
Bereite einen iOpener vor (oder benutze einen Haartrockner oder ein Heißluftgebläse) und erwärme die Vorderseite der Uhr, bis du sie kaum noch anfassen kannst.
-
Lasse den iOpener für mindestens eine Minute auf der Uhr liegen, so dass das Display komplett erhitzt wird. Dadurch wird der Kleber weich, mit dem das Display am Gehäuse befestigt ist.
-
-
In my instance, the problem started with the face/screen popping off because the battery swelled. So I didn’t need to heat the face and pry it off. I did heat it a bit in order to warm the residue adhesive on the edge of the face and the case frame and found it easier to scrap it off gently with the craft blade that came with the $39.21 battery replacement kit. If this is your issue, you can skip the prying up steps.
Same situation as jeb605 - my watch battery swelled and popped the screen off. Fortunately the force touch sensor did not debond from the watch. Thinking about just cleaning the back side of the screen and applying new adhesive. I used an alternate kit that did not come with the force touch sensor.
-
-
Platziere die gebogene Seite der Klinge auf der Lücke zwischen Bildschirm und Gehäuse an der unteren Kante der Uhr, und drücke die Klinge senkrecht nach unten fest in die Lücke.
-
Drehe das Messer nach unten, sobald das Glas etwas angehoben ist, um die Lücke zu vergrößern.
It is not possible to separate the screen from the casing? I have heated this thing numerous times and the opening is way too small to get any type of blade, knife or other tool in between. Any suggestions???
Using a curved blade like the guide recommends, angle the blade straight down between the glass and the edge of the frame, mid-way along the bottom edge of the case. The metal of the case will flex *just a little bit*, allowing you to slowly rotate the blade so the cutting edge is now pointing towards the center of the watch instead of down towards your work surface. You may need to rock the blade back and forth, sort of massaging the curve into the seam between the glass and the metal before it works. And like they mention above, lots of heat. I used the heatpack they sell, put it in my toaster oven on 200. I started at 130, and went up in 20 degree increments until it worked.
Pete -
I've tried everything, heating it up until it's too hot to touch, pressing the knife in the gap straight down, at an angle, nothing seems to work. I've tried using all my arm strength and it still doesn't even enter the gap. Is the iFixit Jimmy not thin enough for the job?
It’s not. The Jimmy’s a great pry tool, but not a cutting blade and not sharp enough for this particular job. You want a curved razor like the guide suggests.
Just to emphasise after quite a struggle - the blade absolutely matters!! I tried about 5 and almost gave up before the last one lifted the glass quite easily. Obviously, you want a thin blade! No, thinner than that!
I got hung up on this step for over an hour. The key for me was to keep the watch straps on! I initially took them off thinking it would be easier to work with the watch, but I guess just the little pressure I placed on the glass while trying to hold the watch and use the blade was enough to keep it in place. At first I thought I didn’t use enough heat and ended up reheating the iOpener a few times and applying it to the watch over the course of an hour. I put the top strap on, put it back flat on the table and held the watch secure with just the strap. I gave it another go with the blade and the screen instantly popped off. Also, be careful with the force you use on the blade… it seems with adequate heat, you don’t need to use that much (I ended up cutting through the Force Touch sensor and punctured the battery).
I would never use a knife like this to remove the screen. It’s way to wide to get in between the glass and body, without potentially breaking the glass. I use the Ultra Thin iFlex Opening Tool, sold by IFIXIT. Seriously. You won’t wanna use a fat blade like that after you take the iFlex for a test drive.
I used the rounded blade provided by iFixIt themselves as part of the Series 1 battery replacement kit and even that was wide enough that it scratched my case while trying to pry the screen up. Also I had to heat the iOpener like 3 or 4 times consecutively at 30s each and leave it on the screen for 5+ minutes before the screen would even budge. Heating for 30 sec and leaving on the screen for 1 minute was not even close to enough.
The display came off nicely after heating the iOpener a couple of times and wiggling the blade a bit. Now i have replaced the battery and the force touch sensor an thought I was ready for a dry run. So I did not peel off the final layer of film so that I can still remove the display. What I see is not good, the display is full of stipes and pixles in many colors. So, did I break the display (e.g. by heat) or does it have to be completely glued to the sensor in order to work?
I got the answer. Unfortunately, I broke the display. A magifying glass revealed that I have scratched the cable where I inserted the blade. Replacing the display and I fixed it!
Jörg -
For anyone who’s having trouble getting the screen separated from the case, try leaving the iopener on the Watch for longer like around 4 or 5 minutes
-
-
-
Sobald die Lücke groß genug ist, setze ein Plektrum in der Lücke unter den Bildschirm.
-
Schiebe das Plektrum an der unteren Kante entlang, um den restlichen Kleber zwischen dem Gehäuse und dem Bildschirm zu lösen.
-
-
-
Bewege das Plektrum um die Ecke Richtung Krone und löse so weiter den Kleber und trenne den Bildschirm vom Gehäuse.
-
-
-
-
Bewege das Plektrum um die obere rechte Ecke und an der Oberkante der Uhr entlang.
-
-
-
Arbeite dich um den restlichen Bildschirm herum die linke Seite herunter und durchtrenne den letzten Kleber.
-
-
-
Halte das erste Plektrum an seinem Platz fest, und fahre mit einem zweiten Plektrum erneut um alle Kanten herum, um sicherzustellen, dass jeglicher Kleber gelöst ist.
-
-
-
Heble vorsichtig an der rechten Kante des Bildschirms, um ihn vom Kleber zu lösen, mit dem er befestigt ist.
-
Heble auch an der linken Kante – aber versuche nicht den Bildschirm zu entfernen, da er noch mit den beiden Kabeln befestigt ist.
My iwatch screen came lose. There are two strips loose I don’t know how or where they connect to. The watch still powers on and screen is not cracked. Can you advise how to get it back on again?
-
-
-
Die obere Schicht des Sensors kann an der Rückseite des Displays festgeklebt sein – wenn das der Fall ist, dann drücke ihn wieder herunter und löse sie dann.
Hi, thanks for the guide, nice work. I miss a picture of the natural opening of the screen, as the mentioned “Force Touch sensor slides” gets connected from the screen to the main body of the watch by a pair of very thin wires. None of these wires are seen in any of the pictures among this guide, which may lead novices to not pay enough attention to them, broke them accidentally, or not knowing what are them for. Picture on step 13 is absolutely impossible without removing the slides / thin wires of the force touch sensor in advance.
Cheers
"If you can see the top layer of your Force Touch sensor" - How are we supposed to know whether we can see this or not? If one of your images shows us this then can you please point this out. Also, an image of what it should look like, without the problem would be good.
Just discovered this article you have posted about replacing the Force Touch Sensor. After looking at the article I can now see your first image, above, is showing the separated Force Touch Sensor. Perhaps you should link to it in this article, so people can get a better idea of what it is and what it looks like:
Same issue as djones I think. My watch was forced apart by an expanding battery and it came apart in such a way that the force touch sensor was still intact, connected to the watch back and still glued to the face. If I had an image showing the two connectors to the force touch sensor along the same side as the cables, I would have better understood and released the force touch sensor from the face before pulling the sensor away from it's connection in the base. Would have saved $20+ on buying a replacement sensor. Thank you for the documented process.
-
-
-
Hebe das Display an und bewege es vorsichtig nach links – achte dabei auf die Displaydaten- und Touchscreen-Kabel.
I have 2 other small cables which are missing in your photos. Can you also explain what to do with them? https://drive.google.com/file/d/1_6ngMn9...
Looks like you forced touch sensor is still attached to the screen and not the body. I’ve got the same issues. I’m going to try to use the plastic tool and heat to gently remove it from the screen and return it down to the body. You can see it in their fix of it… Apple Watch Force Touch Sensor austauschen . Hope this helps.
-
-
-
Platziere die Uhr auf einer kleinen Erhöhung, mindestens 1 cm hoch – eine kleine Box oder die Kante eines Buches funktionieren super. So kann das Display vertikal hängen und du hast besseren Zugang zum Akku.
I would taped the watch to the elevated surface and rotated the surface around as I needed to
-
-
-
Zerschneide ein Plektrum mit der Schere so, dass es etwa so breit ist wie der Akku. Achte darauf, dass keine scharfen Kanten entstehen.
-
Setze das zugeschnittene Plektrum zwischen der rechten Kante des Akkus und dem Gehäuse ein.
-
Drücke fest und gleichmäßig, so dass der sich der Akku langsam aus der Klebeverbindung zur Hauptplatine löst und herauskommt.
-
Bei den größeren Modellen (42 mm) sitzt die Hauptplatine direkt unter dem Akku. Daher musst du hier besonders aufpassen, dass du nicht versehentlich an der Hauptplatine hebelst. Setze das Plektrum nur so tief ein, dass du unter den Akku gelangst, nicht unter die Hauptplatine.
-
Tröpfle, falls nötig, etwas hochkonzentrierten Isopropylalkohol (mindestens 90%ig) um und unter den Akku, so dass der Kleber aufgeweicht wird.
I tried removing the battery with the prying tool as instructed, but I think it may have slightly damaged the outer black plastic wrapping of the battery. Does this mean the battery is now damaged and needs to be replaced? Or is that just a cover around the battery and it doesn’t matter? I just don’t want any battery chemicals leaking out. Asking before I stick the screen back on the watch, I’ve done all the rest and it seems fine otherwise.
Hi Danae, the black plastic is technically just protective, but I would highly recommend replacing the battery. It’s possible there is additional unseen damage, and that plastic helps protect against swelling and normal wear of the battery inside the device.
I had to use the pry tool instead of the pick as the pick was not moving it. Was careful not to damage the battery but found it much easier to get movement and know exactly where I was prying with the pry tool.
Great tutorial but I’ve run into a problem changing the battery on my 42mm Original Series watch .
Getting the battery off with the pick has proven impossible and I’m about to try using the isopropyl alcohol.
• Can you provide any tips on how best to apply it, how long to give it to take effect, how often to apply etc. ?
• Given how narrow the gap is, also how to ensure nothing gets damaged by the alcohol?
• Is there any inherent risk in using the pry tool as Joey ended up doing?
Thanks for any advice
Hey so I’m about to do a repair on one and noticed that it’s drains of battery making it pretty much safe to work with but do I really need to remove the battery? Like can’t I just remove the screen right there and now?
-
-
-
Hebe den Akku an und drehe ihn leicht aus dem Weg, um an den Kabelstecker zu kommen.
-
Heble mit einem Plastiköffnungswerkzeug gegen die Unterseite des Gehäuses, um den Akku-Kabelstecker vom Akkukabel der Uhr zu trennen.
-
Entferne den Akku aus der Uhr.
Why should you remove the battery if you only need to replace the screen?...?
Douglas - this iFixit is for Apple Watch Battery Replacement - looks like you need to remove the screen to replace the battery...
You will find that it is a good precautionary measure to disconnect the battery anytime you are repairing or replacing a screen as a short can occur when reconnecting the screen rendering it useless even if you have the unit turned off.
Great repair guide! You iFixit guys are awesome. Took me about 2 hours but then I am very careful and I replaced the touch sensor at the same time since I had it open anyway. Make sure you have at least 2, and better 3 adhesive gaskets. You need 2 and, well, it’s easy to mess one up while trying to place it.
Will removing the battery reset my icloud info? I have a guy who says he can do this, but i dont want him to run off with my watch after he replaces the battery…
I did not disconnect the battery first. After replacing the screen, it didn’t work. I have to assume I created a short. The watch will still turn on and haptics are evident, but the display doesn’t work. Are there any further repairs to save my watch at this point?
Yeah, sounds like you shorted part of the board. If it’s a Series 0 you’re working with, just go get a new one. Not worth fixing.
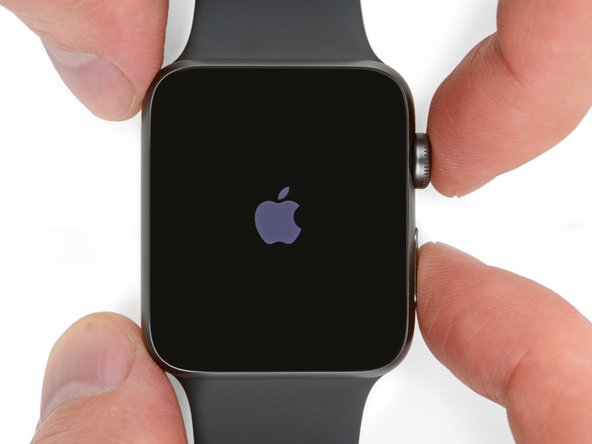
After replacing the battery I tried to turn it on and was presented with the red snake, I let it go for about an hour. When I checked it the red snake was gone, when I tried to turn it on it showed the Apple logo for about 4 seconds then went away. Is this normal, and if not what should I do?
I'm having a similar issue, did you manage to resolve it?
Did you calibrate the battery? You need to fill it up completely and let it continue to charge for a few hours first.
Is it possible to place a battery in and charge/start the watch without the screen plugged in? I want to check integrity of the battery. I was thinking to put it on charge in a closed clear plastic container without the new screen on to see if the battery is good. I ‘really’ do not want to wait another 20 days for a battery replacement and the battery has no visual punctures, front looks good and the back where the adhesive is (or were, rather) is deflated and slightly ‘knobby’. I do not know if it is damage or just how it generally looks like or maybe it looks like so because of the old adhesive. It is not inflated or abnormally expanded. Anyone who knows about this? I used a hair dryer directly on the watch opened to loosen up the adhesive, is that a no-no?
The battery swelled up and popped off the screen, so went directly to Step 12. Luckily the adhesive below the Force Touch sensor was intact. Was able to complete the fix using the Adhesive Strip after replacing the battery. Works again! Thanks!
Hi Alex, I’m having the same problem with my series one with the screen has popped off due to the battery swelling. Did you have any issues starting from step 12?
Glenn -
The apple logo keeps flashing on my series 1 watch, tried force restart with crown and side button but it still just keeps on flashing the apple logo, does anyone have any advise? Is the issue with the battery? Do I need to get a new battery? I change the screen as the screen was broken and used the existing battery.
yes the issue was with battery, swapped with a new battery and booted up fine.
Having the same issue.good to hear it’s the battery and not me.
my watch was completely unloaded and stays in power saver mode when I charge. When I load in power saver mode the red light turns green for a few moments then switch back to red and no longer charge. When I remove the battery and put it back on the charger the charge starts again for a while and then stops. Do I need to change the battery? (apple watch serie 4 nike)
I replaced the screen and battery on mine. Now, it will not charge. Everything works fine, except charging. Any ideas why this may be?
My series one has two other cables/strings in the bottom left corner. Why do none of the pictures address this?
My watch hasn’t recalibrated with the new battery. Even a couple of weeks later I still get premature low battery - it can take hours for the final 10% to run out after the first 90% only took 9 hours. I left it off the charger for multiple days after installation and yet I could still quickly wake it up by pressing the crown to see the time reported with red numbers, so I don’t think it fully ran out.
Is there a way to force calibration? A Google search didn’t yield anything useful in the first several pages of results.
Hy Chris,
Same problem as you. Have you found a solution ?
luc poli -
Watching various videos and instructions from others, I found that there’s no need to remove the screen if your goal is to only swap out the battery.
It’s meant to make it easier to clean off the old glue and install some double-sided adhesive tape but it was far more simpler to loop the tape around the screen with a pair of tweezers than to try to wrangle with the metal bracket securing the display and digitiser cable connectors.
T-7000 glue can presumably be used in lieu of double-sided adhesive tape but it’s definitely more messier.
Anyway, I was initially quite annoyed about my battery expanding and popping the screen off but very quickly got over it when I realised it was a simple $20 DIY fix. Guess I got lucky this time..
I’m just replacing the battery. The screen and eveything is fine. While i’ve done just that and the new battery seems secure and eveything, i don’t know which is the adhesive strip that i’d use to re-secure the watch face back onto the watch itself. I don’t need a sensor because the watch face is fine, i just need the adhesive strip and i’m not seeing anything labelled as such in the kit. Ive got 2 tesa stickers (?) and one 3M sensor thing with a little compotent thingy attached to it. Which is the double sided adhesive that goes around the base of the watch to secure the face to the watch?? I was lucky in that my old swollen battery pushed the face off so replacing the battery was fairly easy. Now i just need to secure the face to the body. Any advice?
Have followed the guide as best I could but when everything is reconnected the watch will not power up. Have disconnected and reconnected several times but still the same. Fear that is only going to do damage. Watch was working before removing swollen battery which had caused screen to detach.
How do you put in the battery and close the Watch
DOESN'T WORK FOR ME : Have followed the guide in every point but i have now the red snake.
Just after repairing i put the watch on the charger, let it some hours to charge.
when I took it, the watch was hot. It started up and was working. I let it discharge then put it back on the charger. After a few hours, it was not charged and showed the green snake. When I took it out, it showed the red snake.
Has anyone had this problem and found a solution?
Replaced my Series 1 battery/force sensor. The swelled original battery popped the watch open, so no prying necessary. However, the watch wouldn't work normally afterward, only displaying the "put me on my charger!" image of the charge cord with the disc on the end.
iFixIt was great about sending a replacement... battery, tools, force touch sensor, the whole kit, no charge. Replacement #2 required prying it open, but the force touch sensor stayed put, so I didn't have to replace that the second time. Watch is charging and behaving normally as I calibrate the battery. Can unlock etc.
Be very gentle/careful with the tiny force touch sensor screw. A great comment above says if you lose it, you can put in bit of a pick to press the sensor snug where the screw would hold it. I strongly recommend using a cheap hands-free, head-mounted magnifier w/light for this job. A loop of tape to stick the watch to a surface to hold it still while fiddling with the tiny cable connections was a HUGE help. Take your time!
Bonjour, connaissez-vous par hasard la référence de la batterie pour AppleWatch 2 de 42mm ?
Merci
Bonjour @drakkar1er35709
Nous la vendons dans notre boutique : Apple Watch (42 mm Series 2) Battery Si vous avez besoin d'autres infos, veuillez contacter notre service client au support@ifixit.com (pour la boutique américaine) ou au eustore@ifixit.com (pour la boutique européenne et française).
Ce sera un plaisir de vous aider !
Bien à vous, Claire
-


Benutze unsere Force Touch Sensor Anleitung ab Schritt 17, um deine Uhr wieder zu verkleben und die Reparatur zu beenden.
Benutze unsere Force Touch Sensor Anleitung ab Schritt 17, um deine Uhr wieder zu verkleben und die Reparatur zu beenden.
Rückgängig: Ich habe diese Anleitung nicht absolviert.
247 weitere Nutzer:innen haben diese Anleitung absolviert.
Besonderer Dank geht an diese Übersetzer:innen:
100%

Diese Übersetzer:innen helfen uns, die Welt zu reparieren! Wie kann ich mithelfen?
Hier starten ›

Team

16 Kommentare
Hi,
I am replacing a battery that swelled and pushed the screen up. This is the original Apple Watch it was working prior to replacing battery but only lasted a few hours. Got first battery and it didn’t do anything, retailer replaced it since it was a dud. New battery in and placed on charger and I got the snake charging symbol then nothing. When I try to force reset, shows white Apple logo and then disappears and does nothing. Help!? Thanks
Same!!!! The Apple logo comes up and then disappears when charging only??!!
Ditto.
I replaced the battery with a new battery and when charging, the Watch will display the Apple Logo for <1 second, and then be blank for a while.
Hi, i had the same problem. After changing the battery, firstly the watch has started. So i have let the watch until the battery was empty and charged it. After a night of charging trying to start the watch : green snake !
So i have let the watch during one week without recharging it. Then i have put the watch on the charger during 2 hours and the watch had started by itself and now all is ok.
luc poli -
Hello, I just replaced the battery on my Apple watch series 1 and have the same issue as some other were already facing while trying to charge the watch : the apple logo appears for few seconds and then disappear again and do the same continuously (sometimes it disappears in a red tainted color). I tried the hard reset, but it was unsuccessful. Does anybody have a solution to this issue ? Many thanks in advance for your help !
Hello!
Did you found the solution?
My Apple Watch serie1 it’s doing the same thing as you described. I’m wondering if did you found the solution, before makes the inversion on a new battery. I would really appreciate!!!
A solution for me : Look at the response i made for Michael Gagne on this page.
luc poli -
If you have this problem, the battery is not connected properly. Although it may look as though it is, the battery connector is either misaligned or not pressed together correctly. Once connected correctly, the watch will need to be placed on its charger where is will show a white apple logo for a number of minutes before finally booting into WatchOS.
Same issue i am also facing
Also just replaced series 1 battery, 38mm, flashing apple logo. Holding the buttons to do a reset gives me a red exclamation mark, resetting again puts me back to the flashing apple. Any ideas anyone?
After Replacing the old, swollen battery, the watch appears to function just fine. I will need to get a new battery to use which works properly and isn’t swollen. Good thing I tested before I pulled the adhesive, or this would have been a much larger headache.
Hi, where did you buy the new battery? I got the same issue, all of the sudden, screen pop up and battery swollen.
Thank you so much!
I had the same symptoms as rJ Jarecki, swollen battery, red exclamation point, intermittent apple logo, but when I leave on the charger either it gets overheated from attempting to turn on or nothing at all. Is it possible that we all get bad batteries? Not sure if I should try another new battery or what.
I damaged the connector attached to the watch which plugs on to the battery. Now what?