Zum Hauptinhalt wechseln

Asus A52F Cooling System Replacement

Was du brauchst

  1. Asus A52F Cooling System Replacement, Battery: Schritt 1, Bild 1 von 2 Asus A52F Cooling System Replacement, Battery: Schritt 1, Bild 2 von 2
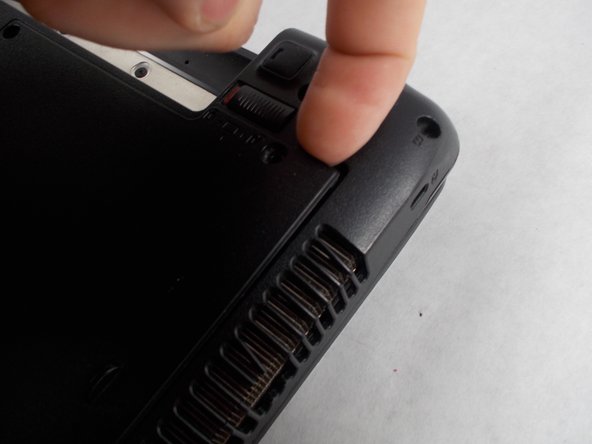
    • Place the laptop face down with the battery facing away from you.

    • Locate the two buttons next to the battery.

    • Slide the right slider to the unlocked (red) position.

  2. Asus A52F Cooling System Replacement: Schritt 2, Bild 1 von 2 Asus A52F Cooling System Replacement: Schritt 2, Bild 2 von 2
    • Hold the left button to the left.

    • Slide the battery with your other hand away from you and it should disconnect.

  3. Asus A52F Cooling System Replacement, Lower Case: Schritt 3, Bild 1 von 3 Asus A52F Cooling System Replacement, Lower Case: Schritt 3, Bild 2 von 3 Asus A52F Cooling System Replacement, Lower Case: Schritt 3, Bild 3 von 3
    • Remove the five Phillips # 0 screws from the back panel.

    • Using your finger or a plastic spudger start to carefully pry up the back planel.

  4. Asus A52F Cooling System Replacement: Schritt 4, Bild 1 von 2 Asus A52F Cooling System Replacement: Schritt 4, Bild 2 von 2
    • Slide the back panel away and remove the panel.

  5. Asus A52F Cooling System Replacement, Cooling System: Schritt 5, Bild 1 von 2 Asus A52F Cooling System Replacement, Cooling System: Schritt 5, Bild 2 von 2
    • Removal of cooling system will void your warranty. Proceed with caution.

  6. Asus A52F Cooling System Replacement: Schritt 6, Bild 1 von 2 Asus A52F Cooling System Replacement: Schritt 6, Bild 2 von 2
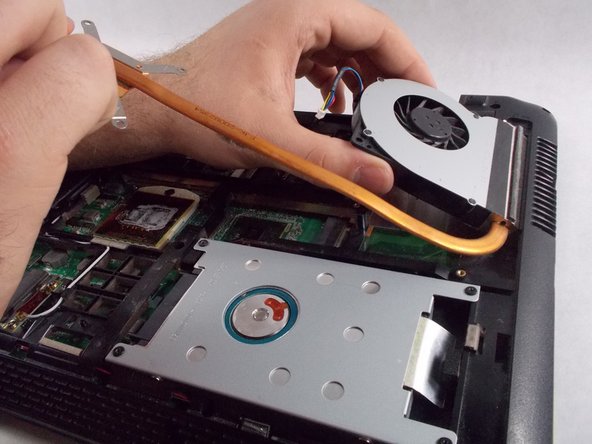
    • Using a Phillips #0 screwdriver, remove all six screws from the cooling system.

    • Unplug the fan power connector.

  7. Asus A52F Cooling System Replacement: Schritt 7, Bild 1 von 2 Asus A52F Cooling System Replacement: Schritt 7, Bild 2 von 2
    • Carefully grab the copper pipe and start to lift upward.

    • Lift to the angle shown and then start to slide it out.

  8. Asus A52F Cooling System Replacement: Schritt 8, Bild 1 von 1
    • Clean the designated area with isopropyl alcohol on a microfiber cloth

    • Replace with new thermal paste if needed

Abschluss

To reassemble your device, follow these instructions in reverse order.

2 weitere Nutzer:innen haben diese Anleitung absolviert.

Bradley Varnum

Mitglied seit: 03/09/17

294 Reputation

2 Anleitungen geschrieben

Team

UMass Dartmouth, Team S5-G1, Botvin Spring 2017 Mitglied von UMass Dartmouth, Team S5-G1, Botvin Spring 2017

UMASSD-BOTVIN-S17S5G1

4 Mitglieder

7 Anleitungen geschrieben

0 Kommentare

Kommentar hinzufügen

Seitenaufrufe:

Letzte 24 Stunden: 0

Letzte 7 Tage: 3

Letzte 30 Tage: 10

Insgesamt: 832