Zum Hauptinhalt wechseln
Gemeinsam reparieren - Jetzt registrieren

Asus Chromebook C201 LCD Screen Replacement

Was du brauchst

  1. Asus Chromebook C201 LCD Screen Replacement, Palm Rest Assembly: Schritt 1, Bild 1 von 1
    • Flip the laptop upside down with the rear end of the computer away from you.

    Frag FixBot
  2. Asus Chromebook C201 LCD Screen Replacement: Schritt 2, Bild 1 von 1
    • Remove the two rear rubber feet by using one of the small, blue plastic spudgers.

    Frag FixBot
  3. Asus Chromebook C201 LCD Screen Replacement: Schritt 3, Bild 1 von 1
    • Use the J0 screwdriver to remove the eight 5mm black screws on the bottom of the laptop, which includes the two that were hidden under the rear rubber feet.

    Frag FixBot
  4. Asus Chromebook C201 LCD Screen Replacement: Schritt 4, Bild 1 von 1
    • Turn the laptop on its side. Use a small, blue opening tool to pry the keyboard cover and laptop apart. Begin from the top right, next to the power button, and slowly work your way around to the opposite side until the keyboard cover is detached.

    Frag FixBot
  5. Asus Chromebook C201 LCD Screen Replacement: Schritt 5, Bild 1 von 2 Asus Chromebook C201 LCD Screen Replacement: Schritt 5, Bild 2 von 2
    • Gently flip the keyboard cover away from the laptop. Rest it safely upside down so the cables are not strained and are easily accessible.

    Frag FixBot
  6. Asus Chromebook C201 LCD Screen Replacement: Schritt 6, Bild 1 von 3 Asus Chromebook C201 LCD Screen Replacement: Schritt 6, Bild 2 von 3 Asus Chromebook C201 LCD Screen Replacement: Schritt 6, Bild 3 von 3
    • Use the metal spudger to gently pry up the small tabs that are clamping down on the keyboard cables.

    Frag FixBot
  7. Asus Chromebook C201 LCD Screen Replacement: Schritt 7, Bild 1 von 2 Asus Chromebook C201 LCD Screen Replacement: Schritt 7, Bild 2 von 2
    • Carefully pull the keyboard cables out of the connecting ports that are attached to the motherboard.

    Frag FixBot
  8. Asus Chromebook C201 LCD Screen Replacement: Schritt 8, Bild 1 von 1
    • Remove the keyboard cover and safely place it somewhere face down.

    Frag FixBot
  9. Asus Chromebook C201 LCD Screen Replacement, LCD Screen: Schritt 9, Bild 1 von 2 Asus Chromebook C201 LCD Screen Replacement, LCD Screen: Schritt 9, Bild 2 von 2
    In diesem Schritt verwendetes Werkzeug:
    Tweezers
    $4.99
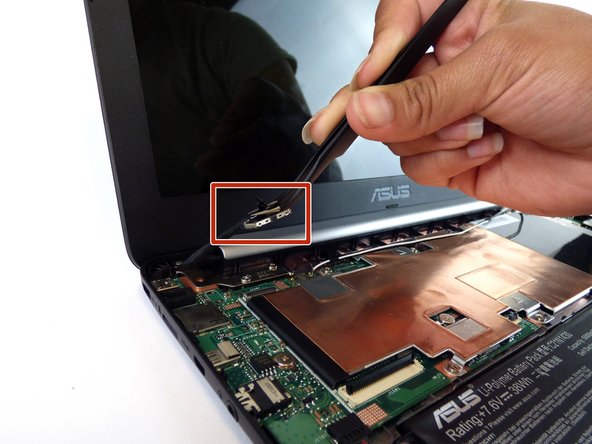
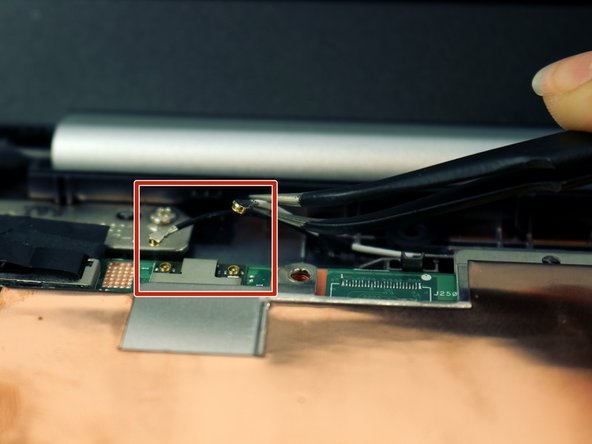
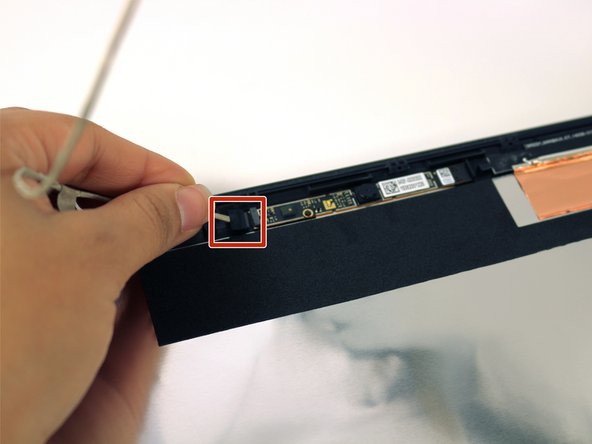
    • Locate the LCD cable and its connector which is located in the upper left hand corner of the computer. Carefully flip up the tiny tab and safely remove the cable using precision tweezers.

    Frag FixBot
  10. Asus Chromebook C201 LCD Screen Replacement: Schritt 10, Bild 1 von 2 Asus Chromebook C201 LCD Screen Replacement: Schritt 10, Bild 2 von 2
    • Disconnect the black and white cables located near the screen hinge.

    Frag FixBot
  11. Asus Chromebook C201 LCD Screen Replacement: Schritt 11, Bild 1 von 2 Asus Chromebook C201 LCD Screen Replacement: Schritt 11, Bild 2 von 2
    • Remove the 6, 4mm silver screws from the hinges attaching the LCD to the laptop using the J0 Phillips screwdriver.

    Frag FixBot
  12. Asus Chromebook C201 LCD Screen Replacement: Schritt 12, Bild 1 von 1
    • Turn the hinges to an upright position.

    Frag FixBot
  13. Asus Chromebook C201 LCD Screen Replacement: Schritt 13, Bild 1 von 2 Asus Chromebook C201 LCD Screen Replacement: Schritt 13, Bild 2 von 2
    • Carefully pop the LCD screen assembly out of the laptop case.

    Frag FixBot
  14. Asus Chromebook C201 LCD Screen Replacement: Schritt 14, Bild 1 von 2 Asus Chromebook C201 LCD Screen Replacement: Schritt 14, Bild 2 von 2
    • Remove the silver cover.

    • Make sure to put the cover back in right side (longer side) up when re-installing

    Frag FixBot
  15. Asus Chromebook C201 LCD Screen Replacement: Schritt 15, Bild 1 von 2 Asus Chromebook C201 LCD Screen Replacement: Schritt 15, Bild 2 von 2
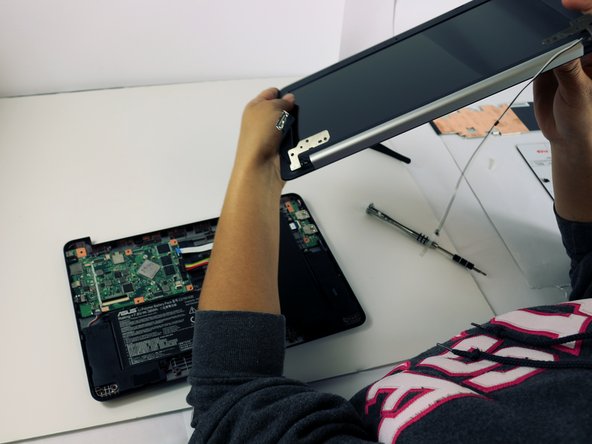
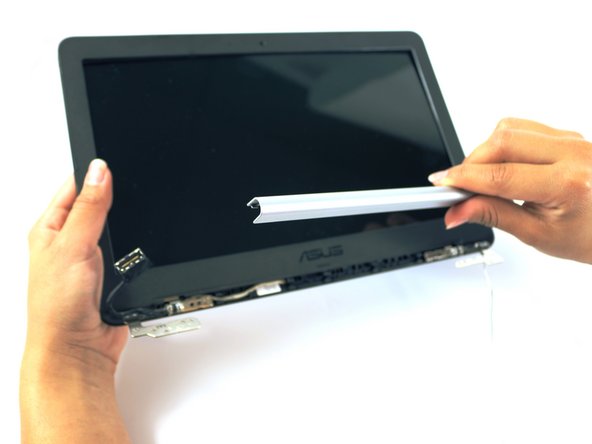
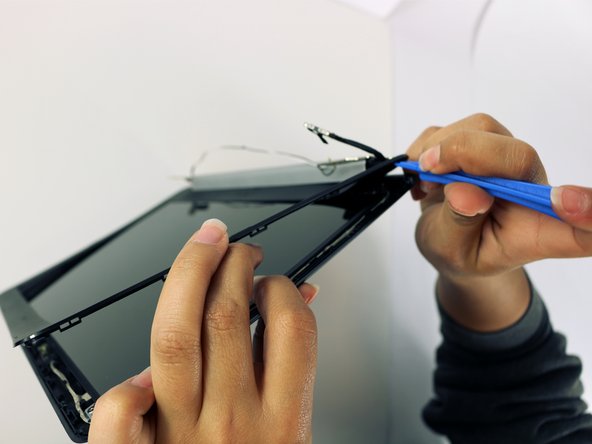
    • Use a blue plastic spudger to snap the LCD cover off, working the spudger around the perimeter and completely remove the cover.

    Frag FixBot
  16. Asus Chromebook C201 LCD Screen Replacement: Schritt 16, Bild 1 von 1
    • Remove the 4, 3mm silver corner screws holding in the LCD.

    Frag FixBot
  17. Asus Chromebook C201 LCD Screen Replacement: Schritt 17, Bild 1 von 2 Asus Chromebook C201 LCD Screen Replacement: Schritt 17, Bild 2 von 2
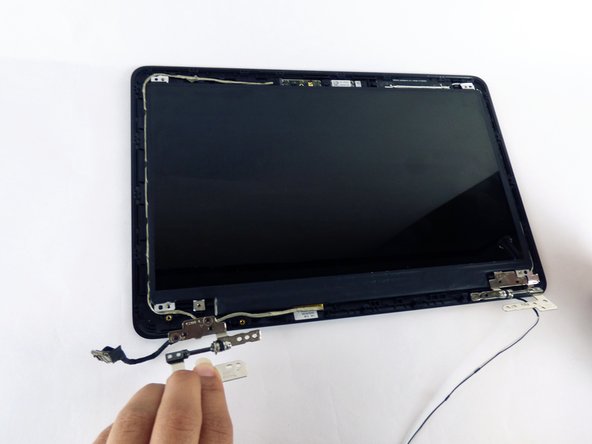
    • Remove the left hinge by unscrewing the two 3mm large Phillips head screws.

    • Unscrew the one 3mm small Phillips head screw.

    Frag FixBot
  18. Asus Chromebook C201 LCD Screen Replacement: Schritt 18, Bild 1 von 2 Asus Chromebook C201 LCD Screen Replacement: Schritt 18, Bild 2 von 2
    • Carefully lift the screen. Gently unravel and unplug the LCD cord.

    Frag FixBot
Abschluss

To reassemble your device, follow these instructions in reverse order.

10 weitere Personen haben diese Anleitung absolviert.

Team

USF Tampa, Team 2-51, Cagle Spring 2016 Mitglied von USF Tampa, Team 2-51, Cagle Spring 2016

USFT-CAGLE-S16S2G51

4 Mitglieder

10 Anleitungen geschrieben

0 Kommentare zur Anleitung

Kommentar hinzufügen

Seitenaufrufe:

Letzte 24 Stunden: 2

Letzte 7 Tage: 8

Letzte 30 Tage: 58

Insgesamt: 4,035