Einleitung
The track pad is small part that controls the motion of the mouse on your computer.
Was du brauchst
-
-
Flip the Chromebook over so that the underside is facing up.
-
Using the Phillips PH #000 screwdriver, remove the 11 "4mm" screws on the back of the device.
-
-
-
Wedge the plastic opening tool between the bottom cover of the laptop and the keyboard panel.
-
Apply pressure and move the plastic opening tool around the border of the laptop until it pops out.
-
-
-
Once the keyboard panel pops out, slowly move it upwards so that the keyboard connection is visible.
-
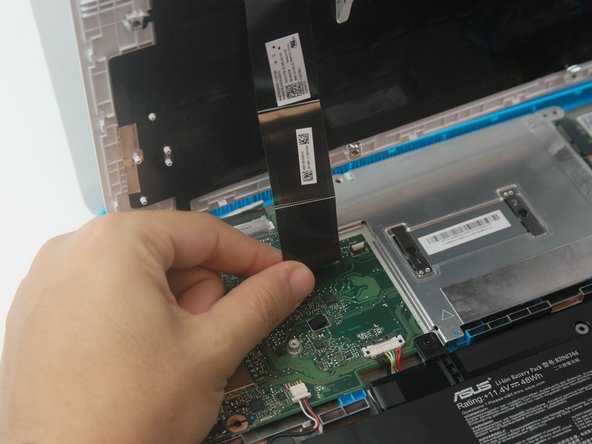
Remove the keyboard connection from the motherboard by pulling it outwards from the connector.
-
-
-
-
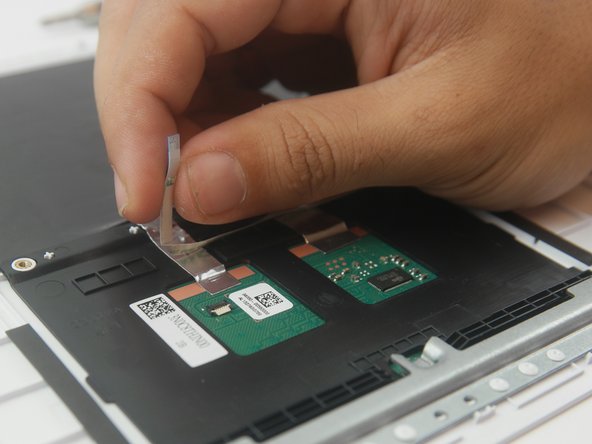
Remove the aluminum tape that secures the trackpad. Use tweezers if necessary.
-
-
-
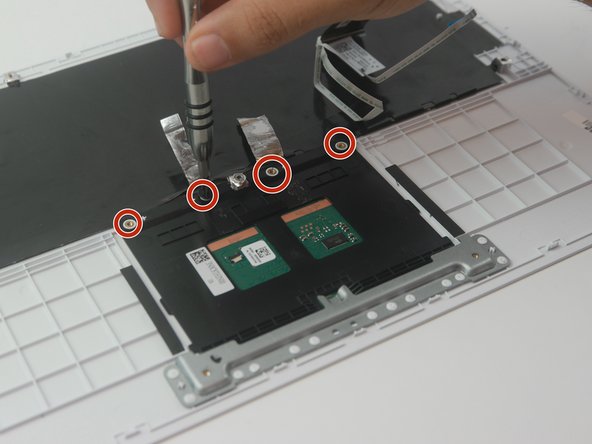
Using the Phillips #000 screwdriver, remove the (4) four "4 mm" screws that secure trackpad onto keyboard.
-
-
-
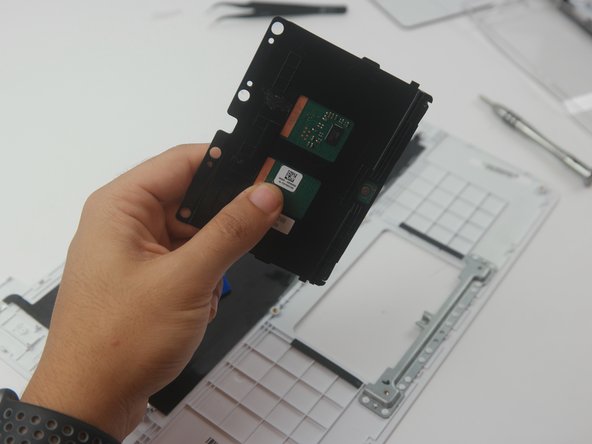
Using a plastic opening tool, pry out the touchpad from the metal securing bracket.
-


To reassemble your device, follow these instructions in reverse order.
To reassemble your device, follow these instructions in reverse order.
Rückgängig: Ich habe diese Anleitung nicht absolviert.
2 weitere Nutzer:innen haben diese Anleitung absolviert.
Team

USF Tampa, Team S6-G4, Remmell Fall 2017 Mitglied von USF Tampa, Team S6-G4, Remmell Fall 2017
USFT-REMMELL-F17S6G4
4 Mitglieder
12 Anleitungen geschrieben