Einleitung
This guide will walk you through the step by step process of removing the LED screen from the laptop. Screen removal is a multistep process that will require you to keep track of the parts taken out of the laptop. Each screw is accounted for in the steps they are removed.
Was du brauchst
-
-
Remove the eight 8.0mm Phillips #0 screws on the bottom of the laptop.
-
Remove the three 6.0mm Phillips #0 screws.
-
-
-
Open the laptop.
-
Using an iFixit opening tool, pry along the edges of the keyboard.
-
Lift the keyboard and slide it gently towards you.
-
-
-
Disconnect the two ZIF connectors by prying up the locking bar with a spudger and removing the ribbon cable.
-
-
-
-
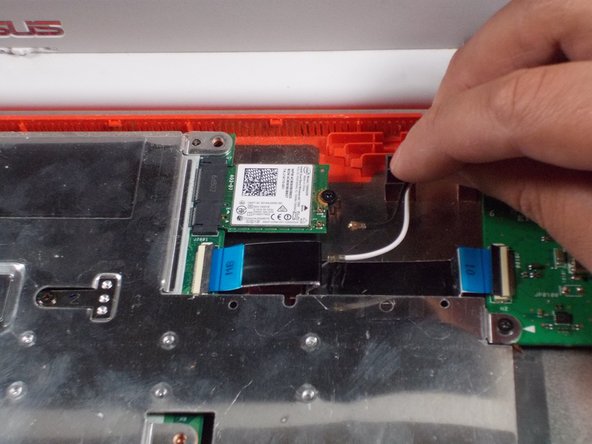
Using your thumb and index finger, pinch the multi-color cable and disconnect it from the motherboard.
-
-
-
Peel back the tape covering the plug.
-
Slide the cable towards the screen and out of the input.
-
-
-
Gently lift screen
-
Peel back the adhesive covering the cable.
-
Remove the cable to free the screen.
-


To reassemble your device, follow these instructions in reverse order.
To reassemble your device, follow these instructions in reverse order.
Rückgängig: Ich habe diese Anleitung nicht absolviert.
Ein:e weitere:r Nutzer:in hat diese Anleitung absolviert.
Team

UMass Dartmouth, Team S1-G7, Simcock Fall 2017 Mitglied von UMass Dartmouth, Team S1-G7, Simcock Fall 2017
UMASSD-SIMCOCK-F17S1G7
3 Mitglieder
9 Anleitungen geschrieben
Ein Kommentar
I used this honestly I broke the screen and some of the wires in the screen are severed. Now I know for sure where the wires go and how to deconstruct it. Thank you so much!