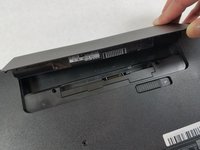
Zum Hauptinhalt wechseln

Asus GL551JW-AH71 RAM Replacement

Was du brauchst

  1. Asus GL551JW-AH71 RAM Replacement, Battery: Schritt 1, Bild 1 von 1
    • Close the device and lay it upside down.

    • Unplug the device and make sure the device is powered off before removing the battery.

  2. Asus GL551JW-AH71 RAM Replacement: Schritt 2, Bild 1 von 2 Asus GL551JW-AH71 RAM Replacement: Schritt 2, Bild 2 von 2
    • Move the battery eject button to the right. The battery will be ejected.

  3. Asus GL551JW-AH71 RAM Replacement: Schritt 3, Bild 1 von 2 Asus GL551JW-AH71 RAM Replacement: Schritt 3, Bild 2 von 2
    • Grab the battery and remove it from the device.

  4. Asus GL551JW-AH71 RAM Replacement, RAM: Schritt 4, Bild 1 von 2 Asus GL551JW-AH71 RAM Replacement, RAM: Schritt 4, Bild 2 von 2
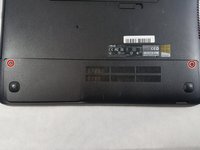
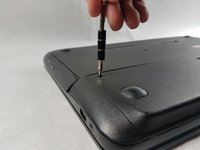
    • Using a Phillips #00 screwdriver, remove the two 11mm screws that hold the access panel in place.

  5. Asus GL551JW-AH71 RAM Replacement: Schritt 5, Bild 1 von 1
    • Remove the access panel by lifting it up.

  6. Asus GL551JW-AH71 RAM Replacement: Schritt 6, Bild 1 von 3 Asus GL551JW-AH71 RAM Replacement: Schritt 6, Bild 2 von 3 Asus GL551JW-AH71 RAM Replacement: Schritt 6, Bild 3 von 3
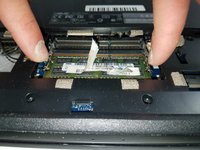
    • Locate the tabs holding the RAM chip in place.

    • Push the tabs in an outward direction from the RAM and the RAM will be released.

    • Gently remove the RAM from the motherboard.

Abschluss

To reassemble your device, follow these instructions in reverse order.

2 weitere Nutzer:innen haben diese Anleitung absolviert.

William Kelley

Mitglied seit: 03/20/19

1.035 Reputation

7 Anleitungen geschrieben

Team

UMass Dartmouth, Team S8-G3, Bailey Spring 2019 Mitglied von UMass Dartmouth, Team S8-G3, Bailey Spring 2019

UMASSD-BAILEY-S19S8G3

4 Mitglieder

16 Anleitungen geschrieben

0 Kommentare

Kommentar hinzufügen

Seitenaufrufe:

Letzte 24 Stunden: 1

Letzte 7 Tage: 2

Letzte 30 Tage: 6

Insgesamt: 220