Zum Hauptinhalt wechseln

Asus K55N-DS81 Screen Replacement

Was du brauchst

  1. Asus K55N-DS81 Screen Replacement, Battery: Schritt 1, Bild 1 von 1
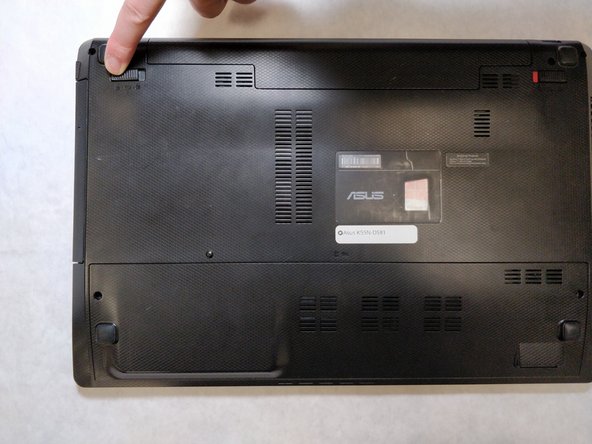
    • Flip the laptop over, such that the bottom of the laptop is facing upwards.

    • Ensure that the laptop is powered off prior to following this guide.

  2. Asus K55N-DS81 Screen Replacement: Schritt 2, Bild 1 von 2 Asus K55N-DS81 Screen Replacement: Schritt 2, Bild 2 von 2
    • Pull the latch to the right of the battery to the right.

  3. Asus K55N-DS81 Screen Replacement: Schritt 3, Bild 1 von 2 Asus K55N-DS81 Screen Replacement: Schritt 3, Bild 2 von 2
    • Pull the latch to the left of the battery to the left. Hold the latch open with a finger to prevent it from closing.

  4. Asus K55N-DS81 Screen Replacement: Schritt 4, Bild 1 von 2 Asus K55N-DS81 Screen Replacement: Schritt 4, Bild 2 von 2
    • While holding the second latch from the previous step, use another hand to reach underneath the battery.

    • Pull the battery upwards and away from the laptop to remove it.

  5. Asus K55N-DS81 Screen Replacement, Screen: Schritt 5, Bild 1 von 1
    • Insert a card between the outer plate cover and the back plate.

    • There may be some clips that break.

  6. Asus K55N-DS81 Screen Replacement: Schritt 6, Bild 1 von 3 Asus K55N-DS81 Screen Replacement: Schritt 6, Bild 2 von 3 Asus K55N-DS81 Screen Replacement: Schritt 6, Bild 3 von 3
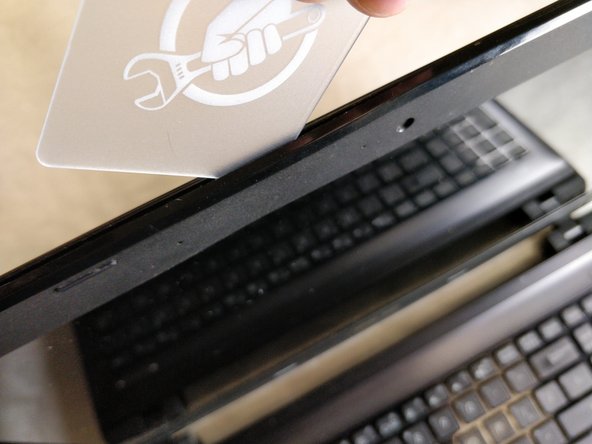
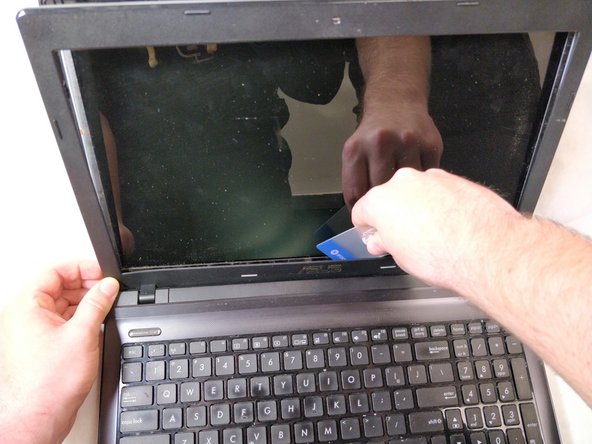
    • Using the card that has been inserted in the top of the screen follow the edge of the screen all the way down to each corner touching the keyboard.

    • Some of the clips may break.

    • If the cover is not being held by just the bottom, go around the screen again to ensure all of the clips have been popped.

  7. Asus K55N-DS81 Screen Replacement: Schritt 7, Bild 1 von 3 Asus K55N-DS81 Screen Replacement: Schritt 7, Bild 2 von 3 Asus K55N-DS81 Screen Replacement: Schritt 7, Bild 3 von 3
    • Remove the plugs at the bottom corners to expose the screws beneath.

  8. Asus K55N-DS81 Screen Replacement: Schritt 8, Bild 1 von 2 Asus K55N-DS81 Screen Replacement: Schritt 8, Bild 2 von 2
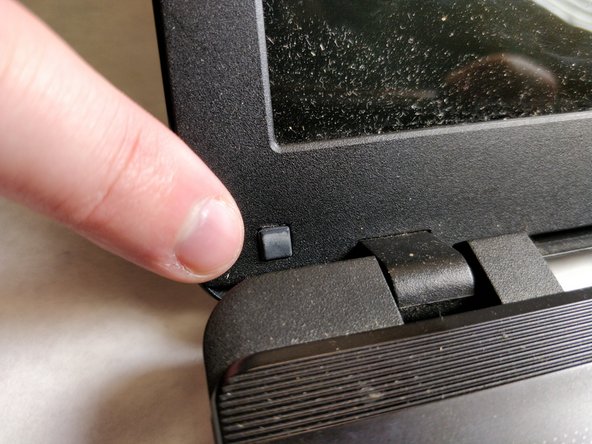
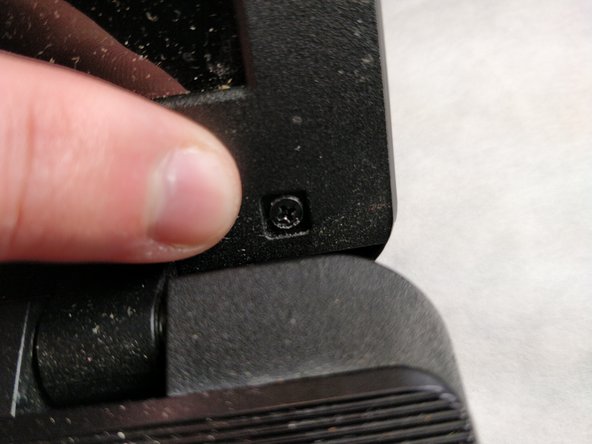
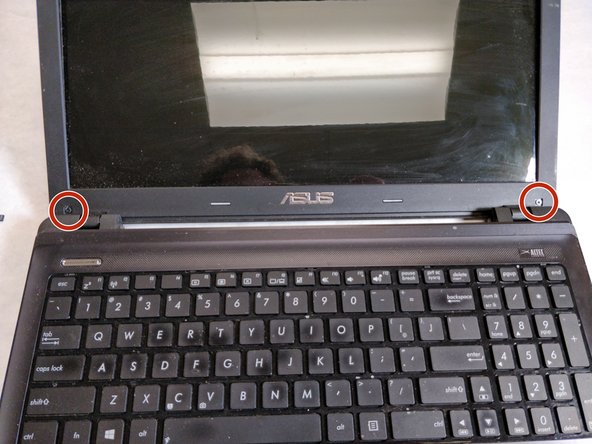
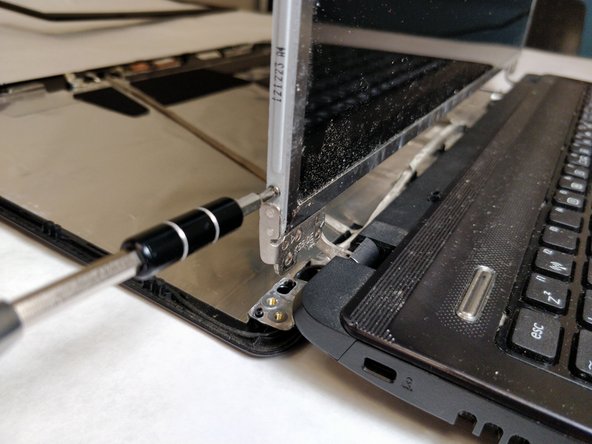
    • Using a JIS #00 screwdriver, remove the two 5 mm screws that were exposed by the bumpers being removed.

  9. Asus K55N-DS81 Screen Replacement: Schritt 9, Bild 1 von 3 Asus K55N-DS81 Screen Replacement: Schritt 9, Bild 2 von 3 Asus K55N-DS81 Screen Replacement: Schritt 9, Bild 3 von 3
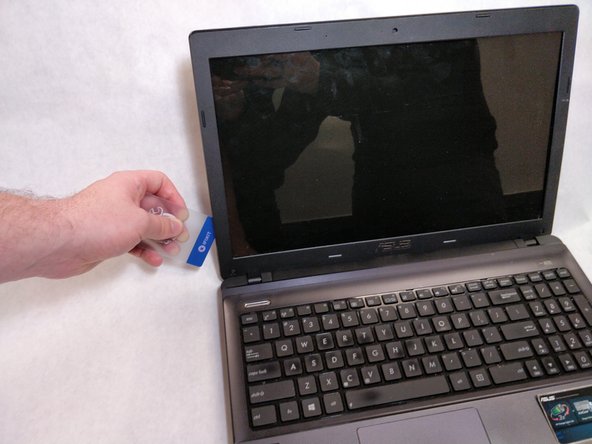
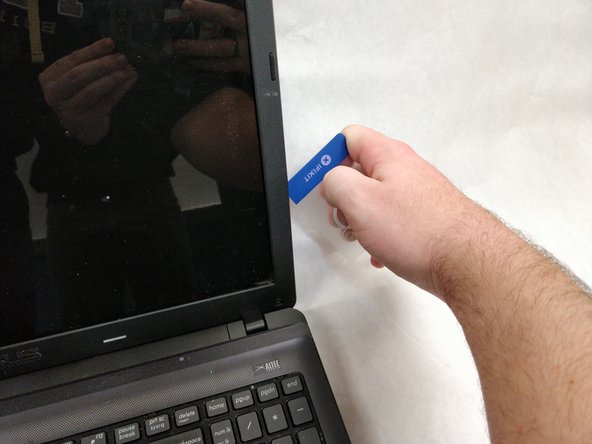
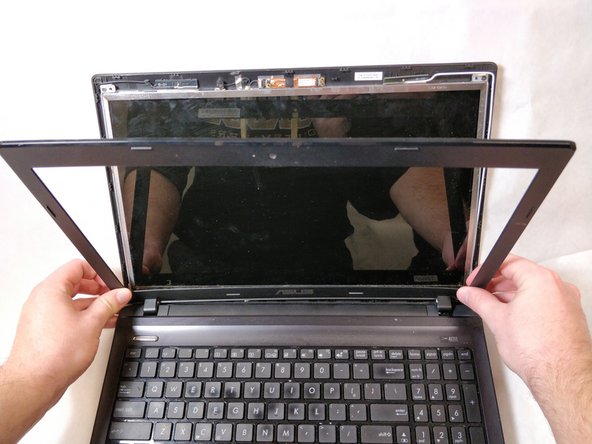
    • Using the card to loosen the remaining clasps inside the screen cover, remove the cover from the back plate and screen.

    • If the cover does not come off of the screen and back plate easily, the cover may be stuck to the hinge. (This is usually due to dirt or grime)

  10. Asus K55N-DS81 Screen Replacement: Schritt 10, Bild 1 von 3 Asus K55N-DS81 Screen Replacement: Schritt 10, Bild 2 von 3 Asus K55N-DS81 Screen Replacement: Schritt 10, Bild 3 von 3
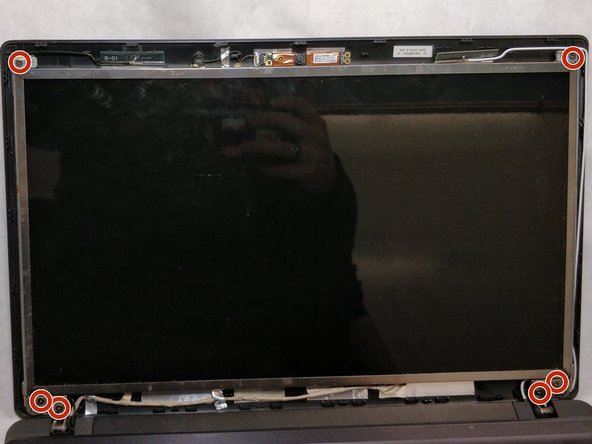
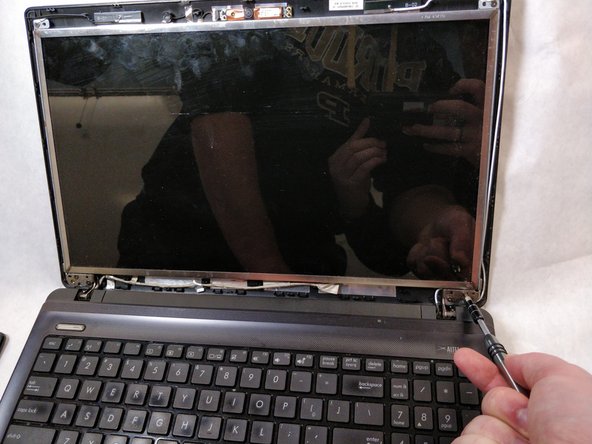
    • Using a JIS #00 screwdriver, remove the six 5 mm screws from the back plate to screen connections in each of the 4 corners of the screen.

  11. Asus K55N-DS81 Screen Replacement: Schritt 11, Bild 1 von 2 Asus K55N-DS81 Screen Replacement: Schritt 11, Bild 2 von 2
    • Remove the plastic covering the connections on the backside of the screen.

    • Make sure back plate is being held so there is no strain occurring on the still connected cables.

  12. Asus K55N-DS81 Screen Replacement: Schritt 12, Bild 1 von 3 Asus K55N-DS81 Screen Replacement: Schritt 12, Bild 2 von 3 Asus K55N-DS81 Screen Replacement: Schritt 12, Bild 3 von 3
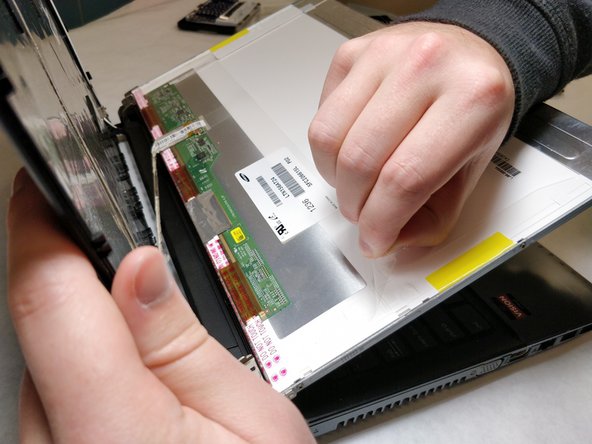
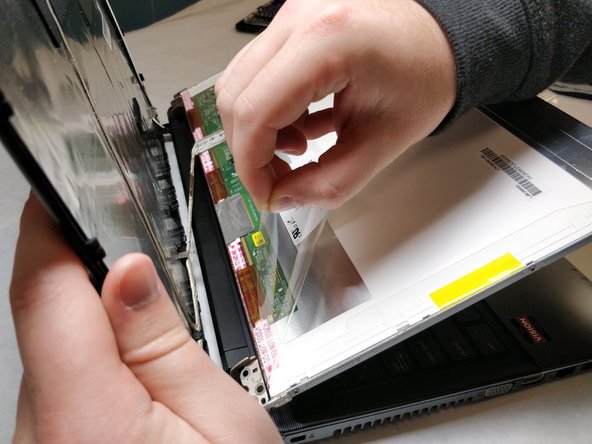
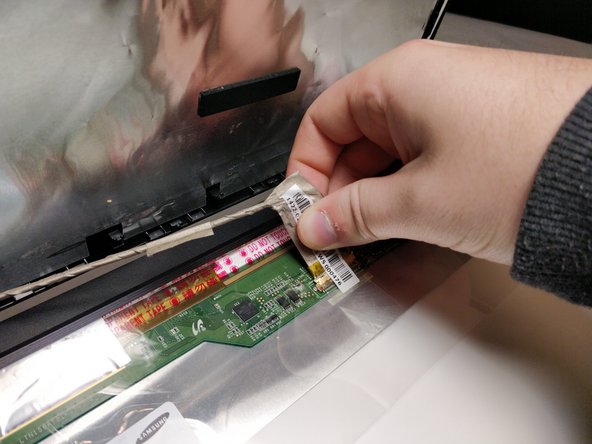
    • Pull up on the tape holding down the ribbon connector.

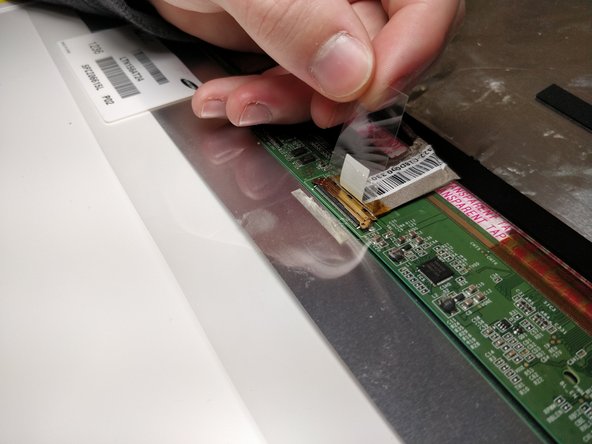
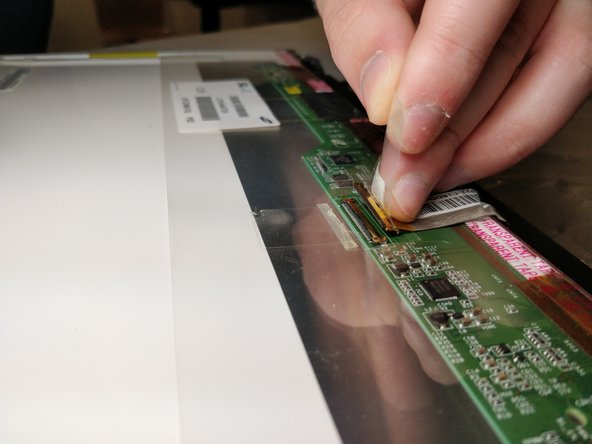
    • Using the brown colored part of the cable pull the cable out of the connection point

    • The connection point is delicate, try to pull straight back and away from the connection point.

  13. Asus K55N-DS81 Screen Replacement: Schritt 13, Bild 1 von 3 Asus K55N-DS81 Screen Replacement: Schritt 13, Bild 2 von 3 Asus K55N-DS81 Screen Replacement: Schritt 13, Bild 3 von 3
    • Using a JIS #00 screwdriver, unscrew the six 2.5 mm screws while holding the bracket to the screen on the sides.

    • The screen should be easily removed when all of the screws are taken out.

Abschluss

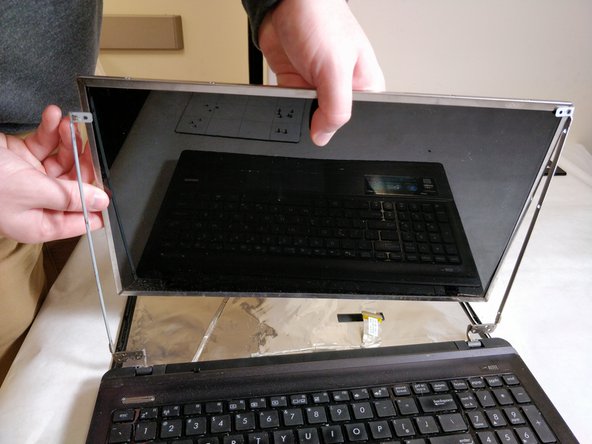
To reassemble your device, follow these instructions in reverse order.

3 weitere Nutzer:innen haben diese Anleitung absolviert.

Team

IUPUI, Team S2-G1, Baechle Fall 2018 Mitglied von IUPUI, Team S2-G1, Baechle Fall 2018

IUPUI-BAECHLE-F18S2G1

4 Mitglieder

5 Anleitungen geschrieben

Ein Kommentar

The guide worked perfect. Easier than I thought.

steve - Antwort

Kommentar hinzufügen

Seitenaufrufe:

Letzte 24 Stunden: 0

Letzte 7 Tage: 1

Letzte 30 Tage: 9

Insgesamt: 447