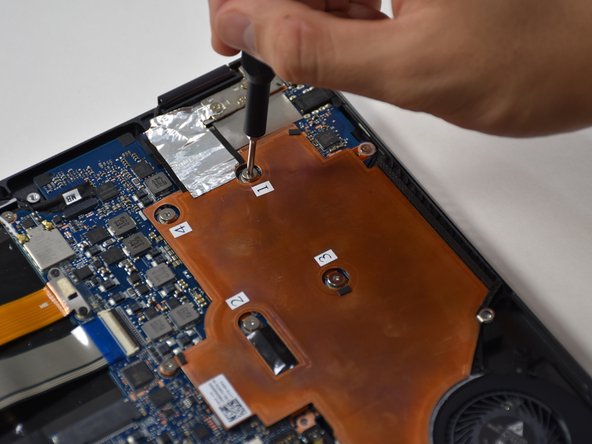
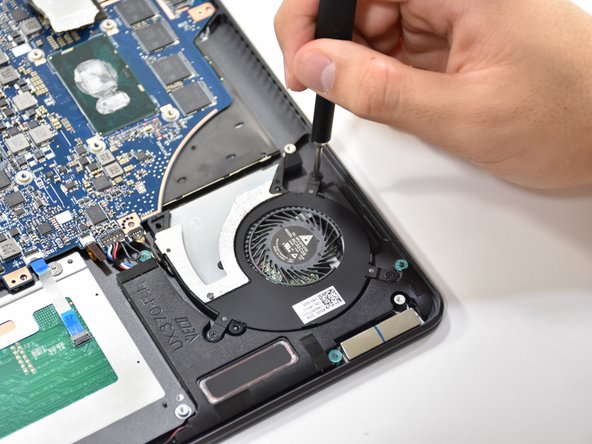
Zum Hauptinhalt wechseln

Asus Q325U CPU Fan Replacement

Was du brauchst

  1. Asus Q325U CPU Fan Replacement, Back Panel: Schritt 1, Bild 1 von 3 Asus Q325U CPU Fan Replacement, Back Panel: Schritt 1, Bild 2 von 3 Asus Q325U CPU Fan Replacement, Back Panel: Schritt 1, Bild 3 von 3
    • Remove the ten 5mm screws using a T5 Torx screwdriver.

  2. Asus Q325U CPU Fan Replacement: Schritt 2, Bild 1 von 3 Asus Q325U CPU Fan Replacement: Schritt 2, Bild 2 von 3 Asus Q325U CPU Fan Replacement: Schritt 2, Bild 3 von 3
    • Lift the back panel upward using the suction tool.

  3. Asus Q325U CPU Fan Replacement, Copper Plate: Schritt 3, Bild 1 von 2 Asus Q325U CPU Fan Replacement, Copper Plate: Schritt 3, Bild 2 von 2
    • Remove the six 3mm screws using a Phillips #00.

  4. Asus Q325U CPU Fan Replacement: Schritt 4, Bild 1 von 2 Asus Q325U CPU Fan Replacement: Schritt 4, Bild 2 von 2
    • Use the plastic opening tool to lift up the edge. Pull upward on the edge.

  5. Asus Q325U CPU Fan Replacement: Schritt 5, Bild 1 von 2 Asus Q325U CPU Fan Replacement: Schritt 5, Bild 2 von 2
    • On the other side of the plate, remove the tape.

  6. Asus Q325U CPU Fan Replacement, CPU Fan: Schritt 6, Bild 1 von 2 Asus Q325U CPU Fan Replacement, CPU Fan: Schritt 6, Bild 2 von 2
    • Remove the three 3.7 mm screws using a Phillips #00 screwdriver.

  7. Asus Q325U CPU Fan Replacement: Schritt 7, Bild 1 von 1
    • Detach the black wire and plug shown using a tweezer.

  8. Asus Q325U CPU Fan Replacement: Schritt 8, Bild 1 von 1
    • Grab CPU fan by its edge and gently pull upwards to remove.

Abschluss

To reassemble your device, follow these instructions in reverse order.

2 weitere Nutzer:innen haben diese Anleitung absolviert.

Team

Cal Poly, Team S19-G1, White Winter 2019 Mitglied von Cal Poly, Team S19-G1, White Winter 2019

CPSU-WHITE-W19S19G1

3 Mitglieder

6 Anleitungen geschrieben

0 Kommentare

Kommentar hinzufügen

Seitenaufrufe:

Letzte 24 Stunden: 0

Letzte 7 Tage: 0

Letzte 30 Tage: 9

Insgesamt: 779