Einleitung
This guide will go over the process of removing and replacing the CPU fan and heat sink assembly.
Was du brauchst
-
-
Use a T5 screwdriver to remove all 10 screws that secure the bottom cover.
-
Pull off the back cover of the laptop.
-
-
-
Wedge an opening tool under the battery's bundled cable connector, and gently pry the connector up and to disconnect the battery.
-
-
-
-
Lift up the black tab next to the silver ribbon cable.
-
Pull lightly on the blue tabs until the silver cable is free.
-
-
-
Use a Phillips #00 screwdriver to remove the 5 marked screws.
-
Gently remove the battery.
-
-
-
Using the iFixit opening tool, gently pry the CPU fan connector out of the socket.
-
-
-
Move the black cable located around the CPU fan out of the holder.
-
Remove the following 9 screws:
-
Three Phillips screws
-
Six Phillips screws
-
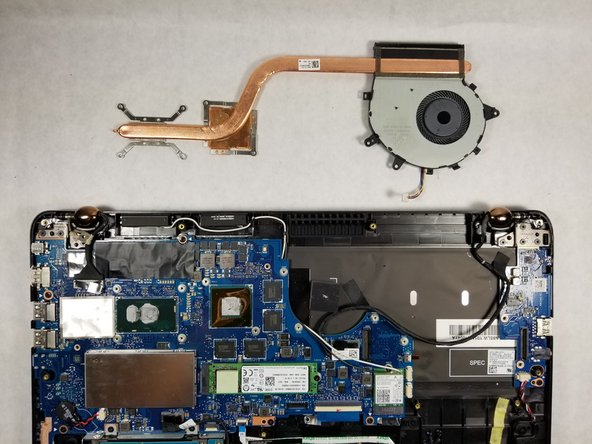
Gently pull vertically on the CPU fan/ heat sink assembly until it is free.
-


To reassemble your device, follow these instructions in reverse order.
To reassemble your device, follow these instructions in reverse order.
Rückgängig: Ich habe diese Anleitung nicht absolviert.
4 weitere Nutzer:innen haben diese Anleitung absolviert.
Team

UMass Dartmouth, Team S66-G6, Rockett Fall 2017 Mitglied von UMass Dartmouth, Team S66-G6, Rockett Fall 2017
UMASSD-ROCKETT-F17S66G6
3 Mitglieder
5 Anleitungen geschrieben