Einleitung
This guide explains the required steps and tools needed to remove the motherboard of the ASUS Q534U laptop. The motherboard is the main circuit board of a computer which allows all of the computer’s components to work together. If the motherboard is not working properly, then the computer will typically give you a black screen and not operate at all. In this case, the motherboard needs to be replaced. Removal of the motherboard is the first step in replacing a defective motherboard.
Read all steps ahead of time so you know what to expect. Before removing the motherboard, you should backup all your important information, then shutdown Windows and disconnect the power cord before proceeding.
Was du brauchst
-
-
Remove ten screws with the T5 driver.
-
Use the opening tool to carefully pry off the back case.
-
-
-
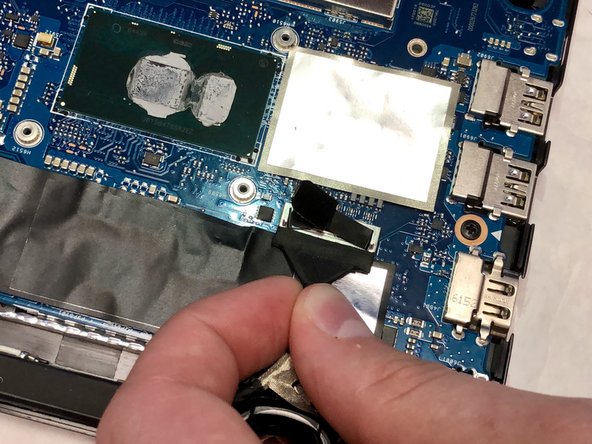
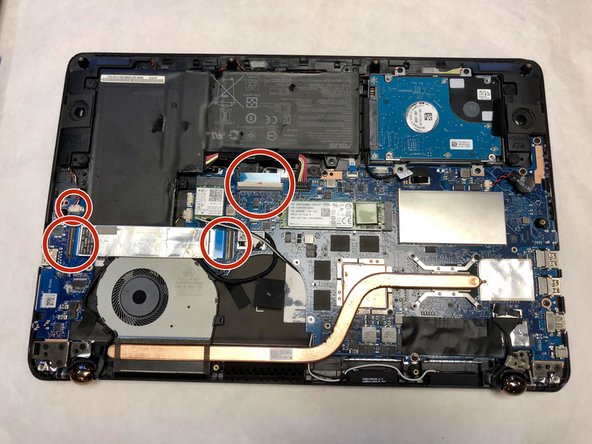
Using the iFixit opening tool, gently pry the CPU fan connector out of the socket.
-
-
-
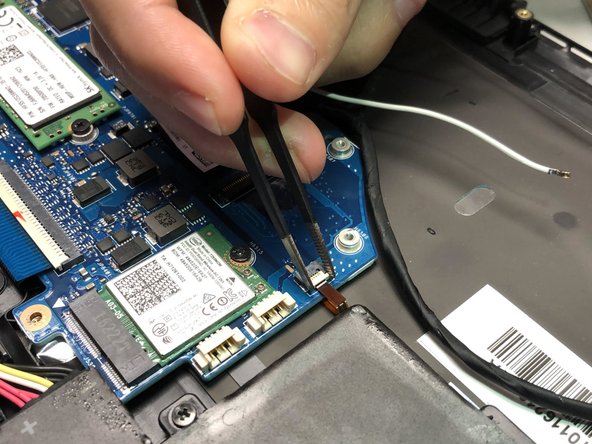
Move the black cable located around the CPU fan out of the holder.
-
Remove the following 9 screws:
-
Three Phillips screws
-
Six Phillips screws
-
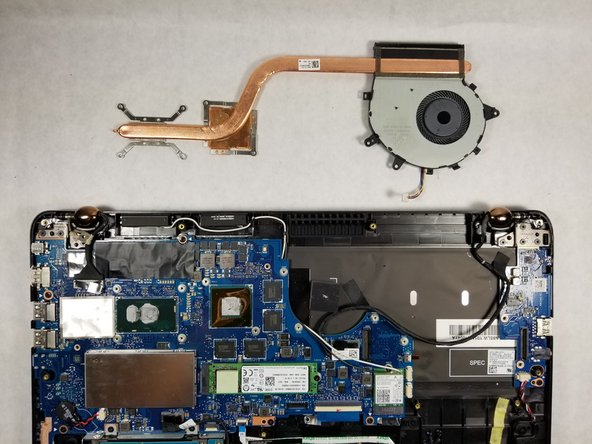
Gently pull vertically on the CPU fan/ heat sink assembly until it is free.
-
-
-
-
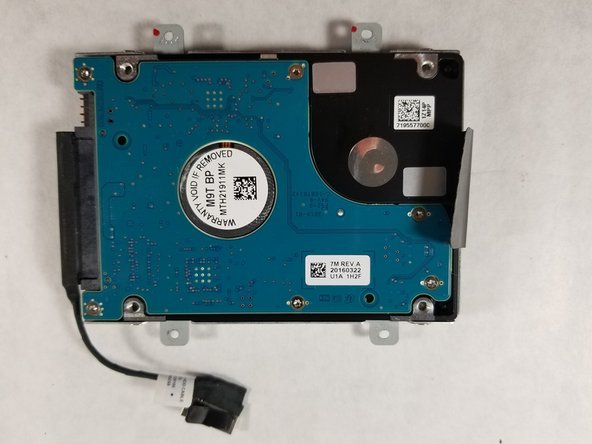
Using a Phillips #00 screwdriver remove the four screws of the metal casing
-
Remove the hard disk from the metal casing
-
-
-
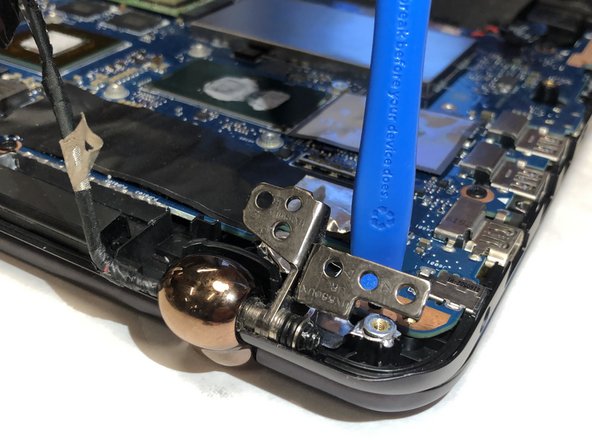
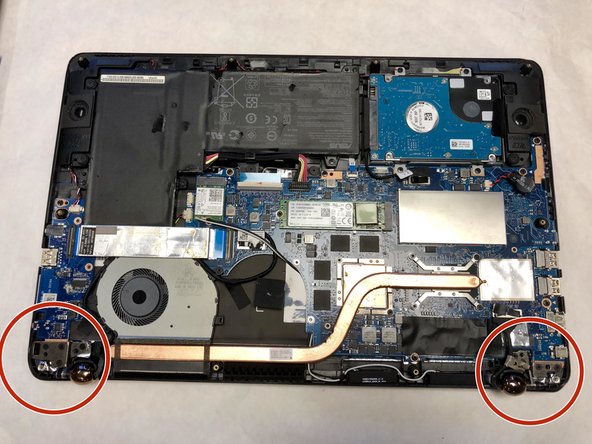
Remove the screws holding the hinges down on both sides of the device.
-
A pry tool might be needed to lift the hinge.
-


To reassemble your device, follow these instructions in reverse order.
To reassemble your device, follow these instructions in reverse order.
Rückgängig: Ich habe diese Anleitung nicht absolviert.
2 weitere Personen haben diese Anleitung absolviert.
Team

IUPUI, Team S1-G9, Hovde Fall 2019 Mitglied von IUPUI, Team S1-G9, Hovde Fall 2019
IUPUI-HOVDE-F19S1G9
4 Mitglieder
2 Anleitungen geschrieben