Einleitung
This guide will show you how to replace the RAM in your Asus Q534U laptop. Perhaps your laptop is experiencing slow-downs with multiple programs open, signaling that you may need to upgrade to a larger amount of RAM. Or maybe your laptop won’t boot, indicating that your current RAM may be faulty. If you need to upgrade to a larger capacity RAM stick, or if your current RAM is faulty and in need of replacement, this guide will help you through the process.
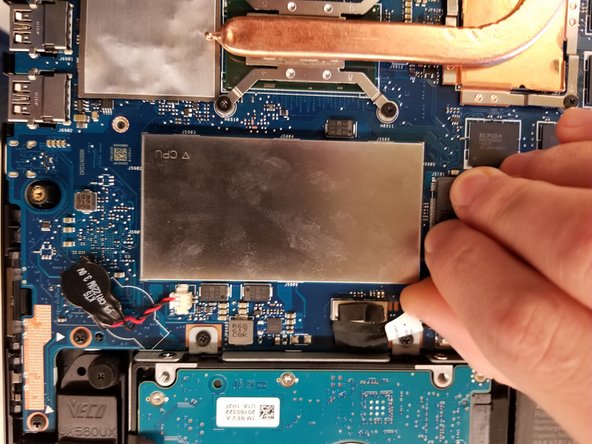
The RAM is located underneath a metal cover on the motherboard so it will not be immediately visible upon opening the case. However, the metal cover can be easily pried from the motherboard, for it is affixed by a clip mechanism rather than screws or glue. To replace the metal cover, be sure to align all four sides of the cover with each of the clips and simply press it into place.
Was du brauchst
-
-
Use a T5 screwdriver to remove all 10 screws that secure the bottom cover.
-
Pull off the back cover of the laptop.
-
-
-
Wedge an opening tool under the battery's bundled cable connector, and gently pry the connector up and to disconnect the battery.
Step 2 I did not realize that the pictures to the right were enlarged for easier understanding of the step. Great walk through even a 66 year old man could understand and do it. Got the I Fix It tools which made opening the case and working with the tiny screws a breeze.
-
-
-
-
Lift up the black tab next to the silver ribbon cable.
-
Pull lightly on the blue tabs until the silver cable is free.
Before doing anything here I would highly recommend disconnecting the buttery. I didn't do it myself at the beginning and when removing this ribbon cable I caused sparks going off the right connector.
Great suggestion, Alex! This guide should now reflect a safer and more accurate procedure. Thanks for the heads-up.
Richard -
To clarify: you need to flip up the black plastic tab of the recepticle, not the cable. Then don't pull the blue tab up, you need to angle it up just a little bit, about 15 degrees, then slide the cable out.
-
-
-
Use a Phillips #00 screwdriver to remove the 5 marked screws.
-
Gently remove the battery.
-
-
-
Locate the metal RAM cover
-
Pull the metal tab on the corner of the metal cover to lift the cover from its clips
-
-
-
While pushing out the metal clips on both sides of the RAM, lift up the RAM to release it
-
Pull the RAM out gently and bring it up from the slot
There has to be another Slot underneath the motherboard unless its somehow built in. I replaced this 8 with a 16 and the machine now says I have a total 24gb. Any tips on how to get to the other 8 card?
Any idea if the one, 8gb ram stick can be replaced with 32 gb?
Did you ever find the other DIMM slot? I’m looking for it still.
I replaced the one 8GB DIMM with a 16GB DIMM giving me a total of 24GB like you did.
I had a hard time finding unbuffered - non ECC memory which is faster than the other kind.
I wonder if the other kind would work too? I think it would.
I’m almost sure that there is NOT another DIMM slot on the opposite side of the board.
ASUS won’t even admit that the 8GB chip can be replaced with a 16GB chip.
Do you know if it can be replaced with 32 GB RAM?
Why do steps #2 and #3 need to be done, can’t we just disconnect the battery cable?
Did anyone find the other slot?
This machine has 8 Gb soldered to the board, there is only one DIMM for adding/expanding memory.
-


To reassemble your device, follow these instructions in reverse order.
To reassemble your device, follow these instructions in reverse order.
Rückgängig: Ich habe diese Anleitung nicht absolviert.
5 weitere Nutzer:innen haben diese Anleitung absolviert.
Team

UMass Dartmouth, Team S66-G6, Rockett Fall 2017 Mitglied von UMass Dartmouth, Team S66-G6, Rockett Fall 2017
UMASSD-ROCKETT-F17S66G6
3 Mitglieder
5 Anleitungen geschrieben
3 Kommentare
One question: I have this model and have determined that I have a bad stick of RAM. I have removed this stick but still have 8 gigs available. Is there another stick that I m not seeing or is this built in?
There are 4, 2GB chips of ram, hard built into the motherboard. Located right above the SSD m.2 bay, and beside the copper cooling line. This model of Laptop has one RAM bay, I'm not sure how the Built in and Bay RAM work together but for all intents and purposes, just assume you are only using the Bay for RAM. @svggrk @elijahelliott