Zum Hauptinhalt wechseln
Gemeinsam reparieren - Jetzt registrieren

Asus ROG G53SW-XT1 Back Panel Replacement

Was du brauchst

    1. Asus ROG G53SW-XT1 Back Panel Replacement, Battery: Schritt 1, Bild 1 von 1
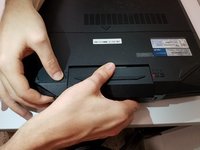
      • Unplug the power cable and flip the computer over.

      Frag FixBot

      Kommentar hinzufügen

    2. Asus ROG G53SW-XT1 Back Panel Replacement: Schritt 2, Bild 1 von 1
      • Unlock the battery by pushing the switch to the right.

      Frag FixBot

      Kommentar hinzufügen

    3. Asus ROG G53SW-XT1 Back Panel Replacement: Schritt 3, Bild 1 von 2 Asus ROG G53SW-XT1 Back Panel Replacement: Schritt 3, Bild 2 von 2
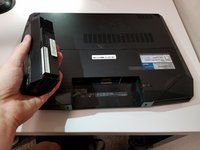
      • Push and hold the left switch, then pull the battery out.

      Frag FixBot

      Kommentar hinzufügen

    1. Asus ROG G53SW-XT1 Back Panel Replacement, Keyboard: Schritt 4, Bild 1 von 3 Asus ROG G53SW-XT1 Back Panel Replacement, Keyboard: Schritt 4, Bild 2 von 3 Asus ROG G53SW-XT1 Back Panel Replacement, Keyboard: Schritt 4, Bild 3 von 3
      • Insert a spudger, or plastic opening tool, into these five slots and pry upwards to pop up the keyboard.

      Frag FixBot

      Kommentar hinzufügen

    2. Asus ROG G53SW-XT1 Back Panel Replacement: Schritt 5, Bild 1 von 3 Asus ROG G53SW-XT1 Back Panel Replacement: Schritt 5, Bild 2 von 3 Asus ROG G53SW-XT1 Back Panel Replacement: Schritt 5, Bild 3 von 3
      • Disconnect the keyboard ribbon cables from the motherboard.

      Frag FixBot

      Kommentar hinzufügen

    1. Asus ROG G53SW-XT1 Back Panel Replacement, Back Panel: Schritt 6, Bild 1 von 3 Asus ROG G53SW-XT1 Back Panel Replacement, Back Panel: Schritt 6, Bild 2 von 3 Asus ROG G53SW-XT1 Back Panel Replacement, Back Panel: Schritt 6, Bild 3 von 3
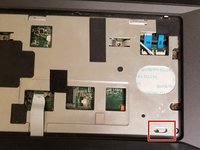
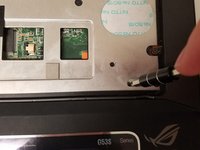
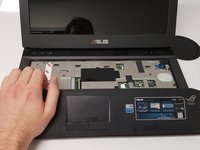
      • Insert your screwdriver into the locking mechanism and slide it to the left. This will unlock the hand rest and allow you to pull it free.

      Frag FixBot

      Kommentar hinzufügen

    2. Asus ROG G53SW-XT1 Back Panel Replacement: Schritt 7, Bild 1 von 1
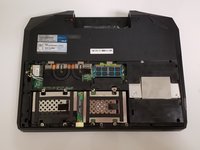
      • Remove the fourteen Phillips #0 screws.

      Frag FixBot

      Kommentar hinzufügen

    3. Asus ROG G53SW-XT1 Back Panel Replacement: Schritt 8, Bild 1 von 2 Asus ROG G53SW-XT1 Back Panel Replacement: Schritt 8, Bild 2 von 2
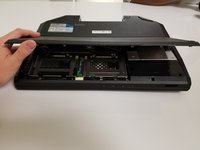
      • Flip the laptop over and pull off the bottom cover.

      Frag FixBot

      Kommentar hinzufügen

Abschluss

To reassemble your device, follow these instructions in reverse order.

Rückgängig: Ich habe diese Anleitung nicht absolviert.

2 weitere Personen haben diese Anleitung absolviert.

0 Kommentare zur Anleitung

Kommentar hinzufügen

Seitenaufrufe:

Letzte 24 Stunden: 1

Letzte 7 Tage: 6

Letzte 30 Tage: 29

Insgesamt: 1,018