Zum Hauptinhalt wechseln

Asus ROG G751JL-DS71 Central Processing Unit Replacement

Was du brauchst

  1. Asus ROG G751JL-DS71 Central Processing Unit Replacement, Central Processing Unit: Schritt 1, Bild 1 von 2 Asus ROG G751JL-DS71 Central Processing Unit Replacement, Central Processing Unit: Schritt 1, Bild 2 von 2
    • Lift the rubber cover found on the bottom of the laptop.

    • Remove the 5.2 mm screw with a Phillips 1 Screwdriver

  2. Asus ROG G751JL-DS71 Central Processing Unit Replacement: Schritt 2, Bild 1 von 3 Asus ROG G751JL-DS71 Central Processing Unit Replacement: Schritt 2, Bild 2 von 3 Asus ROG G751JL-DS71 Central Processing Unit Replacement: Schritt 2, Bild 3 von 3
    • Use the standard spudger to remove the back center panel.

  3. Asus ROG G751JL-DS71 Central Processing Unit Replacement: Schritt 3, Bild 1 von 3 Asus ROG G751JL-DS71 Central Processing Unit Replacement: Schritt 3, Bild 2 von 3 Asus ROG G751JL-DS71 Central Processing Unit Replacement: Schritt 3, Bild 3 von 3
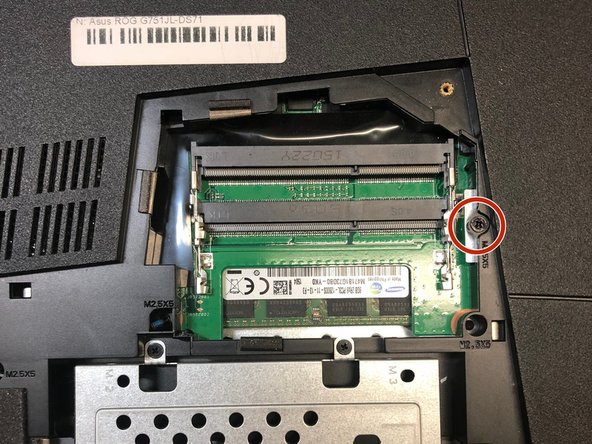
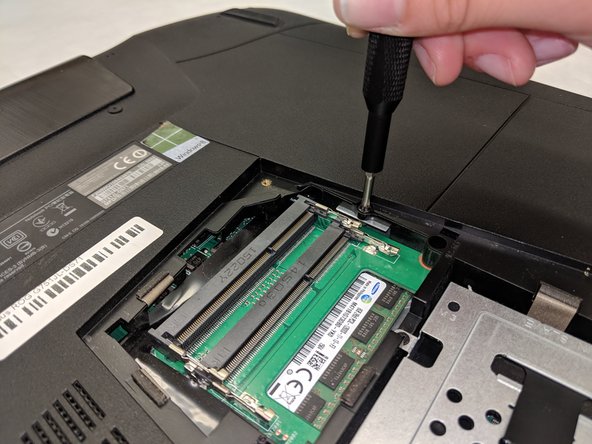
    • Use a Phillips 1 Screwdriver to remove the 5 mm screw that is located underneath the back panel.

  4. Asus ROG G751JL-DS71 Central Processing Unit Replacement: Schritt 4, Bild 1 von 2 Asus ROG G751JL-DS71 Central Processing Unit Replacement: Schritt 4, Bild 2 von 2
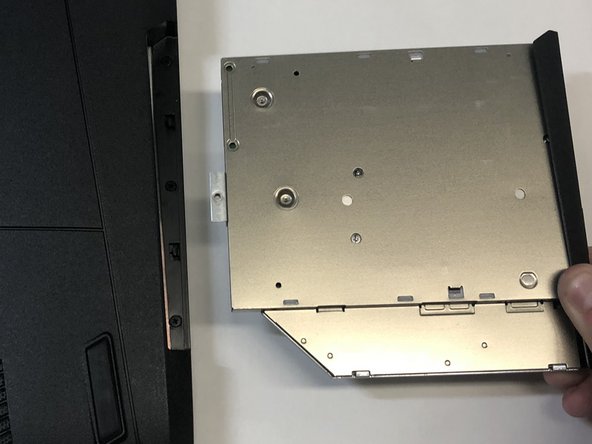
    • Pull out the optical drive found on the side of the laptop.

  5. Asus ROG G751JL-DS71 Central Processing Unit Replacement: Schritt 5, Bild 1 von 3 Asus ROG G751JL-DS71 Central Processing Unit Replacement: Schritt 5, Bild 2 von 3 Asus ROG G751JL-DS71 Central Processing Unit Replacement: Schritt 5, Bild 3 von 3
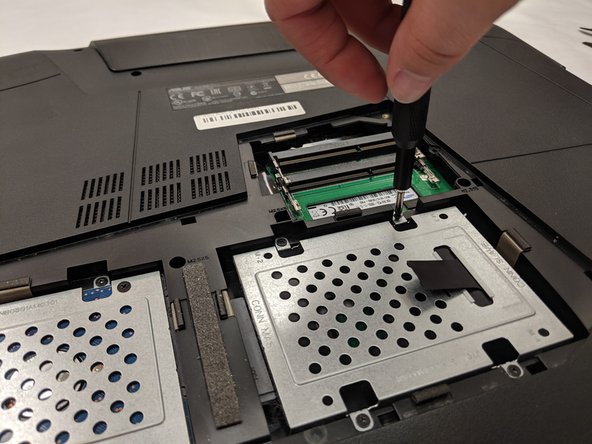
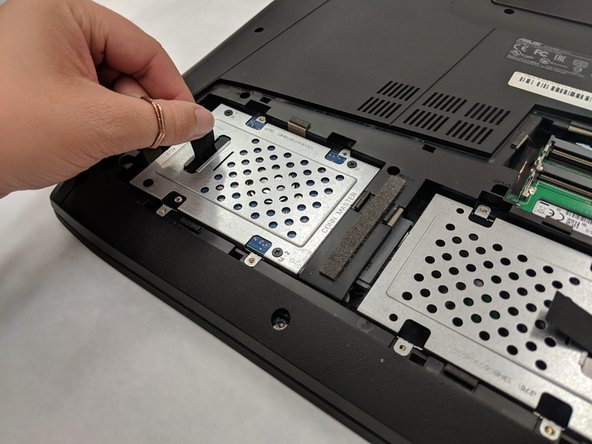
    • Remove the screws holding the hard drives in place using a phillips #1 screwdriver.

    • Using the small flaps, remove the hard drives by hand.

  6. Asus ROG G751JL-DS71 Central Processing Unit Replacement: Schritt 6, Bild 1 von 2 Asus ROG G751JL-DS71 Central Processing Unit Replacement: Schritt 6, Bild 2 von 2
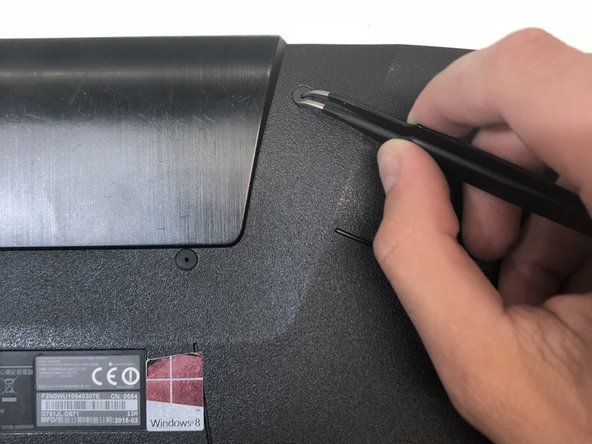
    • Use a pair of tweezers to remove the top four rubber stoppers found on the bottom of the laptop.

  7. Asus ROG G751JL-DS71 Central Processing Unit Replacement: Schritt 7, Bild 1 von 2 Asus ROG G751JL-DS71 Central Processing Unit Replacement: Schritt 7, Bild 2 von 2
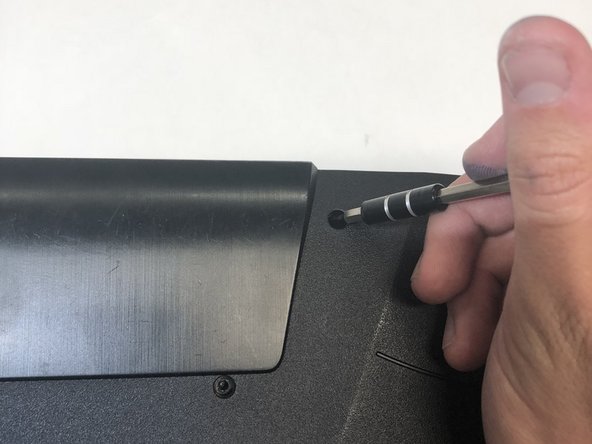
    • Use a Phillips 1 Screwdriver to remove the top four 8.5 mm screws.

  8. Asus ROG G751JL-DS71 Central Processing Unit Replacement: Schritt 8, Bild 1 von 3 Asus ROG G751JL-DS71 Central Processing Unit Replacement: Schritt 8, Bild 2 von 3 Asus ROG G751JL-DS71 Central Processing Unit Replacement: Schritt 8, Bild 3 von 3
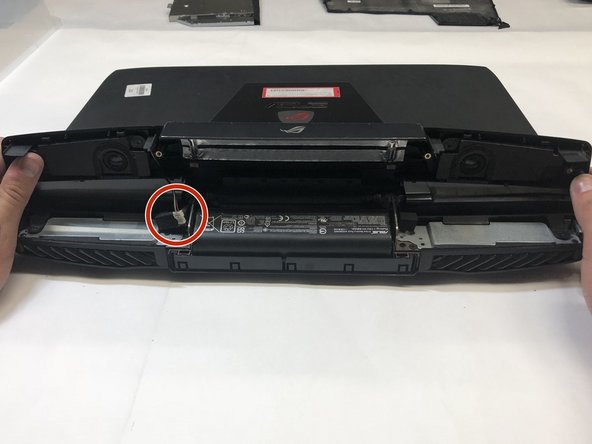
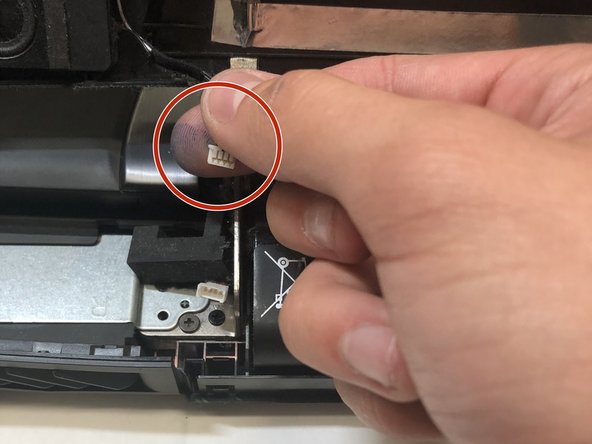
    • Use a metal spudger to carefully pry the top back panel off.

    • While removing the top back panel, be careful not to break the four pin connector located underneath.

    • Disconnect the four-pin connector and remove the top back panel from the computer.

  9. Asus ROG G751JL-DS71 Central Processing Unit Replacement: Schritt 9, Bild 1 von 1
    • Use a Phillips 1 Screwdriver to remove the four 6.8 mm screws underneath the back panel.

  10. Asus ROG G751JL-DS71 Central Processing Unit Replacement: Schritt 10, Bild 1 von 1
    • Use a Phillips 1 Screwdriver to remove the ten 5.2 mm screws holding the main panel in place.

  11. Asus ROG G751JL-DS71 Central Processing Unit Replacement: Schritt 11, Bild 1 von 3 Asus ROG G751JL-DS71 Central Processing Unit Replacement: Schritt 11, Bild 2 von 3 Asus ROG G751JL-DS71 Central Processing Unit Replacement: Schritt 11, Bild 3 von 3
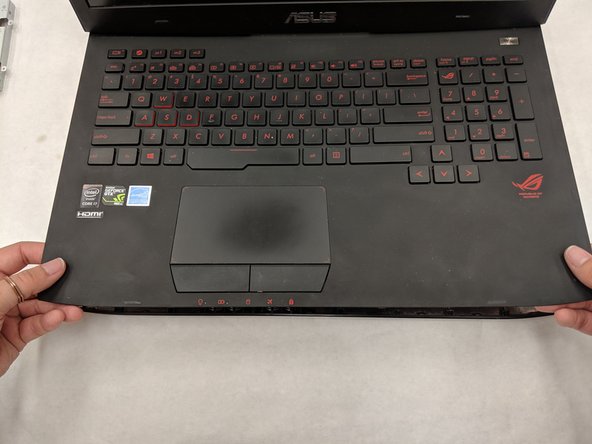
    • Use a metal opening tool to pry the keyboard from the base of the laptop.

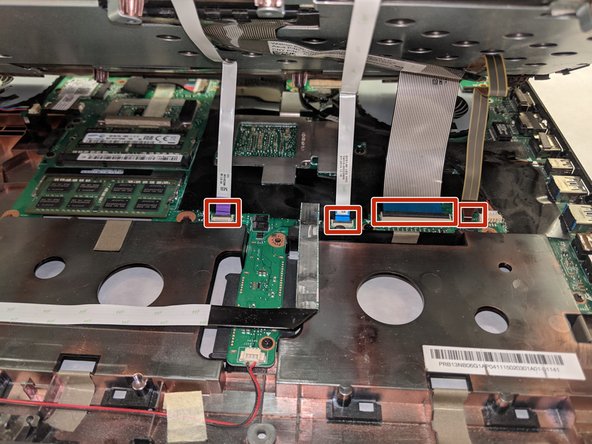
    • Lift the keyboard carefully so as to not tear or break the four ribbon connectors underneath the keyboard.

  12. Asus ROG G751JL-DS71 Central Processing Unit Replacement: Schritt 12, Bild 1 von 2 Asus ROG G751JL-DS71 Central Processing Unit Replacement: Schritt 12, Bild 2 von 2
    • Use a pair of tweezers to undo each of the four ribbon connectors.

    • The keyboard is now completely disconnected from the laptop and you can remove it.

  13. Asus ROG G751JL-DS71 Central Processing Unit Replacement: Schritt 13, Bild 1 von 3 Asus ROG G751JL-DS71 Central Processing Unit Replacement: Schritt 13, Bild 2 von 3 Asus ROG G751JL-DS71 Central Processing Unit Replacement: Schritt 13, Bild 3 von 3
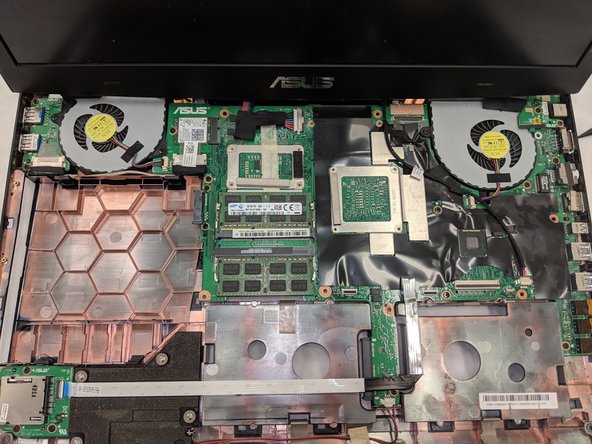
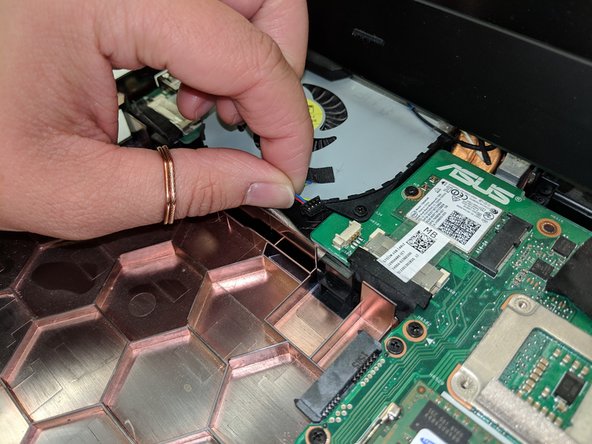
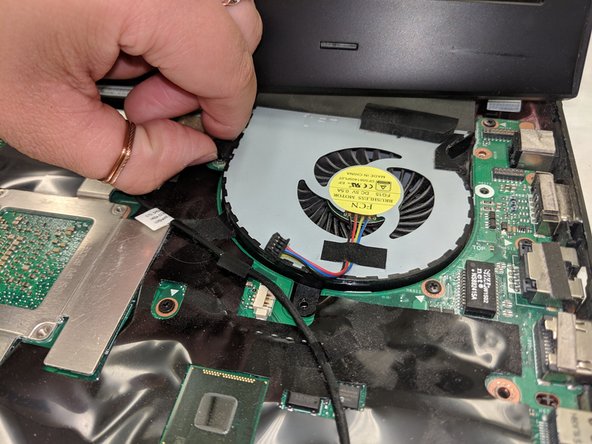
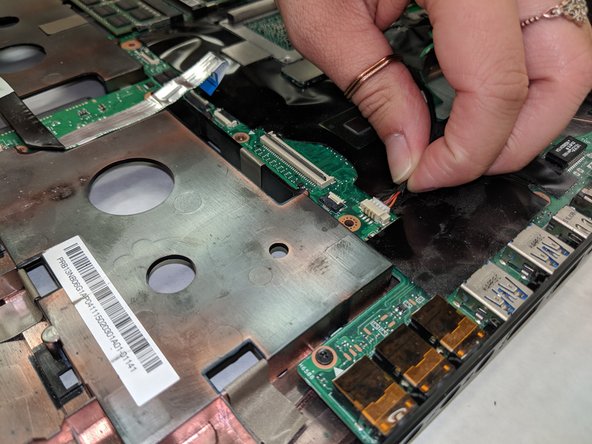
    • Remove the ribbon that connect the fans.

  14. Asus ROG G751JL-DS71 Central Processing Unit Replacement: Schritt 14, Bild 1 von 2 Asus ROG G751JL-DS71 Central Processing Unit Replacement: Schritt 14, Bild 2 von 2
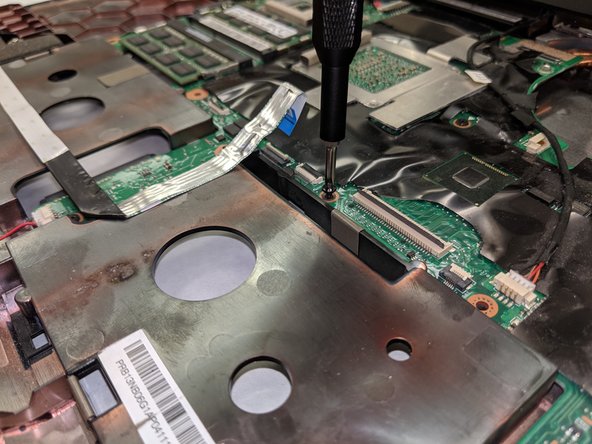
    • Remove the ribbon cables connected to the motherboard.

    remove fan missing

    jpfroud - Antwort

  15. Asus ROG G751JL-DS71 Central Processing Unit Replacement: Schritt 15, Bild 1 von 3 Asus ROG G751JL-DS71 Central Processing Unit Replacement: Schritt 15, Bild 2 von 3 Asus ROG G751JL-DS71 Central Processing Unit Replacement: Schritt 15, Bild 3 von 3
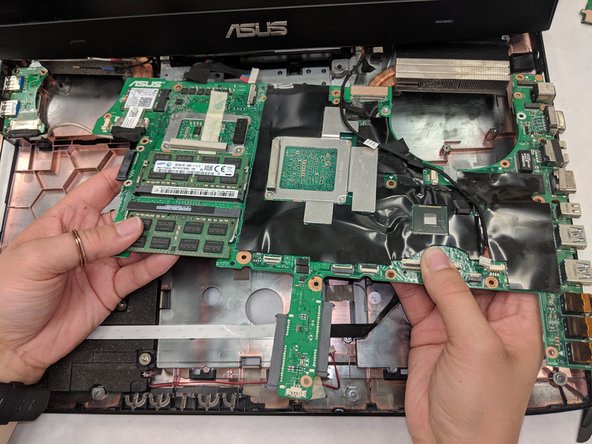
    • Remove the screws holding in the motherboard using a Phillips 0 screwdriver.

    • Remove the motherboard by hand. Be careful as the radiators for the fans are connected underneath the screen.

    some screws shouldn’t be removed and some other shoud (not mentionned)

    jpfroud - Antwort

  16. Asus ROG G751JL-DS71 Central Processing Unit Replacement: Schritt 16, Bild 1 von 3 Asus ROG G751JL-DS71 Central Processing Unit Replacement: Schritt 16, Bild 2 von 3 Asus ROG G751JL-DS71 Central Processing Unit Replacement: Schritt 16, Bild 3 von 3
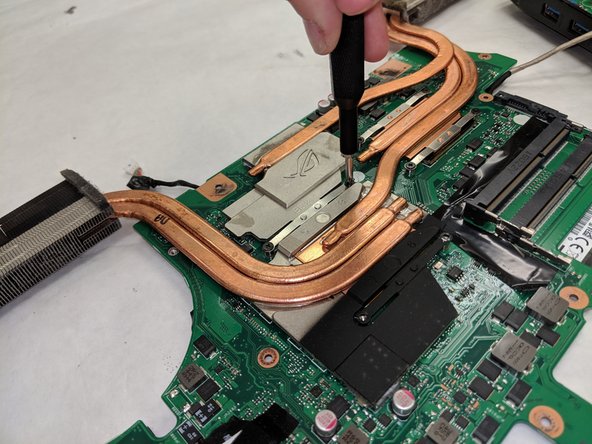
    • Remove the screws holding in the motherboard using a Phillips 0 screwdriver.

    • Remove the heat sink by hand. Be careful not to get thermal paste on your hand

  17. Asus ROG G751JL-DS71 Central Processing Unit Replacement: Schritt 17, Bild 1 von 2 Asus ROG G751JL-DS71 Central Processing Unit Replacement: Schritt 17, Bild 2 von 2
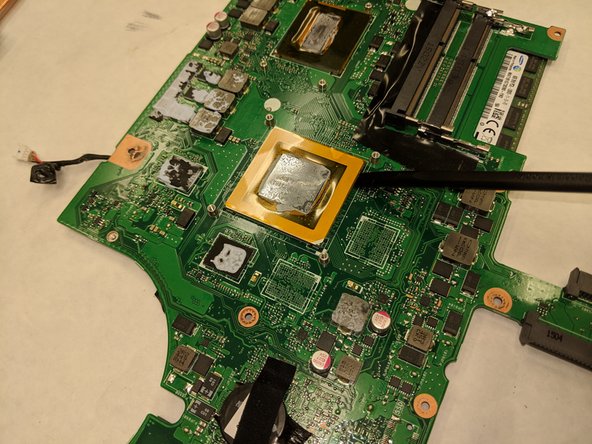
    • The CPU can then be removed with a regular spudger.

    • The CPU is now completely disconnected from the laptop and you can remove it.

    Okay, I'm really confused, first the thing that you are pointing to in the images is the gpu not the cpu, and... you say that you can take it out with a spudger...? This has to be a joke guide

    XPenacoba - Antwort

Abschluss

To reassemble your device, follow these instructions in reverse order.

Justin Keathley

Mitglied seit: 04/01/19

265 Reputation

1 Anleitung geschrieben

Team

IUPUI, Team S8-G8, Wilson Spring 2019 Mitglied von IUPUI, Team S8-G8, Wilson Spring 2019

IUPUI-WILSON-S19S8G8

4 Mitglieder

3 Anleitungen geschrieben

2 Kommentare

Hi Justin, if I were to remove the motherboard and insert a new one using your procedure would I have to change anything in the bios or will just a physical switch do the thing.

kikiluthra - Antwort

I was following this guide normally but then I saw the last step... are you f***ing kidding me?! You DO NOT PRY OFF that chip!! It's a BGA connection and you WILL destroy it. If you need your CPU or GPU replaced, either buy a new motherboard or seek a professional's service that replaces chips like that. But yikes, an iFixit guide that's pretty coherent yet the last step implies removing the chip and damaging it... I must be hallucinating. If anyone did mindlessly follow this guide without prior experience... you have my deepest condolences.

k24a1 - Antwort

Kommentar hinzufügen

Seitenaufrufe:

Letzte 24 Stunden: 0

Letzte 7 Tage: 1

Letzte 30 Tage: 47

Insgesamt: 749