Diese Version enthält möglicherweise inkorrekte Änderungen. Wechsle zur letzten geprüften Version.
Was du brauchst
-
Dieser Schritt ist noch nicht übersetzt. Hilf mit, ihn zu übersetzen!
-
Lift the rubber cover found on the bottom of the laptop.
-
Remove the 5.2 mm screw with a Phillips 1 Screwdriver.
-
-
Dieser Schritt ist noch nicht übersetzt. Hilf mit, ihn zu übersetzen!
-
Use the nylon spudger to remove the back center panel.
-
-
Dieser Schritt ist noch nicht übersetzt. Hilf mit, ihn zu übersetzen!
-
Use a Phillips 1 Screwdriver to remove the 5 mm screw that is located underneath the back panel.
-
-
Dieser Schritt ist noch nicht übersetzt. Hilf mit, ihn zu übersetzen!
-
Pull out the optical drive found on the side of the laptop.
-
-
-
Dieser Schritt ist noch nicht übersetzt. Hilf mit, ihn zu übersetzen!
-
Use a pair of tweezers to remove the top four rubber stoppers found on the bottom of the laptop.
-
-
Dieser Schritt ist noch nicht übersetzt. Hilf mit, ihn zu übersetzen!
-
Use a Phillips 1 Screwdriver to remove the top four 8.5 mm screws.
-
-
Dieser Schritt ist noch nicht übersetzt. Hilf mit, ihn zu übersetzen!
-
Use a nylon spudger to carefully pry the top back panel off.
-
Disconnect the four-pin connector and remove the top back panel from the computer.
-
-
Dieser Schritt ist noch nicht übersetzt. Hilf mit, ihn zu übersetzen!
-
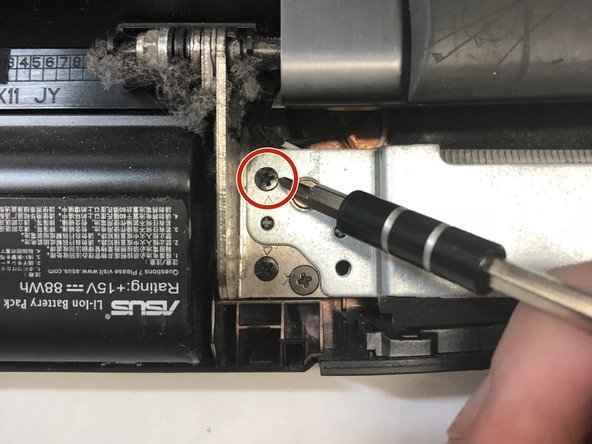
Use a Phillips 1 Screwdriver to remove the four 6.8 mm screws underneath the back panel.
-
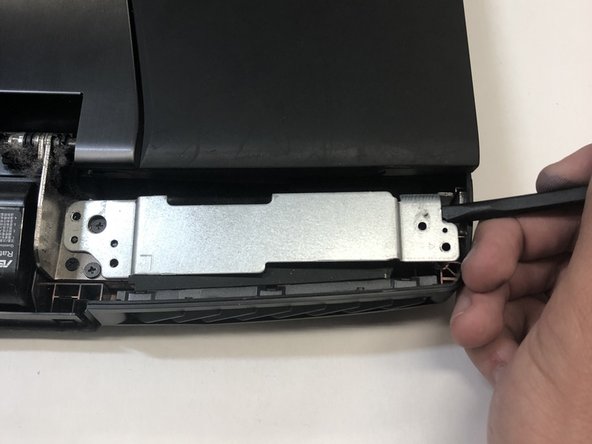
Lift away the metal housings from each side of the laptop.
-
-
Dieser Schritt ist noch nicht übersetzt. Hilf mit, ihn zu übersetzen!
-
Use a Phillips 1 Screwdriver to remove the ten 5.2 mm screws holding the main panel in place.
-
Use a Phillips 1 Screwdriver to remove the four 5.2 mm screws underneath the center panel.
-
-
Dieser Schritt ist noch nicht übersetzt. Hilf mit, ihn zu übersetzen!
-
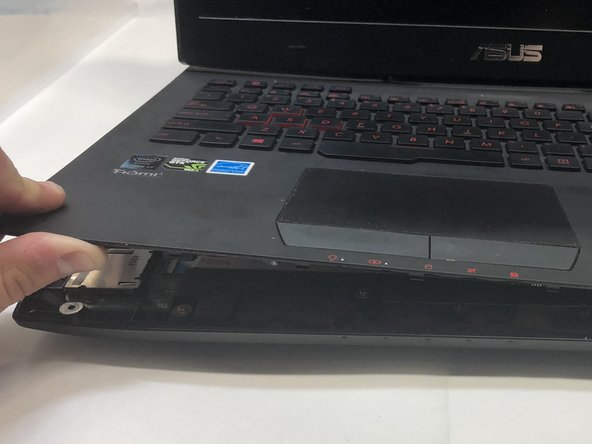
Use a plastic opening tool to pry the keyboard from the base of the laptop.
-
-
Dieser Schritt ist noch nicht übersetzt. Hilf mit, ihn zu übersetzen!
-
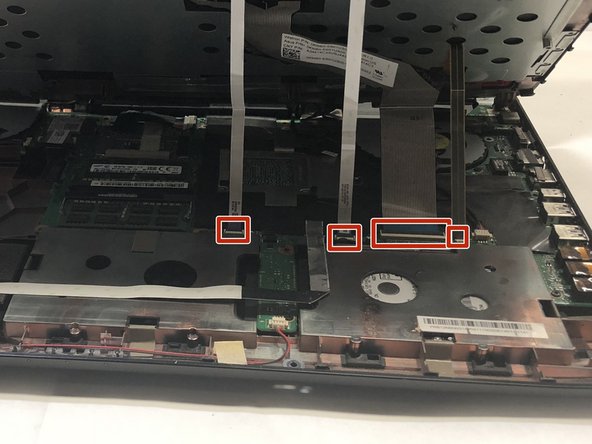
Use a pair of tweezers to undo each of the four ribbon connectors.
-
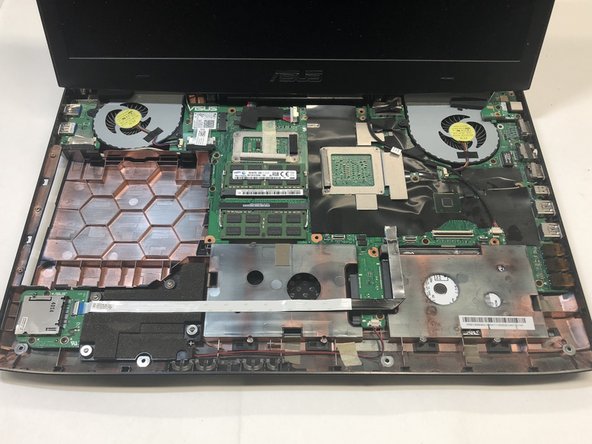
The keyboard is now completely disconnected from the laptop and you can remove it.
-
Rückgängig: Ich habe diese Anleitung nicht absolviert.
2 weitere Nutzer:innen haben diese Anleitung absolviert.
Ein Kommentar
Only shows you how to remove keyboard panel from chasis, not how to actually remove the keyborad from the keyboard panel to replace. sad.


