Diese Version enthält möglicherweise inkorrekte Änderungen. Wechsle zur letzten geprüften Version.
Was du brauchst
-
Dieser Schritt ist noch nicht übersetzt. Hilf mit, ihn zu übersetzen!
-
Lift the rubber cover found on the bottom of the laptop.
-
Remove the 5.2 mm screw with a Phillips 1 Screwdriver.
-
-
Dieser Schritt ist noch nicht übersetzt. Hilf mit, ihn zu übersetzen!
-
Use the nylon spudger to remove the back center panel.
-
-
Dieser Schritt ist noch nicht übersetzt. Hilf mit, ihn zu übersetzen!
-
Use a Phillips 1 Screwdriver to remove the 5 mm screw that is located underneath the back panel.
-
-
Dieser Schritt ist noch nicht übersetzt. Hilf mit, ihn zu übersetzen!
-
Pull out the optical drive found on the side of the laptop.
-
-
-
Dieser Schritt ist noch nicht übersetzt. Hilf mit, ihn zu übersetzen!
-
Use a pair of tweezers to remove the top four rubber stoppers found on the bottom of the laptop.
-
-
Dieser Schritt ist noch nicht übersetzt. Hilf mit, ihn zu übersetzen!
-
Use a Phillips 1 Screwdriver to remove the top four 8.5 mm screws.
-
-
Dieser Schritt ist noch nicht übersetzt. Hilf mit, ihn zu übersetzen!
-
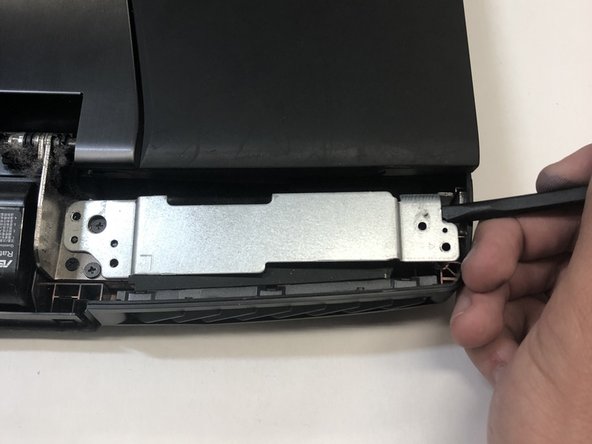
Use a nylon spudger to carefully pry the top back panel off.
-
Disconnect the four-pin connector and remove the top back panel from the computer.
-
-
Dieser Schritt ist noch nicht übersetzt. Hilf mit, ihn zu übersetzen!
-
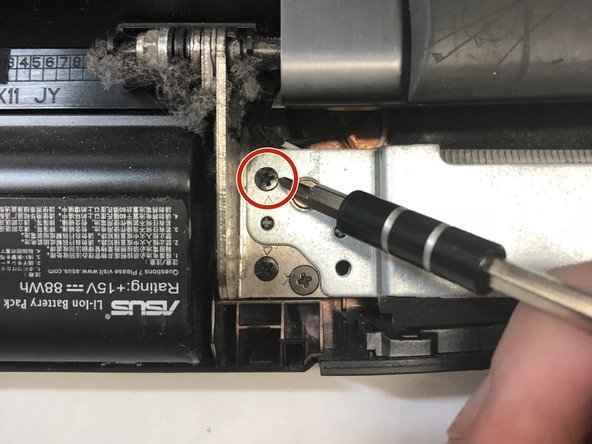
Use a Phillips 1 Screwdriver to remove the four 6.8 mm screws underneath the back panel.
-
Lift away the metal housings from each side of the laptop.
-
-
Dieser Schritt ist noch nicht übersetzt. Hilf mit, ihn zu übersetzen!
-
Use a Phillips 1 Screwdriver to remove the ten 5.2 mm screws holding the main panel in place.
-
Use a Phillips 1 Screwdriver to remove the four 5.2 mm screws underneath the center panel.
-
-
Dieser Schritt ist noch nicht übersetzt. Hilf mit, ihn zu übersetzen!
-
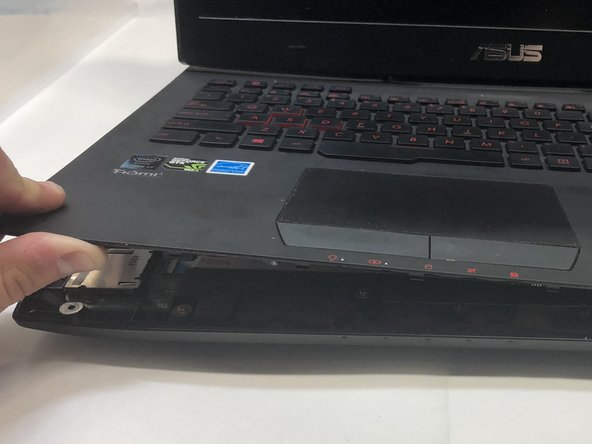
Use a plastic opening tool to pry the keyboard from the base of the laptop.
-
-
Dieser Schritt ist noch nicht übersetzt. Hilf mit, ihn zu übersetzen!
-
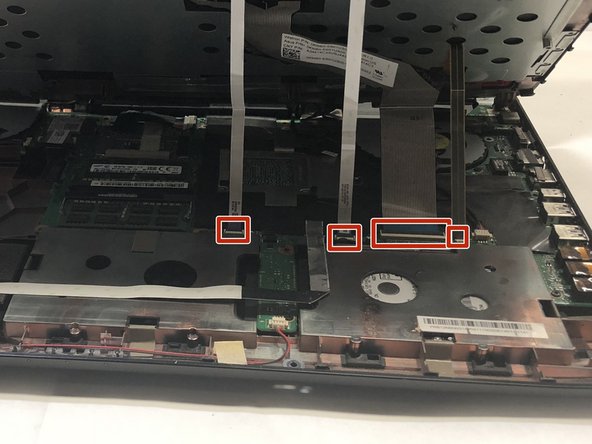
Use a pair of tweezers to undo each of the four ribbon connectors.
-
The keyboard is now completely disconnected from the laptop and you can remove it.
-
-
Dieser Schritt ist noch nicht übersetzt. Hilf mit, ihn zu übersetzen!
-
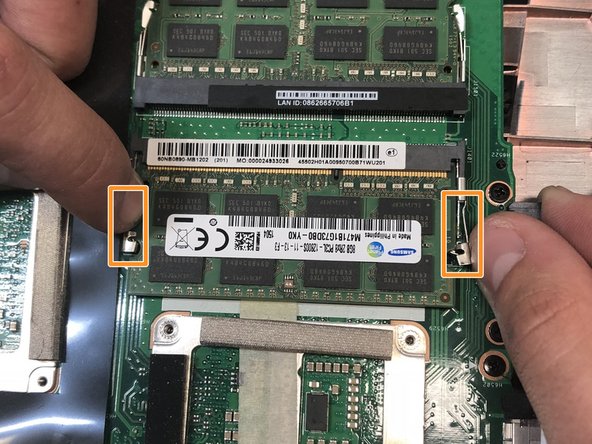
First locate the RAM.
-
Then pull the tabs located on the left and right of the RAM outwards to release the RAM.
-
You can now remove the RAM and replace it.
-


Rückgängig: Ich habe diese Anleitung nicht absolviert.
Ein:e weitere:r Nutzer:in hat diese Anleitung absolviert.
Team

Cal Poly, Team S16-G1, Banghart Winter 2018 Mitglied von Cal Poly, Team S16-G1, Banghart Winter 2018
CPSU-BANGHART-W18S16G1
4 Mitglieder
22 Anleitungen geschrieben