Zum Hauptinhalt wechseln
Gemeinsam reparieren - Jetzt registrieren

Asus TUF Gaming FX505DY Motherboard Replacement

Was du brauchst

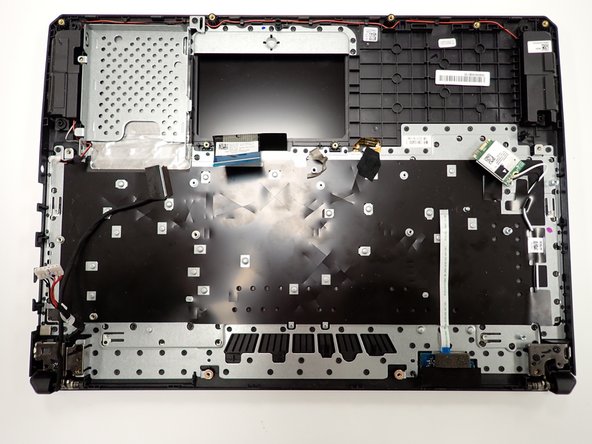
  1. Asus TUF Gaming FX505DY Motherboard Replacement, Back Case: Schritt 1, Bild 1 von 1
    • Turn off the laptop.

    • Disconnect the charging cable.

    • Failure to disconnect the charging cable and power down the computer could result in personal or property damage.

    • Flip the laptop so the back is facing up.

    Frag FixBot

    Kommentar hinzufügen

  2. Asus TUF Gaming FX505DY Motherboard Replacement: Schritt 2, Bild 1 von 2 Asus TUF Gaming FX505DY Motherboard Replacement: Schritt 2, Bild 2 von 2
    • Use a Phillips #1 screwdriver to remove the five 6 mm screws that secure the back panel.

    • Use the same screwdriver to remove the six 13 mm screws securing the back panel.

    Frag FixBot

    Kommentar hinzufügen

  3. Asus TUF Gaming FX505DY Motherboard Replacement: Schritt 3, Bild 1 von 2 Asus TUF Gaming FX505DY Motherboard Replacement: Schritt 3, Bild 2 von 2
    • Insert the plastic opening tool at a corner and pry up along the edges, leaving the back side with the hinges for last.

    • Do not insert the opening tool too far into the laptop to avoid damaging internal components.

    Frag FixBot

    Kommentar hinzufügen

  4. Asus TUF Gaming FX505DY Motherboard Replacement: Schritt 4, Bild 1 von 2 Asus TUF Gaming FX505DY Motherboard Replacement: Schritt 4, Bild 2 von 2
    • Gently lift up the back panel to release any remaining clips on the side with the hinges and remove the panel.

    Frag FixBot

    Kommentar hinzufügen

  5. Asus TUF Gaming FX505DY Motherboard Replacement, Motherboard: Schritt 5, Bild 1 von 3 Asus TUF Gaming FX505DY Motherboard Replacement, Motherboard: Schritt 5, Bild 2 von 3 Asus TUF Gaming FX505DY Motherboard Replacement, Motherboard: Schritt 5, Bild 3 von 3
    • With a Phillips 0-bit screwdriver, remove eight 5.0 mm screws on the silver brackets

    • With a Phillips 0-bit screwdriver, remove two 5.0 mm screws holding the edge of the fans in place

    Frag FixBot

    Kommentar hinzufügen

  6. Asus TUF Gaming FX505DY Motherboard Replacement: Schritt 6, Bild 1 von 3 Asus TUF Gaming FX505DY Motherboard Replacement: Schritt 6, Bild 2 von 3 Asus TUF Gaming FX505DY Motherboard Replacement: Schritt 6, Bild 3 von 3
    • Gently remove all power cables connecting the fans to the motherboard.

    • Once all cables and screws are removed, carefully lift up and remove the fans and heat sink

    Frag FixBot

    Kommentar hinzufügen

  7. Asus TUF Gaming FX505DY Motherboard Replacement: Schritt 7, Bild 1 von 2 Asus TUF Gaming FX505DY Motherboard Replacement: Schritt 7, Bild 2 von 2
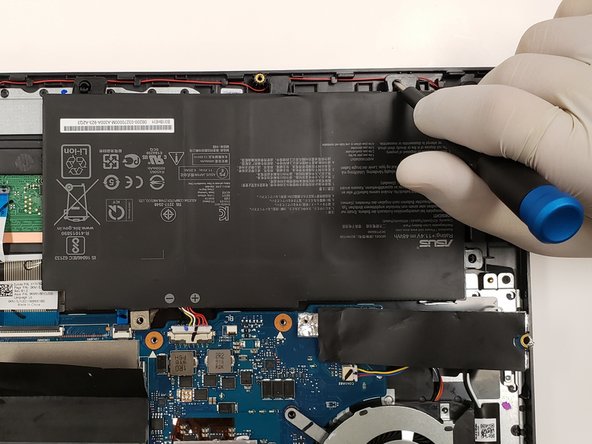
    • With a Phillips 0-bit screwdriver, unscrew four 5.0 mm screws.

    • Disconnect the primary connector cable located at the bottom left and carefully remove the module.

    Frag FixBot

    Kommentar hinzufügen

  8. Asus TUF Gaming FX505DY Motherboard Replacement: Schritt 8, Bild 1 von 3 Asus TUF Gaming FX505DY Motherboard Replacement: Schritt 8, Bild 2 von 3 Asus TUF Gaming FX505DY Motherboard Replacement: Schritt 8, Bild 3 von 3
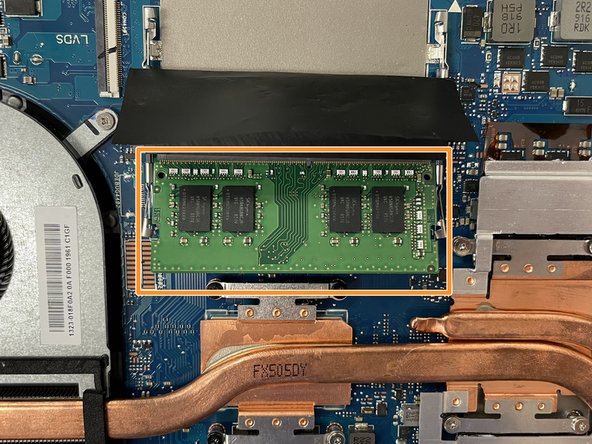
    • Removing the ram, push down unto the ram and move the metal locking tabs to the side by lifting upward slightly then moving each to their outside.

    • Pull the ram out toward the angle when the ram is sticking up at an angle when released.

    Frag FixBot

    Kommentar hinzufügen

  9. Asus TUF Gaming FX505DY Motherboard Replacement: Schritt 9, Bild 1 von 2 Asus TUF Gaming FX505DY Motherboard Replacement: Schritt 9, Bild 2 von 2
    • With a Phillips 0-bit screwdriver, unscrew four 5.0 mm top screws holding the hard drive in place.

    • Pinch the top left corner with your finger and slide the harddrive out of its casing.

    Frag FixBot

    Kommentar hinzufügen

  10. Asus TUF Gaming FX505DY Motherboard Replacement: Schritt 10, Bild 1 von 2 Asus TUF Gaming FX505DY Motherboard Replacement: Schritt 10, Bild 2 von 2
    • With a Phillips 0-bit screwdriver, unscrew two 5.0 mm screws holding SSD down to the motherboard on the right side of the board

    • Slide module out of protective casing to remove piece.

    Frag FixBot

    Kommentar hinzufügen

  11. Asus TUF Gaming FX505DY Motherboard Replacement: Schritt 11, Bild 1 von 3 Asus TUF Gaming FX505DY Motherboard Replacement: Schritt 11, Bild 2 von 3 Asus TUF Gaming FX505DY Motherboard Replacement: Schritt 11, Bild 3 von 3
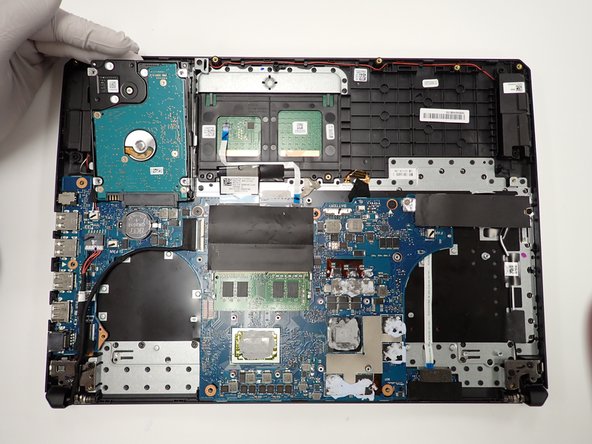
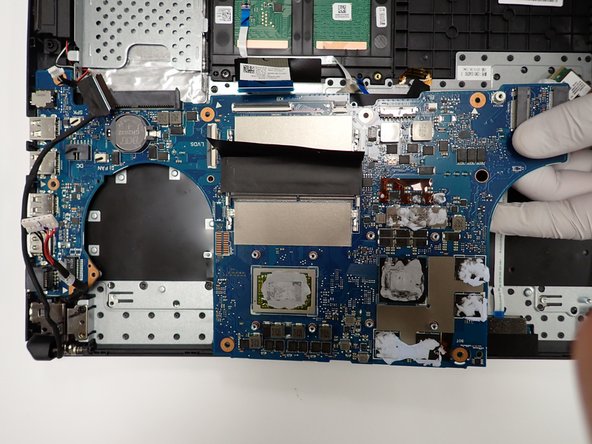
    • With a size 0 Phillips screwdriver, unscrew three center 5 mm screws securing the board in place.

    • Carefully lift the board and place in a safe area.

    Frag FixBot

    Kommentar hinzufügen

Abschluss

To reassemble your device, follow these instructions in reverse order.

Rückgängig: Ich habe diese Anleitung nicht absolviert.

1 Kommentar zur Anleitung

Can I change the motherboard of my laptop? I have the model FX505DY (Ryzen 5 3550H, Radeon RX 560X, 17.3 inches). I would like to change it for the FX505DT model (Ryzen 7 3570H, GTX 1650, 17.3 inches)

Luis Nox - Antwort Teilen

Kommentar hinzufügen

Seitenaufrufe:

Letzte 24 Stunden: 3

Letzte 7 Tage: 13

Letzte 30 Tage: 82

Insgesamt: 2,901