Einleitung
You may need to replace one or both fans in your Asus TUF Gaming FX705G if you experience overheating in your laptop. This can decrease efficiency and be harmful to the computer’s motherboard. During this process, be cautious of wires and make sure to avoid discharges of static electricity. This a very crucial, as discharges can cause elements of the laptop to short circuit.
Was du brauchst
-
-
Use the iFixit opening tool to lift the back cover's seam, then insert the spudger parallel to the back cover and lift gently upward.
-
-
-
-
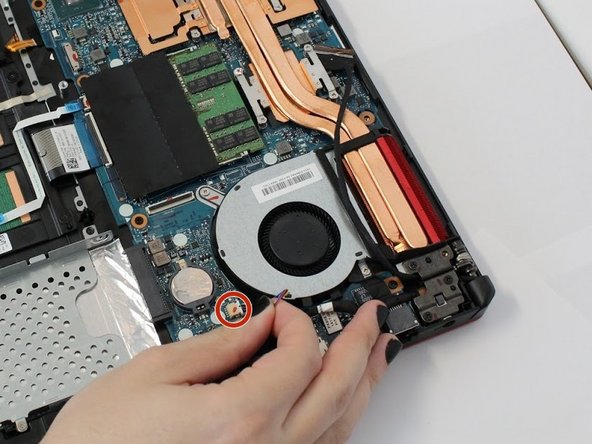
Disconnect the wire from the motherboard, and lift the battery from its housing.
-
-
-
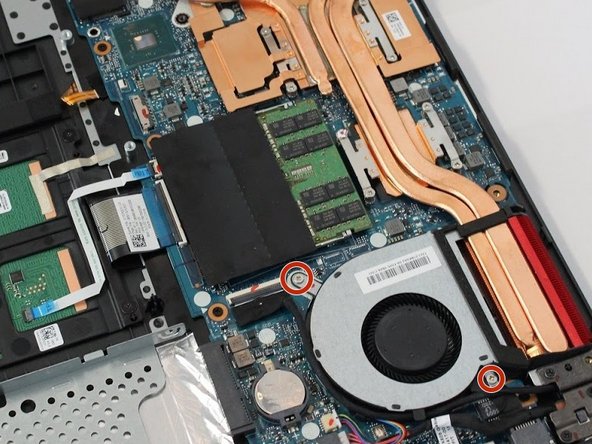
Lift the motherboard to unclip the housing clip on the back of the fan.
-
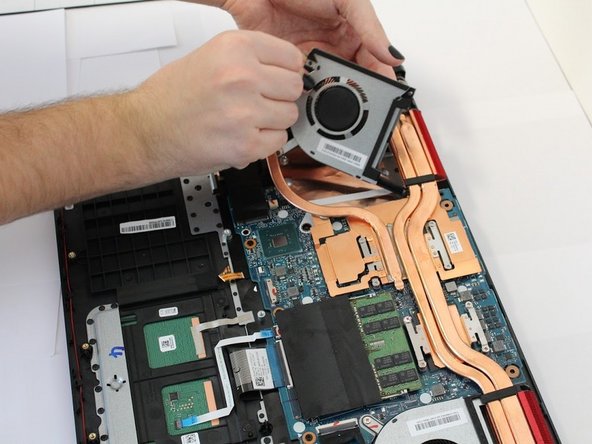
Remove the fan.
-


To reassemble your device, follow these instructions in reverse order.
To reassemble your device, follow these instructions in reverse order.
Rückgängig: Ich habe diese Anleitung nicht absolviert.
15 weitere Personen haben diese Anleitung absolviert.
Team

Grand Valley State University, Team S4-G5, DeVasto Fall 2019 Mitglied von Grand Valley State University, Team S4-G5, DeVasto Fall 2019
GVSU-DEVASTO-F19S4G5
4 Mitglieder
6 Anleitungen geschrieben
3 Kommentare
A bit nerve-racking, but got the new CPU fan installed, seems to be working fine according to armory crate. I did note that the CPU fan plug was quite stiff but I did manage to carefully wiggle it out. Anyways found your instructions very helpful especially the pics.
Thank You.
Is it possible to change the cpu an gpu I'm a noob for sure thanks
Like to change them to make it a better pc might not be able to FX705DY