Einleitung
In this guide, you will learn how to replace the touchscreen display on the Asus V500CA-DB51T. This guide was made to help with replacing a broken or defective touchscreen display, and is a moderately challenging repair.
Was du brauchst
-
-
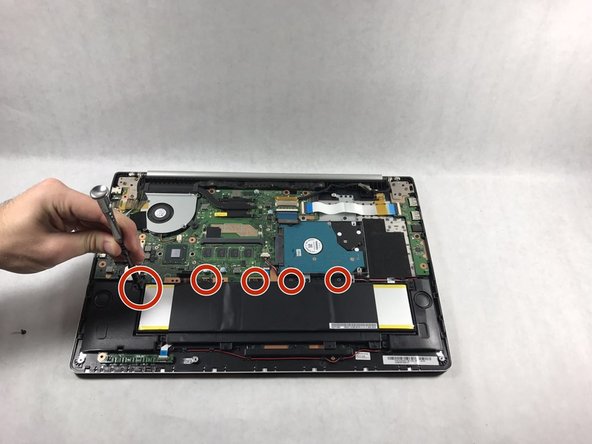
Remove the following ten screws securing the lower case to the upper case:
-
The top left and right corners have .7 cm screws.
-
The two top-middle and four bottom are .4 cm screws.
-
The middle left and right are .8 cm screws.
-
Remove the screws using the Phillips #00 screwdriver.
-
-
-
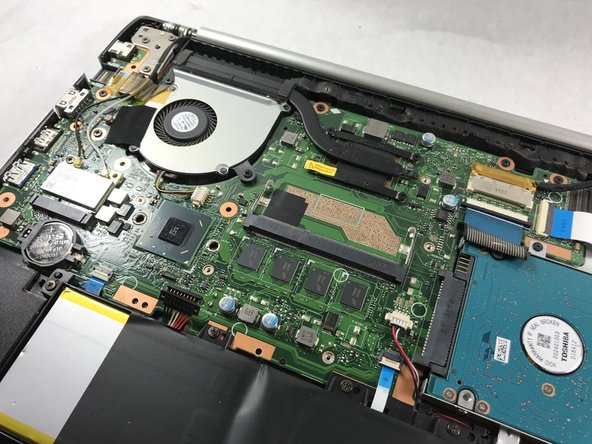
Wedge your fingers between the upper case and the lower case.
-
Gently pull the lower case away from the upper case.
-
Remove the lower case and set it aside.
-
-
-
Use the flat end of the blue plastic opening tool to lift the battery connector up out of its socket on the motherboard.
-
-
-
-
Remove the tri-point screws that secure the battery to the casing.
-
All screws securing the battery in place are .5 cm tri-point screws.
-
-
-
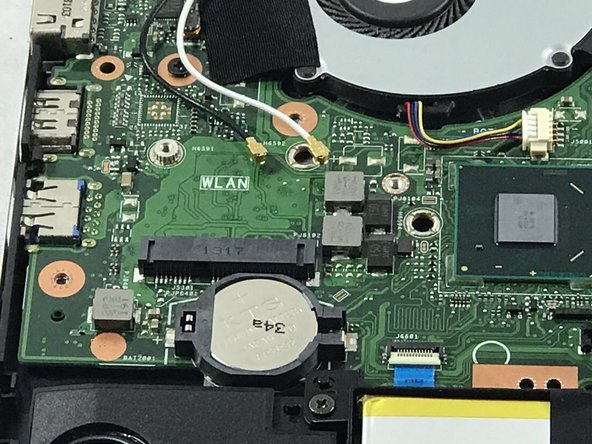
Locate the section of the device that houses the WiFi Card.
-
This should be a white, square-shaped object located just above the left end of the battery.
-
-
-
Disconnect the black and white wires that are connected to the WiFi card by gently pulling them upward with a pair of tweezers.
-
Using the tweezers, gently pull the WiFi card out away from yourself.
-
-
-
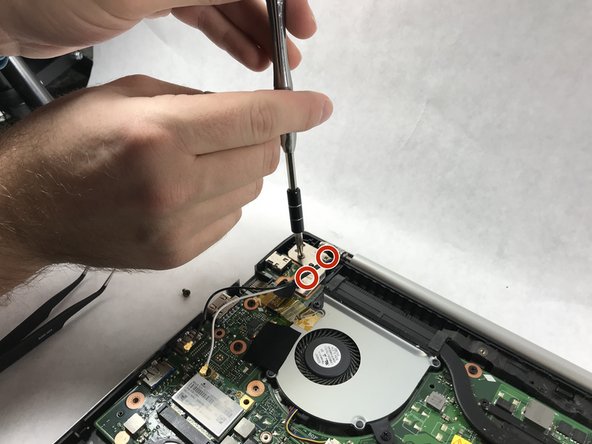
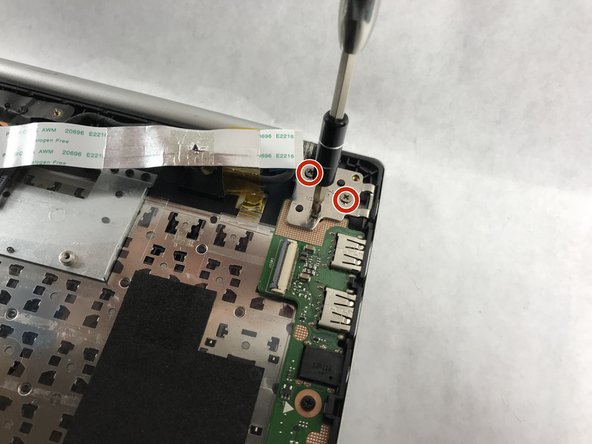
Gently remove the ribbon cable using tweezers.
-
Using the Phillips #00 screwdriver remove the six .4 cm screws from the screen brackets.
-
-
-
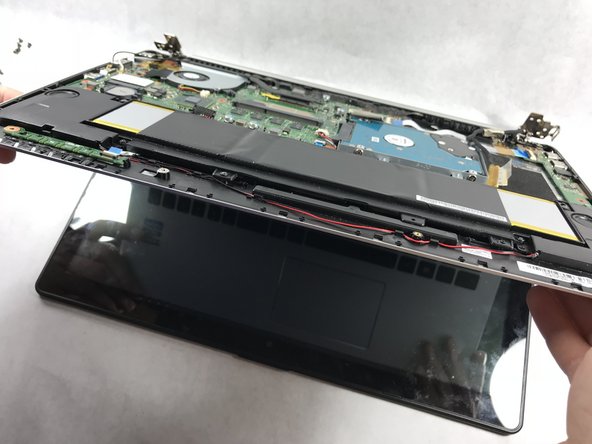
Slowly lift up on the main case of the laptop.
-
Gently pull the laptop from the screen when it is perpendicular with the screen.
-


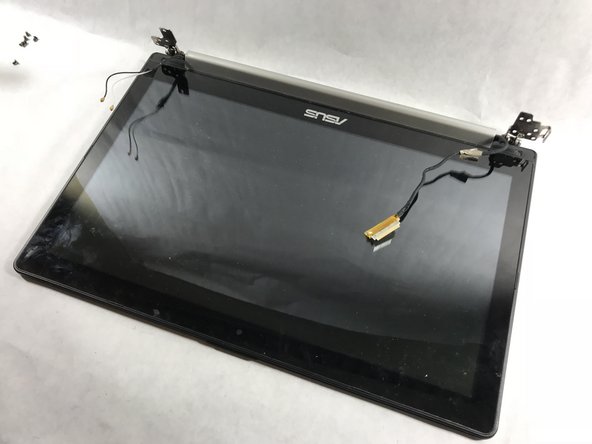
To reassemble your device, follow these instructions in reverse order.
To reassemble your device, follow these instructions in reverse order.
Rückgängig: Ich habe diese Anleitung nicht absolviert.
Eine weitere Person hat diese Anleitung absolviert.
Team

UMass Dartmouth, Team S6-G2, Rockett Fall 2017 Mitglied von UMass Dartmouth, Team S6-G2, Rockett Fall 2017
UMASSD-ROCKETT-F17S6G2
3 Mitglieder
6 Anleitungen geschrieben