Einleitung
If your Asus VivoBook E203MA-TBCL432B trackpad isn’t working properly – touchpad not showing up in the device manager and/or not responding to touch – use this guide to replace the trackpad.
A properly working trackpad should respond immediately and work smoothly; there should be no glitches, freezing, or nonresponse. If you are experiencing any of those issues, there may be a software problem that can be fixed through troubleshooting, but it may be necessary to replace the trackpad.
Before beginning, make sure to power off your laptop completely and disconnect from any external power source. The repairs difficulty is considered moderate as the user will need to remove the battery as well as ribbon cables, which can break if not removed correctly.
Was du brauchst
-
-
Position the laptop so that the bottom panel is facing upwards, the hinge is away from you, and the ASUS logo is against the table.
-
-
-
Use a Phillips #0 screwdriver to remove the eight 5 mm screws on the back panel.
-
Remove the two 7 mm Phillips #0 screws.
-
-
-
Insert the iFixit opening tool in between the back panel and the rest of the laptop.
-
With the iFixit opening tool, lift the panel from the laptop body. Work your way around the device creating separation with the tool.
-
Once there is enough separation between the back panel and the device, gently pull off the back panel with your hands and completely remove it.
-
-
-
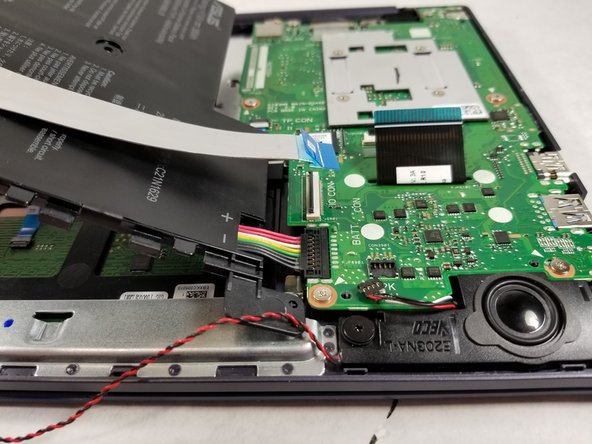
Now that the back panel is removed you can clearly see the battery and all of its connectors.
-
Begin by removing the silver ribbon cable along the back of the battery.
-
To disconnect it from the motherboard, lift the black tab on the Zero Insertion Force (ZIF) connector up and pull the cable away using the blue tab.
-
Disconnect the ribbon cable from the left side in the same way.
-
-
-
-
Remove the red and black wire along the bottom of the battery.
-
This does not need to be disconnected, only removed from the clamps along the bottom of the battery.
-
-
-
Using the Phillips #0 screwdriver, remove the two 3 mm screws located at the top and left side of the battery.
-
-
-
Gently lift the battery being mindful of the one cable still connected to the motherboard.
-
With the battery lifted, pull the remaining connector going to the motherboard up, it should come out with little force.
-
-
-
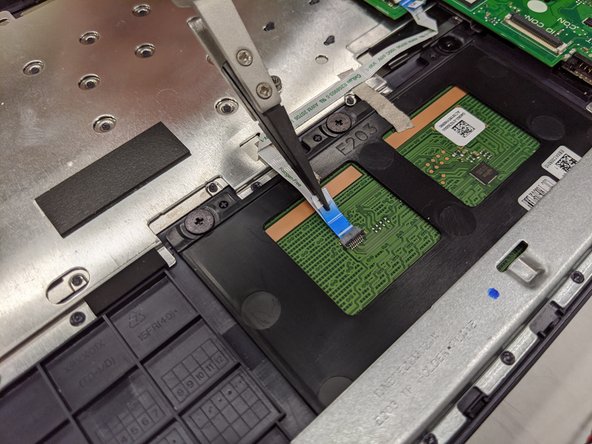
Insert the iFixit tool underneath the cable that is attached to the trackpad to unclip the cable.
-
Using the reverse tweezers, remove the ribbon cable and the tape that is attached to the trackpad.
-
-
-
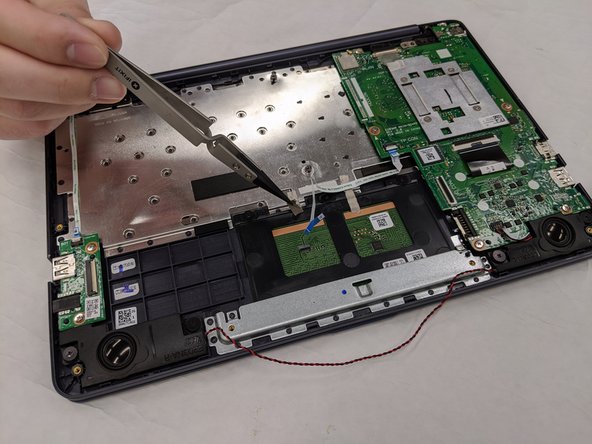
Using a Phillips #00 screwdriver, remove the three 2.0 mm screws above the trackpad.
-
-
-
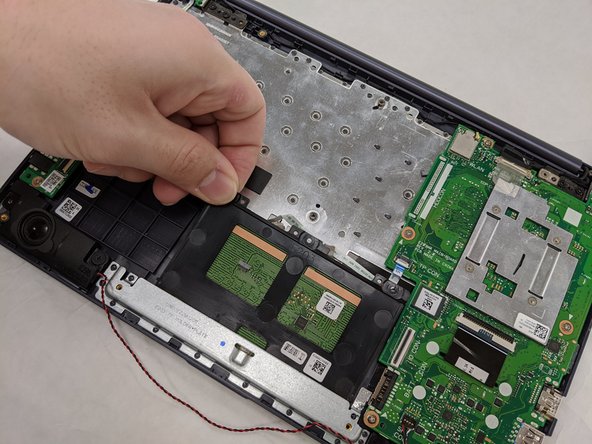
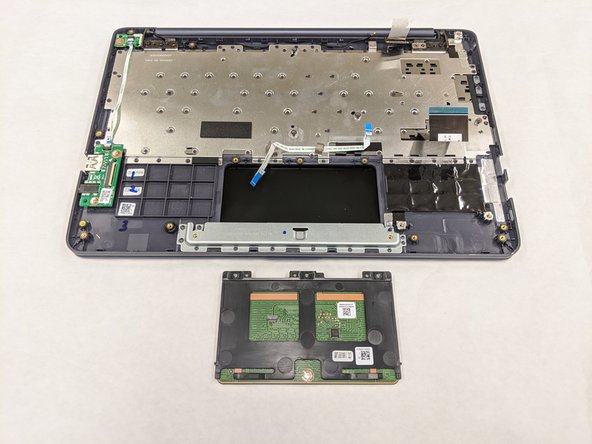
Insert the iFixit opening tool under the frame that surrounds the trackpad and carefully pry the frame of the trackpad up.
-
Now that the track pad is lifted up, gently slide it out by pulling it towards the hinges.
-


To reassemble your device, follow these instructions in reverse order.
To reassemble your device, follow these instructions in reverse order.
Rückgängig: Ich habe diese Anleitung nicht absolviert.
2 weitere Nutzer:innen haben diese Anleitung absolviert.
Team

IUPUI, Team S3-G3, Wilson Fall 2019 Mitglied von IUPUI, Team S3-G3, Wilson Fall 2019
IUPUI-WILSON-F19S3G3
4 Mitglieder
3 Anleitungen geschrieben