Einleitung
This guide will show you how to remove the back panel and remove/replace the battery for the Asus VivoTab Smart tablet.
Once you are done, calibrate your newly installed battery by draining it below 10% and then charging it uninterrupted to 100%.
Was du brauchst
-
-
Place the device face down on a flat surface.
-
Remove the back panel with the plastic opening tool by sliding the tool around the edge of the panel.
-
-
-
Remove the tape covering the 3 ribbons by peeling it off with your hands or with the tweezers.
-
Carefully detach the ribbons from the device's motherboard by pulling outward using tweezers.
-
-
-
Remove the tape covering the areas marked by the black arrows
-
Remove two 3.7 mm Phillips #00 screws
-
Remove eleven 2.7 mm Phillips #00 screws
-
-
-
-
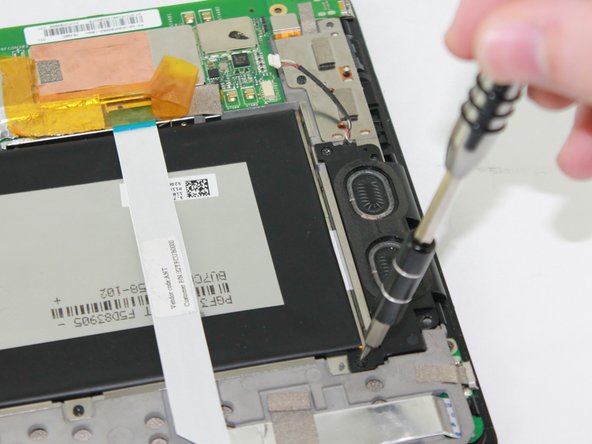
Gently unplug the speaker from the motherboard by grabbing the wire near the plastic white plug with tweezers and gently pulling.
-
Lift up on the speaker with your fingers to remove it.
-
-
-
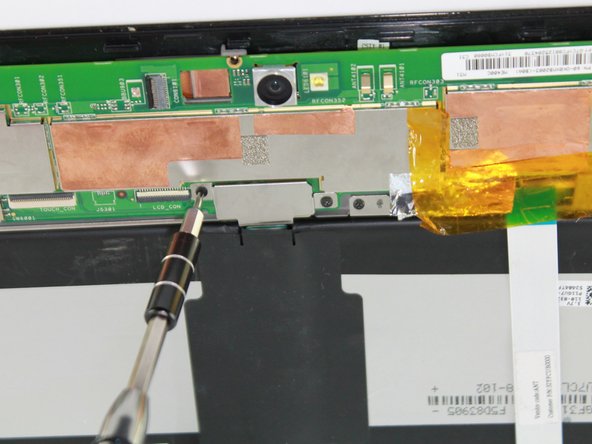
Use tweezers to separate the battery tray from the device
-
Lift the battery tray from the device using your hands.
-
-
-
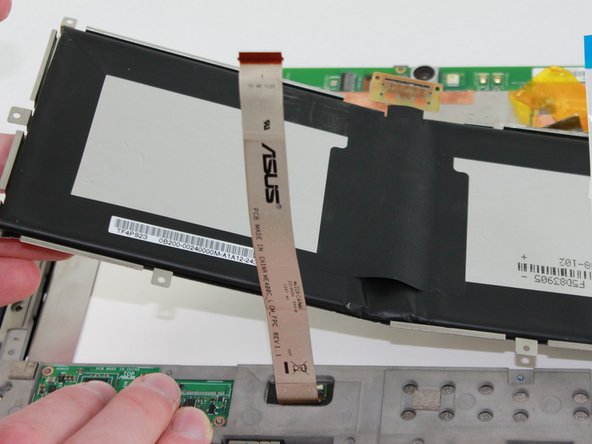
Detach the battery from the tray by pulling the battery up from the tray with your hands.
-


To reassemble your device, follow these instructions in reverse order.
To reassemble your device, follow these instructions in reverse order.
Rückgängig: Ich habe diese Anleitung nicht absolviert.
3 weitere Nutzer:innen haben diese Anleitung absolviert.

Team

USF Tampa, Team 2-4, Sullivan Fall 2016 Mitglied von USF Tampa, Team 2-4, Sullivan Fall 2016
USFT-SULLIVAN-F16S2G4
4 Mitglieder
5 Anleitungen geschrieben
2 Kommentare
Hi
So where is the next step ?!
Hi
So where is the next step ?!
Please answer to me. This is so