Diese Version enthält möglicherweise inkorrekte Änderungen. Wechsle zur letzten geprüften Version.
Was du brauchst
-
Dieser Schritt ist noch nicht übersetzt. Hilf mit, ihn zu übersetzen!
-
Rimuovere la cover posteriore
-
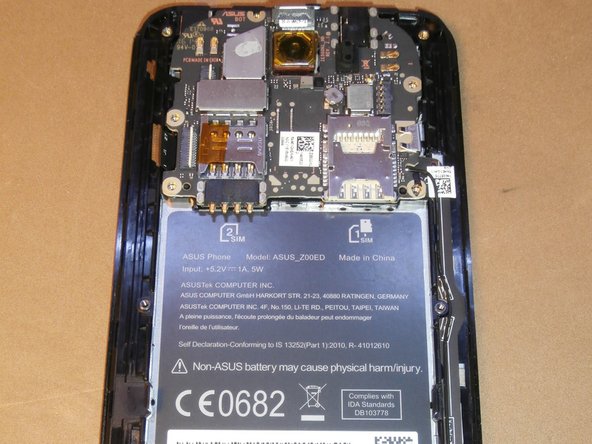
scollegare la batteria
-
rimuovere sim card e microSD
-
-
Dieser Schritt ist noch nicht übersetzt. Hilf mit, ihn zu übersetzen!
-
rimuovere la protezione in plastica con dei plettri facendo attenzione a non rompere i gancini che la tengono in posizione
-
-
Dieser Schritt ist noch nicht übersetzt. Hilf mit, ihn zu übersetzen!
-
scollegare i due flat sollevando il fermo bianco
-
scollegare la fotocamera
-
-
Dieser Schritt ist noch nicht übersetzt. Hilf mit, ihn zu übersetzen!
-
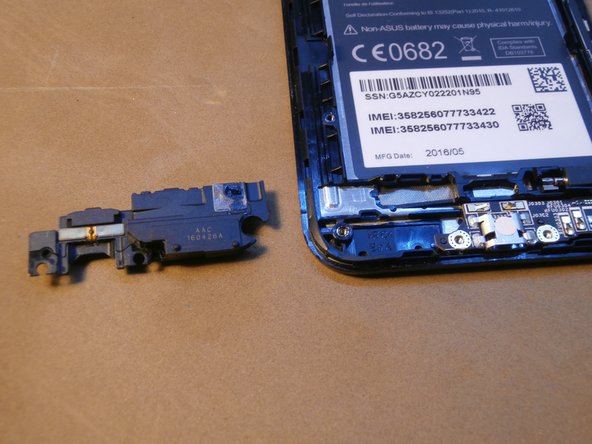
con l'aiuto di uno spudger rimuovere l'altoparlante posteriore
-
-
-
Dieser Schritt ist noch nicht übersetzt. Hilf mit, ihn zu übersetzen!
-
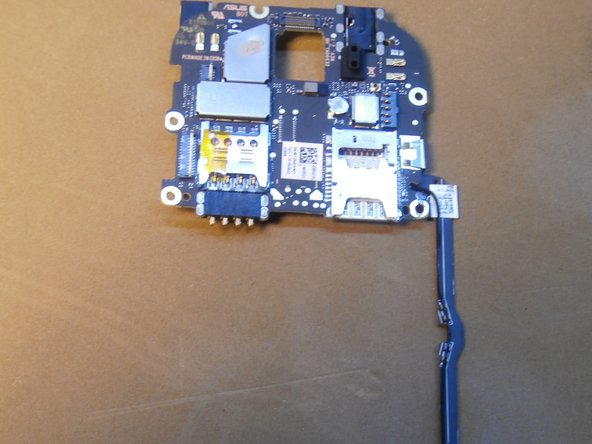
partendo dal basso sollevare la scheda madre
-
-
Dieser Schritt ist noch nicht übersetzt. Hilf mit, ihn zu übersetzen!
-
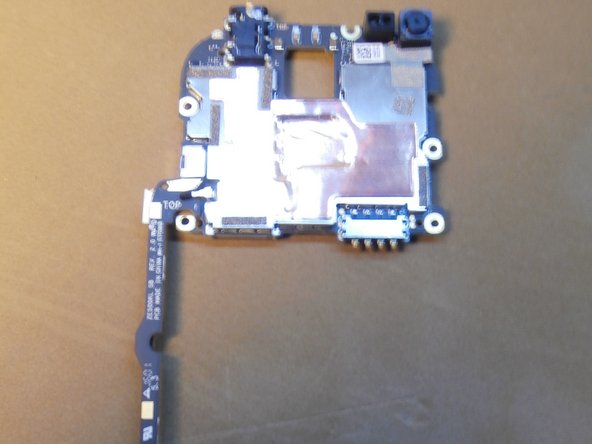
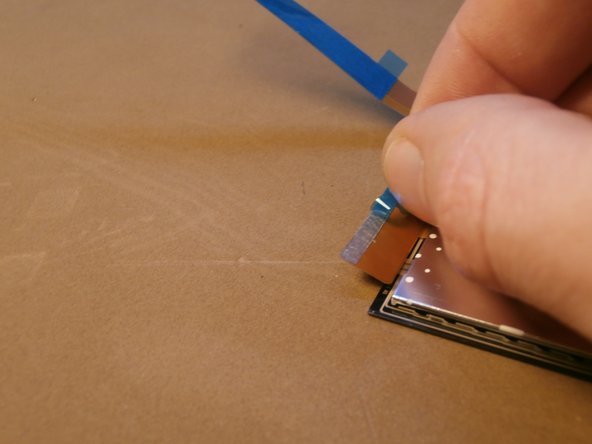
scollare il driver del touchscreen per poter rimuovere lo schermo
-
-
Dieser Schritt ist noch nicht übersetzt. Hilf mit, ihn zu übersetzen!
-
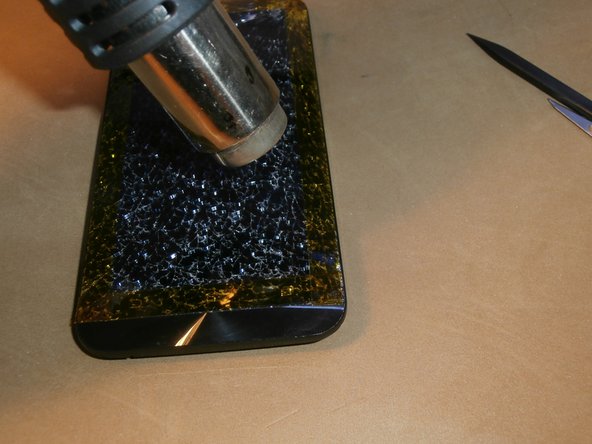
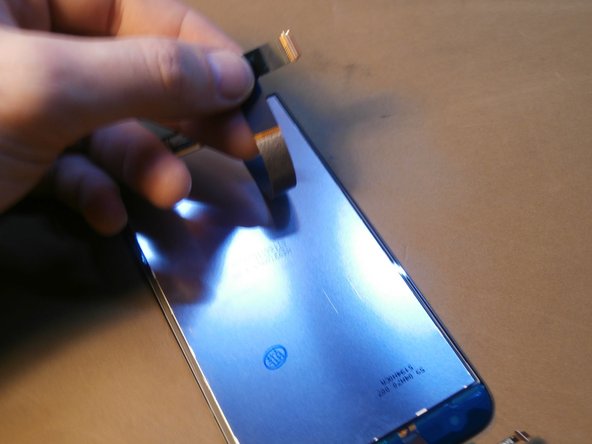
con l'aiuto di un phon ad aria calda o un iOpener rimuovere lo schermo dal frame del telefono
-
-
Dieser Schritt ist noch nicht übersetzt. Hilf mit, ihn zu übersetzen!
-
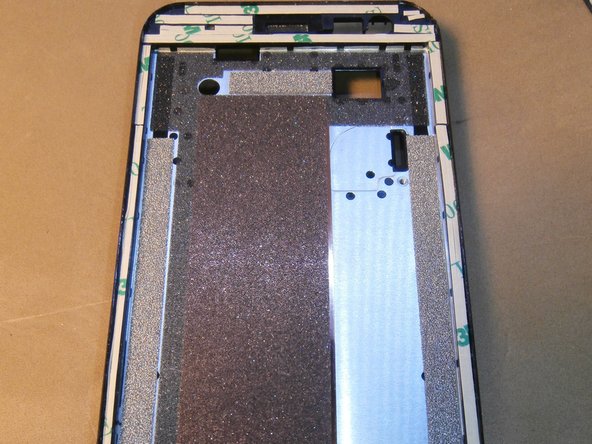
Rimuovere i residui di colla sul perimetro del frame
-
incollare il flat del display in posizione
-
-
Dieser Schritt ist noch nicht übersetzt. Hilf mit, ihn zu übersetzen!
-
applicare il biadesivo al frame
-
-
Dieser Schritt ist noch nicht übersetzt. Hilf mit, ihn zu übersetzen!
-
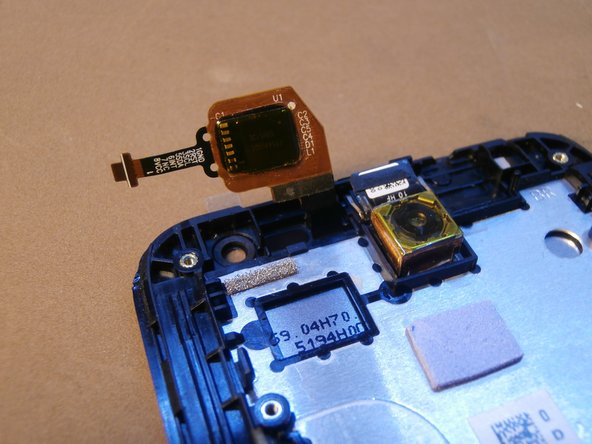
Prima di installare il nuovo schermo riposizionare la guarnizione antipolvere della fotocamera anteriore
-
Inserire il nuovo schermo in posizione facendo passare i flat nelle apposite scanalature
-


Rückgängig: Ich habe diese Anleitung nicht absolviert.
3 weitere Nutzer:innen haben diese Anleitung absolviert.
Ein Kommentar
Just had my cracked LCD replaced. Everything was working fine before the replacement but after that, a third of a centimeter and all the subkeys (Back, Home, Recent keys) we rented working. The tech tried to checkout the fitting but it still didn't work. Had to install an assistive key app to be able to use the phone. He told me to go back on Thursday to replace the LCD with a different one cuz this last unit they had might be defective. Could it be a screen seating problem or an issue related to glue remnants or excess adhesive?